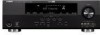
Yamaha RX V365 Owner's Manual
Yamaha RX V365 - AV Receiver Manual
 |
UPC - 027108933047
View all Yamaha RX V365 manuals
Add to My Manuals
Save this manual to your list of manuals |
Yamaha RX V365 manual content summary:
- Yamaha RX V365 | Owner's Manual - Page 1
U RX-V365 AV Receiver OWNER'S MANUAL - Yamaha RX V365 | Owner's Manual - Page 2
INSTRUCTIONS CAUTION RISK OF ELECTRIC SHOCK DO NOT OPEN CAUTION: TO REDUCE THE RISK OF ELECTRIC SHOCK, DO NOT REMOVE COVER (OR BACK). NO USER-SERVICEABLE PARTS INSIDE. REFER SERVICING TO QUALIFIED SERVICE the wall outlet and disconnect the antenna or cable system. This will prevent damage to the - Yamaha RX V365 | Owner's Manual - Page 3
instructions contained in this manual, meets FCC requirements. Modifications not expressly approved by Yamaha may void your authority, granted by the FCC, to use the product. 2 IMPORTANT: When connecting this product to accessories and/or another product use only high quality shielded cables. Cable - Yamaha RX V365 | Owner's Manual - Page 4
cause electrical shock to the user and/or damage to cable from the wall outlet, grasp the plug; do not pull the cable Yamaha service personnel when any service read the "Troubleshooting" section on MODEL: Serial No.: The serial number is located on the rear of the unit. Retain this Owner's Manual in - Yamaha RX V365 | Owner's Manual - Page 5
35 Remote control features 37 Controlling this unit, a TV, or other components .... 37 Setting remote control codes 39 Advanced setup 40 ADDITIONAL INFORMATION Troubleshooting 41 Glossary 46 Specifications 47 Index 48 APPENDIX (at the end of this manual) List of remote control codes i About - Yamaha RX V365 | Owner's Manual - Page 6
separately) or Bluetooth wireless audio receiver (such as YBA-10, sold separately) Other features ◆ 192-kHz/24-bit D/A converter ◆ iPod controlling capability ◆ Sleep timer ◆ Cinema and music night listening modes ◆ Remote control with preset remote control codes Manufactured under license under - Yamaha RX V365 | Owner's Manual - Page 7
O NIGHT Selects a night listening mode (see page 19). P VOLUME control Adjusts the volume level of this unit (see page 17). Q VIDEO (VIDEO AUX) jack Connects to a game console or a video camera using a composite video cable (see page 15). R AUDIO L/R (VIDEO AUX) jacks Connects to a game console or - Yamaha RX V365 | Owner's Manual - Page 8
according to the state of Yamaha iPod universal dock or Bluetooth Wireless Audio Receiver connected to this unit ( Code Modulation) digital audio signals. k Headphones indicator Lights up when headphones are connected (see page 19). l SP A B indicators Lights up according to the set of front speakers - Yamaha RX V365 | Owner's Manual - Page 9
the input source to MULTI CH IN (see page 18). w AUDIO SEL Selects an audio input select setting for each input source (see page 18). x SLEEP Sets the sleep timer (see page 20). y Numeric buttons Enter remote control codes or preset station number (see page 39). ADDITIONAL INFORMATION APPENDIX - Yamaha RX V365 | Owner's Manual - Page 10
CD-R (REC) OUTPUT SUB WOOFR FRONT A g h i a DOCK terminal Connect to the Yamaha iPod Universal Dock (such as YDS-11, sold separately) or Bluetooth Wireless Audio Receiver (such as YBA-10, sold separately) using its dedicated cable (see page 14). b COMPONENT VIDEO jacks Connect to Y, PB/CB and - Yamaha RX V365 | Owner's Manual - Page 11
guide The following steps describe the easiest way to operate this unit. See the related pages for details on the operation and settings. Step 1: Check a Yamaha iPod universal dock or Bluetooth Wireless Audio Receiver ☞P. audio cable x 1 Step 2: Set up your speakers Place your speakers - Yamaha RX V365 | Owner's Manual - Page 12
component you want to operate. y • To set the remote control codes for other components, see page 39. Notes • Do not spill water or other liquids on the remote control. • Do not drop the remote control. • Do not leave or store the remote control in the following types of conditions: - places of high - Yamaha RX V365 | Owner's Manual - Page 13
using this unit. See page 40 for details on setting "SP IMP." ■ 5.1-channel speaker connection cd e fg D DTV/CBL HDMI VIDEO BL DVR IN OUT MONITOR OUT ANTENNA AM GND FM 75 UNBAL. SPEAKERS SURROUND CENTER FRONT B R L R L AUDIO BL DVR CD IN OUT IN MD/ OUT (PLAY) CD-R (REC - Yamaha RX V365 | Owner's Manual - Page 14
the knob to secure the wire. Connecting the banana plug (except Europe, Russia, Korea, and Asia models) The banana plug is a single-pole electrical connector widely used to terminate speaker cables. First, tighten the knob and then insert the banana plug connector into the end of the corresponding - Yamaha RX V365 | Owner's Manual - Page 15
the input source (DVD or DTV/ CBL). Furthermore, available audio/video signals depend on the specification of the connected video monitor. Refer to the instruction manual of each connected component. ■ HDMI jack and cable plug HDMI HDMI cable plug (Yellow) (Green) (Blue) (Red) V Composite video - Yamaha RX V365 | Owner's Manual - Page 16
indicator flashes irregularly. Component video in TV (or projector) Video in Y PB PR HDMI in Audio out V RL DOCK COMPONENT VIDEO DVD DTV/CBL DVR MONITOR OUT PR OUT DVD DTV/CBL HDMI DIGITAL INPUT PB OPTICAL Y CD 3 DTV/ CBL 2 COAXIAL DVD 1 DVD VIDEO DTV/CBL DVR IN OUT MONITOR - Yamaha RX V365 | Owner's Manual - Page 17
wall outlets. Component DVD player or Blu-ray Disc Signal type Video Set-top box Audio Video Audio Jacks on component HDMI out* Component out Video out (composite) Optical out* Audio out (analog) HDMI out* Component out Video out (composite) Optical out* Analog out (analog) Jacks on this unit - Yamaha RX V365 | Owner's Manual - Page 18
. We recommend that you connect a 5.1-channel speaker system before using this feature. • The source connected to the MULTI CH INPUT jacks on this unit cannot be recorded. Connecting a Yamaha iPod universal dock or Bluetooth Wireless Audio Receiver This unit is equipped with the DOCK terminal - Yamaha RX V365 | Owner's Manual - Page 19
Notes • The audio signals input at the DOCK nearest authorized Yamaha dealer or service center about models. Connecting the power cable Once all connections are complete, plug the power cable into the AC wall outlet. Power cable receive infrared signals from the remote control. 15 En English - Yamaha RX V365 | Owner's Manual - Page 20
MENU" (see page 32). • Altering any parameters in "BASIC SETUP" resets all parameters manually adjusted in "SOUND MENU" (see page 32). • Initial settings are indicated by (*) in the following each parameters. • Press nRETURN on the remote control to return to the previous menu level. 1 Press hAMP on - Yamaha RX V365 | Owner's Manual - Page 21
unwanted noise that may damage your speakers. Check whether your CD player supports CDs encoded in DTS. Also, check the sound output level of your instructions. y • To adjust the level of each speaker, see page 19. y • See page 19 to adjust the level of each speaker. • This does not affect the AUDIO - Yamaha RX V365 | Owner's Manual - Page 22
Playback Guide to contents When you want... Adjust the tonal quality of the front speakers Edit parameters of signals are output only from the front left and right channels. ■ Selecting audio input jacks (AUDIO SELECT) Use this feature (audio input jack select) to switch the input jack assigned - Yamaha RX V365 | Owner's Manual - Page 23
jBAND LEVEL TITLE on the remote control, you can also select the speaker by pressing lk / n. • The available speaker channels differ depending on the speaker settings. 2 Press ll / h on the remote control (or press FPRESET/TUNING l / h) to adjust the speaker output level. Control range: -10.0 dB to - Yamaha RX V365 | Owner's Manual - Page 24
from a continuous signal to make discrete signals. The number of source channels in the input signal (front/surround/LFE). The number of bits passing (f) on the remote control to select a video source and then an audio source. CD MD/CD-R TUNER DVD DTV/CBL DVR V-AUX/DOCK Audio sources Video sources - Yamaha RX V365 | Owner's Manual - Page 25
to a music program from the FM radio station. Notes *1 You must connect a cable TV or a satellite tuner to this unit in advance. See page 13 for details. to the selected SCENE buttons on the front panel and the remote control. Select the desired SCENE template SCENE template library (Image) - Yamaha RX V365 | Owner's Manual - Page 26
digital video recorder. ■ Music discs (CD, SA-CD or DVD-Audio) SCENE template Input source Playback mode Features Music Disc Listening DVD 2ch your iPod stationed in a Yamaha iPod universal dock or Bluetooth component that is connected to the Bluetooth receiver. ■ TV programs SCENE template - Yamaha RX V365 | Owner's Manual - Page 27
connected to the Yamaha iPod universal dock or a Bluetooth component is connected to the Bluetooth receiver, this unit plays back the audio sources input at may need to set the input source of the SCENE template on the remote control. See page 24 for details. • You can create a customized SCENE - Yamaha RX V365 | Owner's Manual - Page 28
control code for each input source in advance (see page 39). 1 Press the desired iSCENE button on the remote control. 2 Press the desired buttons in the * area below to control the input source component of the selected SCENE template. * POWER POWER STANDBY POWER TV AV A B C MUTE CD MD - Yamaha RX V365 | Owner's Manual - Page 29
to enjoy multi-channel playback from almost any stereo or multi-channel sound source. This unit is also equipped with a Yamaha digital sound available sound field parameters differ depending on the settings of the speakers. Category MUSIC ENTERTAIN MOVIE STEREO ENHANCER Program Pop/Rock Hall Jazz - Yamaha RX V365 | Owner's Manual - Page 30
A larger value adjusts the center image towards the front left and right speakers. Control range: 0 (center channel sound is output only from center speaker) to 7 (center channel sound is output only from front left and right speakers), initial setting is 3. For Music Enh. 2ch and Music Enh. 5ch - Yamaha RX V365 | Owner's Manual - Page 31
tuning, press FPRESET/TUNING l / h once. To tune into the desired station manually, press FPRESET/TUNING l / h repeatedly. When this unit is tuned into a station, the TUNED indicator lights up and the frequency of the received station is shown on the front panel display. Lights up AUTO TUNED A AM - Yamaha RX V365 | Owner's Manual - Page 32
the first received station will be manually and store it as described in "Manual station preset" on this page. Manual station preset Use this feature to store the FM or AM stations manually. 1 Tune into a station. See page 27 for using instructions operation with the remote control, press fTUNER to - Yamaha RX V365 | Owner's Manual - Page 33
b / a: Skip backward/forward Notes • Operations can be also done with the controls on your iPod. Refer to the instruction manuals of your iPod for the operations on your iPod. • Some features may not be compatible depending on the model or the software version of your iPod. • For a complete list of - Yamaha RX V365 | Owner's Manual - Page 34
the instructions Check that the Bluetooth component detects the Bluetooth receiver. If the Bluetooth component detects the Bluetooth receiver, "YBA-10 YAMAHA remote control, the connected Bluetooth receiver searches and connect to the last connected Bluetooth component. If the Bluetooth receiver - Yamaha RX V365 | Owner's Manual - Page 35
manually adjust any speaker settings, alter the quality and tone of the sound output by the system or compensate for video signal processing delays when using LCD monitors or projectors. Parameter A)SPEAKER SET B)SP LEVEL C)SP DISTANCE D)CENTER GEQ E)LFE LEVEL F)D.RANGE G)AUDIO Audio Receiver - Yamaha RX V365 | Owner's Manual - Page 36
remote control. "BASIC SETUP" appears on the front panel display. 2 Press lk / n to select "MANUAL SETUP." .MANUAL SETUP 3 Press lENTER to enter "MANUAL you select "NONE" in "CENTER," the center channel signals are directed to the front left and right speakers. • When you select "NONE" in "SUR. - Yamaha RX V365 | Owner's Manual - Page 37
level of each speaker. Control range: -10 to 0* to +10 dB Control step: 1 dB SP LEVEL FL FR C SL SR SWFR Adjusted speaker Front left speaker Front right speaker Center speaker Surround left speaker Surround right speaker Subwoofer Set menu Notes • The available speaker channels differ depending - Yamaha RX V365 | Owner's Manual - Page 38
channel according to the capacity of your subwoofer or headphones. Control range: -20 to 0* dB Control step: 1 dB ■ Speaker LFE SP LFE Adjusts the speaker audio output. -20dB Reduces the current volume by 20 dB. ■ Audio input selector buttons (f) on the remote control). Input rename B)INPUT RENAME - Yamaha RX V365 | Owner's Manual - Page 39
want to change the name of. 2 Press hAMP and then press ll / h on the remote control to place the "_" (underscore) under the space or the character you want to edit. appropriate input mode. DTS Enables to playback a DTS-CD. Multi channel input setup E)MULTI CH SET ■ BGV BGV Use this feature to - Yamaha RX V365 | Owner's Manual - Page 40
Use this feature to start pairing the connected Bluetooth Wireless Audio Receiver (such as YBA-10, sold separately) with your Check that the Bluetooth component detects the Bluetooth receiver. For details, refer to the instruction manual of the Bluetooth component. 3 Select the Bluetooth receiver - Yamaha RX V365 | Owner's Manual - Page 41
the input source. TV MUTE Mutes the audio output. *2 These buttons control your TV only when fDTV/CBL is pressed. For details, see the "Digital TV/Cable TV" column on page 38. y • You can control more than one TV by setting the appropriate remote control code for any input source selector buttons - Yamaha RX V365 | Owner's Manual - Page 42
NIGHT 5 6 7 8 MULTI CH IN AUDIO SEL 9 0 SLEEP 10 ENT [9] Remote control [1] AV POWER [2] TITLE [3] PRESET/CH k PRESET/CH n A/B/C/D/E l DVD player/ recorder VCR Power *1 Power *1 Title Up VCR channel up Down VCR channel down Left Digital TV/ Cable TV Power *2 Up Down Left - Yamaha RX V365 | Owner's Manual - Page 43
by setting the appropriate remote control codes. For a complete list of available remote control codes, refer to "List of remote control codes" at the end of this manual. Remote control code default settings Input source Component category Manufacturer Default code CD CD Yamaha 5013 MD/CD - Yamaha RX V365 | Owner's Manual - Page 44
and hold KTONE CONTROL and then Speaker impedance SP IMP. (U.S.A. and Canada models only) Caution If you are to use 6 ohm speakers, set "SP RESET • Select "CANCEL" not to reset any parameters of this unit. • Select "RESET" to reset the parameters of this unit. Notes • This setting completely resets - Yamaha RX V365 | Owner's Manual - Page 45
Troubleshooting Refer to the table below when this unit does not function properly. If the problem you are experiencing is not listed below or if the instruction below does not help, turn off this unit, disconnect the power cable, and contact the nearest authorized Yamaha dealer or service - Yamaha RX V365 | Owner's Manual - Page 46
Troubleshooting Problem Cause Remedy Sound is heard from the speaker on one side only. Incorrect cable connections. Incorrect settings in "SP LEVEL." Connect the cables properly. If the problem persists, the cables may be defective. Adjust the "SP LEVEL" settings. Only the center speaker - Yamaha RX V365 | Owner's Manual - Page 47
INTRODUCTION PREPARATION BASIC OPERATION ADVANCED OPERATION Troubleshooting Problem Cause Remedy The sound field parameters about 30 seconds. "CHECK SP WIRES" appears on the front panel display. Speaker cables are short-circuited. Make sure all speaker cables are connected correctly. There - Yamaha RX V365 | Owner's Manual - Page 48
Troubleshooting Problem the manual tuning problem with the signal path Turn off this unit and reconnect the Yamaha iPod 14 from your iPod to this unit. universal dock to the DOCK terminal of this unit. Try resetting your iPod. - Unknown iPod The iPod being used is not supported Audio Receiver - Yamaha RX V365 | Owner's Manual - Page 49
all batteries. Set the remote control code correctly using "List of remote control codes" at the end of this manual. Try setting another code for the same manufacturer using "List of remote control codes" at the end of this manual. See page 8 - 8 39 39 ■ Resetting the system Use this feature - Yamaha RX V365 | Owner's Manual - Page 50
in a theater having many speakers designed for acoustic effects. Since home conditions, such as room size, wall material, number of speakers, and so on, can differ so widely, it is inevitable that there are differences in the sound heard. Based on a wealth of actually measured data, Yamaha CINEMA - Yamaha RX V365 | Owner's Manual - Page 51
stereo) to Front SP OUT, [U.S.A. and Canada models] 1 kHz, 50 W/8 0.06% or less [Other models] 1 kHz, 50 Channel Separation CD, etc. Input 5.1 kΩ shorted (1 kHz/10 kHz 60 dB/45 dB or more • Tone Control Output Impedance AUDIO OUT (REC 200 mV/1.2 kΩ SUBWOOFER OUTPUT (2ch Stereo and FRONT SP: SMALL - Yamaha RX V365 | Owner's Manual - Page 52
display 3, 4 Front speakers 32 ■G G)AUDIO SET 34 Game Playing 23 ■H Hall 25 HDMI 11 HDMI jack, HDMI cable plug 11 HDMI terminals 6 Headphone dynamic range 34 Headphone LFE 34 Headphones indicator 4 HP D.R 34 HP LFE 34 ■I Infrared window 8 Infrared window, remote control 5 INI.VOL 34 - Yamaha RX V365 | Owner's Manual - Page 53
Setting remote control codes 39 Setting the speaker impedance 40 SIGNAL INFO 20 Signal information 31 SILENT CINEMA 26 SILENT CINEMA indicator 4 SLEEP indicator 4 Sleep timer 20 SLEEP, remote control 5 Sound field programs 25 Sound menu 31 SP A B indicators 4 SP D.R 34 SP IMP 40 SP LFE - Yamaha RX V365 | Owner's Manual - Page 54
List of remote control codes Blu-ray Player Samsung 2137 CD Player Yamaha 5000, 5013 CD Recorder Yamaha 5001 DVD Acoustic Solutions 2078 2077, 2098 H&B 2075 Haaz 2074 HE 2078 Hitachi 2032, 2072 Home Electronics 2078 Innovation 2072 Irradio 2134 JDB 2078 JVC 2033, 2045, - Yamaha RX V365 | Owner's Manual - Page 55
Akai 0059, 0065, 0127, 0129, 0130, 0200, 0204, 0208, 0209, 0213, 0217, 0218, 0255 Akiba 0209, 0218 Akura 0206, 0209, 0218 Alaron 0200 Alba 0200, 0207, 0208, 0209, 0217, 0218 ALBIRAL 0212 Allstar 0213 Amplivision 0207 Amstrad 0204, 0206, 0208, 0209, 0218 Amtron 0062 Anam 0208 - Yamaha RX V365 | Owner's Manual - Page 56
Lenco 0208 Lenoir 0207, 0208 Lesa 0214 Leyco 0206, 0213, 0217 LG 0016, 0038, 0039, 0127, 0128, 0157, 0158, 0163, 0164, 0166, 0188, 0189, 0200, 0201, 0207, 0208, 0210, 0213, 0214, 0215, 0217 Liesenk 0217 Life 0206, 0208 Lifetec 0206, 0208, 0218 Loewe 0063, 0128, 0203, 0204, - Yamaha RX V365 | Owner's Manual - Page 57
0215 Wega 0205 Weltblick 0213, 0217 Weston 0215 White Westinghouse 0200, 0207, 0217 Yamaha 0000, 0001, 0002, 0003, 0004, 0005, 0060, 0061 Yamishi 0218 1046 Asha 1002, 1014 Asuka 1042, 1045, 1046, 1050 Audio Dynamics1000 Audiovox 1003 Baird 1042, 1043, 1047 Basic Line 1044, - Yamaha RX V365 | Owner's Manual - Page 58
RX-V365 List of remote control codes The following remote control codes are available in addition to "List of remote control codes" at the end of the owner's manual Weltblick 1045 White Westinghouse 1013 XR-1000 1004, 1005, 1006 Yamaha 1000, 1001, 1007 Yamishi 1050 Yokan 1050 Yoko 1045, - Yamaha RX V365 | Owner's Manual - Page 59
- Yamaha RX V365 | Owner's Manual - Page 60
© 2009 Yamaha Corporation All rights reserved. Printed in China WQ95850 - Yamaha RX V365 | Owner's Manual - Page 61
correspond to those in the Owner's Manual. Les lettres dans les cercles et les numéros dans les carrés correspondent à ceux du mode d'emploi. ■ Front panel/Face avant TCDE F GHI UC RX-V365 P VOLUME STANDBY /ON PHONES SILENT CINEMA SPEAKERS EDIT PRESET/TUNING A/B/C/D/E 1 l PRESET/TUNING - Yamaha RX V365 | Owner's Manual - Page 62
■ Remote control/Boîtier de télécommande a b f h i j l POWER POWER STANDBY POWER TV AV A B C MUTE CD MD/CD-R TUNER DVD DTV o REC p r q t v PROG 1 2 ENHANCER SUR.DECODE 3 4 STRAIGHT NIGHT 5 6 7 8 MULTI CH IN AUDIO SEL 9 0 SLEEP 10 ENT s u x w y Printed in China WQ95950
-
 1
1 -
 2
2 -
 3
3 -
 4
4 -
 5
5 -
 6
6 -
 7
7 -
8
-
9
-
10
-
11
-
12
-
13
-
14
-
15
-
16
-
17
-
18
-
19
-
20
-
21
-
22
-
23
-
24
-
25
-
26
-
27
-
28
-
29
-
30
-
31
-
32
-
33
-
34
-
35
-
36
-
37
-
38
-
39
-
40
-
41
-
42
-
43
-
44
-
45
-
46
-
47
-
48
-
49
-
50
-
51
-
52
-
53
-
54
-
55
-
56
-
57
-
58
-
59
-
60
-
61
-
62
 |
 |

RX-V365
AV Receiver
OWNER’S MANUAL
U