Yamaha RX-V863 Owner's Manual
Yamaha RX-V863 Manual
 |
View all Yamaha RX-V863 manuals
Add to My Manuals
Save this manual to your list of manuals |
Yamaha RX-V863 manual content summary:
- Yamaha RX-V863 | Owner's Manual - Page 1
U RX-V863 AV Receiver OWNER'S MANUAL - Yamaha RX-V863 | Owner's Manual - Page 2
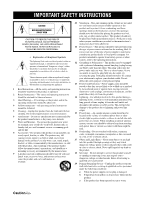
voltage or other hazards. Refer all servicing to qualified service personnel. 19 Damage Requiring Service - Unplug this product from the wall outlet and refer servicing to qualified service personnel under the following conditions: a) When the power-supply cord or plug is damaged, b) If liquid - Yamaha RX-V863 | Owner's Manual - Page 3
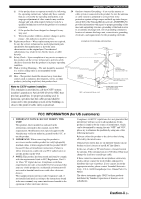
SECTION 810-21) GROUND CLAMPS POWER SERVICE GROUNDING ELECTRODE SYSTEM (NEC ART 250. PART H) FCC INFORMATION (for US customers) 1 IMPORTANT NOTICE: DO NOT MODIFY THIS UNIT! This product, when installed as indicated in the instructions contained in this manual, meets FCC requirements. Modifications - Yamaha RX-V863 | Owner's Manual - Page 4
sounds user power cord and outdoor antennas disconnected from a wall outlet or the unit during a lightning storm. 14 Do not attempt to modify or fix this unit. Contact qualified Yamaha service personnel when any service power plug can be reached easily. 17 Be sure to read the "Troubleshooting Canada - Yamaha RX-V863 | Owner's Manual - Page 5
Using the advanced setup 109 ADDITIONAL INFORMATION Troubleshooting 113 Resetting the system 122 Glossary 123 Sound field program information 126 Specifications 127 Index 129 APPENDIX (at the end of this manual) Front panel i Remote control ii List of remote control codes iii "ASPEAKERS - Yamaha RX-V863 | Owner's Manual - Page 6
/576p to 720p, 1080i or 1080p DOCK terminal ◆ DOCK terminal to connect a Yamaha iPod universal dock (such as YDS-10, sold separately) or Bluetooth adapter (such as YBA-10, sold separately) Other features ◆ YPAO (Yamaha Parametric Room Acoustic Optimizer) for automatic speaker setup ◆ 192-kHz/24-bit - Yamaha RX-V863 | Owner's Manual - Page 7
case of differences between the manual and product, the product has priority. • "ASPEAKERS" or "4DVD" (example) indicates the name of the parts on the front panel or the remote control. Refer to the attached sheet or the pages at the end of this manual for the information about each position of the - Yamaha RX-V863 | Owner's Manual - Page 8
of this unit must be set for your local voltage BEFORE plugging the power cable into the AC wall outlet. Improper setting of the VOLTAGE SELECTOR may if you notice the following conditions: - the operation range of the remote control decreases. - the BTRANSMIT indicator does not flash or its light - Yamaha RX-V863 | Owner's Manual - Page 9
guide Quick start guide The following steps describe the easiest way to enjoy DVD movie playback in your home theater. See pages 11 to 15 for details of the speaker placement. Front right Video monitor speaker Front left speaker Subwoofer Surround right speaker Center speaker can also connect - Yamaha RX-V863 | Owner's Manual - Page 10
XM OUTPUT OPTICAL DIGITAL INPUT COAXIAL FRONT B/ZONE B/ ZONE 2/PRESENCE R EXTRA SP L FRONT A R L FM 75Ω UNBAL. GND AM HD Radio ANTENNA REMOTE TRIGGER OUT +12V IN OUT 15mA MAX. DVD DTV/CBL IN1 IN2 SPEAKERS CENTER SURROUND R L DVR OUT IN3 SURROUND BACK/BI-AMP R L SINGLE - Yamaha RX-V863 | Owner's Manual - Page 11
MD recorder or a turntable ☞ P. 23 • Connecting an external amplifier ☞ P. 24 • Connecting a DVD player via analog multi-channel audio connection ☞ P. 25 • Connecting a Yamaha iPod universal dock or Bluetooth adapter ☞ P. 25 • Using the REMOTE IN/OUT jacks ☞ P. 26 • Using the VIDEO AUX - Yamaha RX-V863 | Owner's Manual - Page 12
of input sources and sound field programs. y If you connect a Yamaha product that has capability of the SCENE control signals, this unit can automatically activate the component and start playback. Refer to the instruction manual of the DVD player for further information. ■ The default assigned - Yamaha RX-V863 | Owner's Manual - Page 13
unit • Automatically optimizing the speaker parameters for your listening room (AUTO SETUP) ☞ P. 32 • Manually adjusting various parameters of this unit ☞ P. 82 • Setting the remote control ☞ P. 102 • Adjusting the advanced parameters ☞ P. 109 ■ Additional feature • Automatically turning off - Yamaha RX-V863 | Owner's Manual - Page 14
XM OUTPUT OPTICAL DIGITAL INPUT COAXIAL FRONT B/ZONE B/ ZONE 2/PRESENCE R EXTRA SP L FRONT A R L FM 75Ω UNBAL. GND AM HD Radio ANTENNA REMOTE TRIGGER OUT +12V IN OUT 15mA MAX. DVD DTV/CBL IN1 IN2 SPEAKERS CENTER SURROUND R L DVR OUT IN3 SURROUND BACK/BI-AMP R L SINGLE - Yamaha RX-V863 | Owner's Manual - Page 15
subwoofer with a built-in amplifier, such as the Yamaha Active Servo Processing Subwoofer System, is effective not only for reinforcing bass frequencies from any or all channels, but also for reproducing the high fidelity sound of the LFE (low-frequency effect) channel included in Dolby Digital and - Yamaha RX-V863 | Owner's Manual - Page 16
88). For other speaker combinations You can enjoy multi-channel sources with sound field programs by using a speaker combination other than the 7.1/ 6.1/5.1-channel speaker combinations. Use the automatic setup feature (see page 32) or set the "SPEAKER SET" parameters in "MANUAL SETUP" (see page 87 - Yamaha RX-V863 | Owner's Manual - Page 17
from the front and surround back speakers with extra ambient effects produced by the sound field programs (see page 48). You can adjust the vertical position of dialogues with using the presence speakers (see page 75). To use the presence speakers, connect the speakers to the EXTRA SP terminal (see - Yamaha RX-V863 | Owner's Manual - Page 18
XM OUTPUT OPTICAL DIGITAL INPUT COAXIAL FRONT B/ZONE B/ ZONE 2/PRESENCE R EXTRA SP L FRONT A R L FM 75Ω UNBAL. GND AM HD Radio ANTENNA REMOTE TRIGGER OUT +12V IN OUT 15mA MAX. DVD DTV/CBL IN1 IN2 SPEAKERS CENTER SURROUND R L DVR OUT IN3 SURROUND BACK/BI-AMP R L SINGLE - Yamaha RX-V863 | Owner's Manual - Page 19
L DVR OUT IN3 SURROUND BACK/BI-AMP R L TRIGGER OUT 12V 5mA MAX. SINGLE Connections (optional) Subwoofers PREPARATION Right Left Front speakers (FRONT A) Right Left Surround speakers Left (SINGLE) Surround back speaker ■ For the 5.1-channel speaker setting EXTRA SP terminals (see - Yamaha RX-V863 | Owner's Manual - Page 20
. Check if your speakers support biamplification. To make the bi-amplification connections, use the FRONT and SURROUND BACK/BI-AMP terminals as shown below. To activate the bi-amplification connections, set "BI-AMP" to "ON" in "ADVANCED SETUP" (see page 112). Front speakers Right Left 4 Tighten - Yamaha RX-V863 | Owner's Manual - Page 21
to input PCM, Dolby Digital and DTS bitstreams. When you connect components to both the COAXIAL and OPTICAL jacks, priority is given to the signals input at the COAXIAL jack. Optical input jacks are compatible with digital signals with up to 96 kHz of sampling frequency. ■ Video jacks This unit has - Yamaha RX-V863 | Owner's Manual - Page 22
Information on HDMI™ ■ HDMI signal compatibility Audio signals Audio signal types Audio signal formats Compatible channel analog audio input (see page 25) - DIGITAL INPUT OPTICAL (or COAXIAL) • Refer to the supplied instruction manuals 60 Hz, 50 Hz - 1080p/60 Hz, 50 Hz, off the power of the HDMI - Yamaha RX-V863 | Owner's Manual - Page 23
OPTICAL) ■ Video signal flow Input HDMI COMPONENT VIDEO Connections Output AUDIO S VIDEO Digital output Analog output VIDEO Through Video conversion ON (see page 98) Notes • 2-channel as well as multi-channel • The analog component video signals with 1080p of resolution are only output at the - Yamaha RX-V863 | Owner's Manual - Page 24
on page 22 for connecting information. Make sure that this unit monitor is compatible with the OPTICAL DIGITAL INPUT FRONT B/ZONE B/ ZONE 2/PRESENCE R EXTRA SP L CD DVD 5 6 COAXIAL FRONT A R L DVD DTV/CBL IN1 IN2 SPEAKERS CENTER SURROUND R L DVR OUT IN3 SURROUND BACK/BI-AMP - Yamaha RX-V863 | Owner's Manual - Page 25
XM OUTPUT OPTICAL DIGITAL INPUT COAXIAL FRONT B/ZONE B/ ZONE 2/PRESENCE R EXTRA SP L FRONT A R L FM 75Ω UNBAL. GND AM HD Radio ANTENNA REMOTE TRIGGER OUT +12V IN OUT 15mA MAX. DVD DTV/CBL IN1 IN2 SPEAKERS CENTER SURROUND R L DVR OUT IN3 SURROUND BACK/BI-AMP R L DOCK - Yamaha RX-V863 | Owner's Manual - Page 26
Connecting a set-top box Optical out Audio out Satellite receiver, cable TV receiver or HDTV decoder S-video OPTICAL DIGITAL INPUT COAXIAL FRONT B/ZONE B/ ZONE 2/PRESENCE R EXTRA SP L FRONT A R L DVD IN1 DTV/CBL IN2 SPEAKERS CENTER SURROUND R L DVR OUT IN3 SURROUND BACK/BI-AMP - Yamaha RX-V863 | Owner's Manual - Page 27
PHONO jacks are only compatible with a turntable with an MM or a high-output MC cartridge. To connect a turntable with a lowoutput MC cartridge to the PHONO jacks, use an in-line boosting transformer or an MC-head amplifier. • When you connect both the DIGITAL INPUT (OPTICAL) jack and the DIGITAL - Yamaha RX-V863 | Owner's Manual - Page 28
jacks. 3 SUR.BACK PRE OUT jacks Surround back channel output jacks. When you only connect one external amplifier for the surround back channel, connect it to the SINGLE jack. Notes • When "BI-AMP" is set to "ON", this unit outputs the front channel audio signals at the SUR.BACK PRE OUT jacks - Yamaha RX-V863 | Owner's Manual - Page 29
out Multi-format player/External decoder (5.1-channel output) Multi-format player/External decoder (7.1-channel output) *1 The analog audio input jacks assigned as "FRONT" in "MULTI CH" (see page 97). ■ Connecting a Yamaha iPod universal dock or Bluetooth adapter This unit is equipped with the - Yamaha RX-V863 | Owner's Manual - Page 30
buttons. Refer to the owner's manuals for details about the capability of the SCENE control signals of the components. • If the component connected to the REMOTE OUT jack is not the Yamaha product, set "SCENE IR" in the advanced setup menu to "OFF" (see page 112). S VIDEO VIDEO L AUDIO R OPTICAL - Yamaha RX-V863 | Owner's Manual - Page 31
the nearest authorized Yamaha dealer or service center about outdoor antennas OPTICAL COAX DIGITAL INPUT FRONT B/ZONE B/ ZONE 2/PRESENCE R EXTRA SP L R FM 75Ω UNBAL. GND AM HD Radio ANTENNA REMOTE model) Press and hold Insert Release (Canada model) Open the lever Insert Close the - Yamaha RX-V863 | Owner's Manual - Page 32
the power cable Setting the speaker impedance (U.S.A. model) MONITOR OUT AC OUTLETS SWITCHED 120V 80Hz 100W MAX. TOTAL 0.8A MAX. TOTAL C DVR To the AC wall outlet Caution If you are to use 6 ohm speakers, set "SP IMP." to "6Ω MIN" as follows BEFORE using this unit. 4 ohm speakers can be also - Yamaha RX-V863 | Owner's Manual - Page 33
will be delay for a few seconds before this unit can reproduce sound. • You can also turn on the main zone by pressing SSCENE (or ASCENE) buttons. standby mode, this unit consumes a small amount of power in order to receive infrared signals from the remote control. y Press LSYSTEM OFF to set the - Yamaha RX-V863 | Owner's Manual - Page 34
source. The DOCK indicator also lights up when this unit is charging the battery of the stationed iPod in the standby mode. • Flashes while the connected Yamaha Bluetooth adapter (such as YBA-10, sold separately) and the Bluetooth component is in the paring or the Bluetooth adapter is searching the - Yamaha RX-V863 | Owner's Manual - Page 35
make settings for the presence and surround back speakers automatically by running "AUTO SETUP" (see page 32) or manually by adjusting settings for "SUR.B L/R SP" (see page 88) in "SPEAKER SET". Connections Using the remote control The remote control transmits a directional infrared ray. Be sure to - Yamaha RX-V863 | Owner's Manual - Page 36
supplied optimizer microphone collects and this unit analyzes the sound your speakers produce in your actual listening environment. Using AUTO SETUP Notes • Be advised that it is normal for loud test tones to be output during the "AUTO SETUP" procedure. • To achieve the best results, make sure the - Yamaha RX-V863 | Owner's Manual - Page 37
ASSIGN". Notes • "RELOAD" or "UNDO" is available only when you have previously run "AUTO SETUP" and confirmed the results. • "RELOAD" or "UNDO" is not available when you change the setting of "BI-AMP" in the advanced setup (see page 112) or "EXTRA SP ASSIGN" in "BASIC MENU" (see page 87). 6 Press - Yamaha RX-V863 | Owner's Manual - Page 38
. The following message appears in the OSD. When this unit starts the automatic setup procedure, loud test tones are output at the speakers. For more accurate measurements, keep quiet and move to the wall where speakers are not around. We recommend that you leave the listening room during the - Yamaha RX-V863 | Owner's Manual - Page 39
do not place it on top of this unit. AUTO SETUP AUTO SETUP Complete Disconnect Microphone PRESS [ENTER] [MENU]:Exit Results of the speaker output level (LEVEL) y If you are not satisfied with the results or want to manually adjust each parameter, use "MANUAL SETUP" (see page 82). English 35 En - Yamaha RX-V863 | Owner's Manual - Page 40
OF PHASE Reverse Channel FL -- CENTER PL PR SL SR SBL SBR [ ]/[[]:Select [ENTER]:Return y • For details about each warning message, see the "AUTO SETUP" section in "Troubleshooting" on page 120. • When the corresponding warning message is not applicable to a speaker, "--" is displayed - Yamaha RX-V863 | Owner's Manual - Page 41
templates for various situations of using this unit. As the initial factory setting, the following SCENE templates are assigned to each SCENE button buttons, you need to set the input source of the SCENE template on the remote control. See page 41 for details. 1 Press and hold the SSCENE (or - Yamaha RX-V863 | Owner's Manual - Page 42
3 TV Sports Viewing Action Game Playing RPG Playing LP Record Listening Note * When iPod is connected to the Yamaha iPod universal dock or a Bluetooth component is connected to the Bluetooth adapter, this unit plays back the audio sources input at the DOCK terminal. y You can create your original - Yamaha RX-V863 | Owner's Manual - Page 43
this SCENE template when you enjoy the high fidelity sound of the music discs on your DVD player. Select a Yamaha iPod universal dock or Bluetooth component that is connected to the Bluetooth adapter. Straight control signals and is connected to the REMOTE OUT jack of this unit, this unit operates the - Yamaha RX-V863 | Owner's Manual - Page 44
for a SCENE template: • INPUT: The input source component. • MODE: The active sound field programs, "Straight" or "Pure Direct" mode. SCENE : DVD Viewing INPUT : you need to set the input source of the SCENE template on the remote control. See page 41 for details. • You can create a customized - Yamaha RX-V863 | Owner's Manual - Page 45
remote control. 2 Press the desired buttons in the * area below to control the input source component of the selected SCENE template. * CODE SET TRANSMIT POWER TV POWER AV STANDBY POWER TUNER DOCK V-AUX XM CBL DTV SIRIUS CD A MD CD-R DVD DVR VCR PHONO TV VOL TV CH AMP setup - Yamaha RX-V863 | Owner's Manual - Page 46
speakers. Check whether your CD player supports CDs encoded in DTS. Also, check the sound input source information on the instructions. • See page 65 for details about SIRIUS Satellite Radio tuning instructions. • See page 70 for details about iPod operations. • See page 72 for details about Bluetooth - Yamaha RX-V863 | Owner's Manual - Page 47
following operations, set the operation mode selector on the remote control to FAMP. Selecting the MULTI CH INPUT component B speakers. When you activate the Zone B speakers, all the speakers in the main room are muted. Note If you select the sound field program and activate the Zone B speakers, - Yamaha RX-V863 | Owner's Manual - Page 48
operating information of this unit on a video monitor. 1 Turn on the video monitor connected to this unit. 2 Press JDISPLAY on the remote control input, no sound is output. Note This feature is not available when no digital input jacks (OPTICAL, COAXIAL and HDMI) are assigned. In addition, HDMI - Yamaha RX-V863 | Owner's Manual - Page 49
OPTICAL Playing video sources in the background of an audio source You can combine a video image from a video source with sound speaker terminals. • All Dolby Digital and DTS audio signals are mixed down to the left and right headphone channels. Muting the audio output Press GMUTE on the remote - Yamaha RX-V863 | Owner's Manual - Page 50
You can display the audio and video information of the current input signal. 1 Set the operation mode selector to FAMP and then press ISET MENU on the remote control. The top "SET MENU" display appears in the OSD. SET MENU . ;AUTO SETUP ;MANUAL SETUP .A;SIGNAL INFO [ ]/[ ]:Up/Down [ENTER]:Enter - Yamaha RX-V863 | Owner's Manual - Page 51
the standby mode, this unit does not cut off the power to AC OUTLET(S) while charging connected iPod (see page after a few seconds. y The sleep timer setting can also be canceled by pressing CSTANDBY (or KMAIN ZONE ON/OFF) sound field program. Flashes SLEEP SLEEP 120min. Lights up SLEEP Straight - Yamaha RX-V863 | Owner's Manual - Page 52
of precise digital decoders that allow you to enjoy multi-channel playback from almost any stereo or multi-channel sound source. This unit is also equipped with a Yamaha digital sound field processing (DSP) chip containing several sound field programs which you can use to enhance your playback - Yamaha RX-V863 | Owner's Manual - Page 53
channel in order to offer a powerful playing environment with a being-there feeling by enhancing various effects tones while maintaining a clear sense of directions. This sound feeling of large-scale movie productions. It reproduces a broad theater sound field matching the cinemascope and - Yamaha RX-V863 | Owner's Manual - Page 54
reverberations but puts emphasis on reproducing a powerful space expanded widely to the left and right. The reproduced depth is also restrained relatively to ensure the separation between audio channels and the clarity of the sound. This sound field features stable reverberations that match a wide - Yamaha RX-V863 | Owner's Manual - Page 55
51). Sound field programs Before performing the following operation, set the operation mode selector on the remote control to channel stereo sources are output from only the front left and right speakers. Multi-channel sources are decoded straight into the appropriate channels without any additional - Yamaha RX-V863 | Owner's Manual - Page 56
SETUP" (see page 32) and "SP LEVEL" (see page 89). 1 Press 7LEVEL on the remote control and then 8k / n repeatedly to select the speaker you want to adjust. Display Adjusted speaker FRONT L Front left speaker FRONT R Front right speaker CENTER Center speaker sound speaker channels. y Speaker - Yamaha RX-V863 | Owner's Manual - Page 57
mode selector on the remote control to FSOURCE and then press 4TUNER. Manual tuning mode (MANUAL TUNING) Use this feature manual tuning mode, this nit automatically selects the analog radio service. You cannot select the HD Radio audio programs (see page 57) and display the HD Radio information - Yamaha RX-V863 | Owner's Manual - Page 58
in the manual tuning mode. • Press GINFO (or 0INFO) repeatedly to toggle the frequency information and sound field program information in the front audio program, and if the main audio program is also not available, this unit is tuned into the analog service. 1 0 3 7 y If the entered frequency - Yamaha RX-V863 | Owner's Manual - Page 59
stations in the selected band and then another band. (Canada model) 2 Press CBAND (or 7BAND) to select "FM • If the number of received stations does not reach 40 manually, and you can also store the sub-audio programs of FM HD Radio station. 1 Tune into a station. See page 53 for tuning instructions - Yamaha RX-V863 | Owner's Manual - Page 60
describes the procedure to exchange preset station "E1" with "A5". Before performing the following operations, set the operation mode selector on the remote control to FSOURCE and then press 4TUNER. 1 Select preset station "E1" using DA/B/C/D/E and EPRESET/TUNING/CH l / h. See "Using station preset - Yamaha RX-V863 | Owner's Manual - Page 61
services. Furthermore, supplemental program services allow listeners to select from up to 8 HD Radio programs multicast on a single FM HD Radio channel. For further information also select the desired HD Radio audio program by pressing the numeric key. While this unit is in the automatic or manual - Yamaha RX-V863 | Owner's Manual - Page 62
level DSP PROG. INFO e.g.) The Bottom Line Sound field program Back to "STATION INFO 1" y remote control. The following information is displayed in the video monitor. TUNER Information Manual Setup" (see page 98). • The current HD Radio reception level appears on the top of the HD Radio information - Yamaha RX-V863 | Owner's Manual - Page 63
and Home Dock required (each sold separately) to receive XM service. It is prohibited to copy, decompile, disassemble, reverse engineer, hack, manipulate or otherwise make available any technology or software incorporated in receivers compatible with the XM Satellite Radio System. Installation costs - Yamaha RX-V863 | Owner's Manual - Page 64
begin receiving XM programming Radio service in Canada online on the remote control to sound content of the XM Satellite Radio broadcasts in multi-channels (see page 80). • You can set the XM Satellite Radio preset channels (see page 62). • You can display the XM Satellite Radio information - Yamaha RX-V863 | Owner's Manual - Page 65
Satellite Radio preset channels" on page 62. y The initial factory setting of all preset channels (A1 to E8) is "001 Preview". 3 Press EPRESET/TUNING/CH l / h (or 8PRESET/CH k / n) repeatedly to change the preset channel number (1 to 8). y You can also select the preset channel number directly by - Yamaha RX-V863 | Owner's Manual - Page 66
the operation mode selector on the remote control to FSOURCE and then press 4XM. Setting the XM Satellite Radio preset channels You can use this feature to store up to 40 XM Satellite Radio channels (A1 to E8: 8 preset channel numbers in each of the 5 preset channel groups). You can then recall any - Yamaha RX-V863 | Owner's Manual - Page 67
section in "Troubleshooting" on page 113 for appropriate remedies. ■ Displaying the XM Satellite Radio information in the front panel display Press GINFO (or 0INFO) repeatedly to toggle between the following XM Satellite Radio information display modes. CHANNEL INFO e.g.) 043 XMU Channel number/name - Yamaha RX-V863 | Owner's Manual - Page 68
also has more than 55 channels Canada for subscribers with a Canadian address. To Get SIRIUS Satellite Radio a subscription and compatible tuner and antenna are required and sold separately. Visit sirius.com for the most complete and up-to-date channel lineup and information instruction manuals supplied - Yamaha RX-V863 | Owner's Manual - Page 69
on the remote control to FSOURCE. 1 Rotate the RINPUT selector (or press 4SIRIUS) to select "SIRIUS" as the input source. The cursor on the left of the SIRIUS indicator lights up in the front panel display and the SIRIUS Satellite Radio information (such as channel number, channel name, category - Yamaha RX-V863 | Owner's Manual - Page 70
channel is locked (see page 67). - the channel is out of service. - you do not subscribe to the channel. ■ Preset Search mode Prior to selecting a preset channel display, select channel "0". • To enter a one-digit or two-digit channel number, press the numeric buttons (6) on the remote control and - Yamaha RX-V863 | Owner's Manual - Page 71
feature to set the Parental Lock code number (PIN) and select the channels to be locked. 1 Set the operation mode selector to FAMP on the remote control and then press ISET MENU to display. 2 Press 8n to select "MANUAL SETUP" and then press 8ENTER. 3 Press 8n repeatedly to select "INPUT MENU" and - Yamaha RX-V863 | Owner's Manual - Page 72
lock code number, use "SR PIN" in "ADVANCED SETUP" to reset the Parental Lock code number. • When you select "ALL" in "INIT" (see page 112), all locked channels are unlocked. ■ Tuning into the locked channels You can tune into the locked channels by the Direct number access mode or preset tuning - Yamaha RX-V863 | Owner's Manual - Page 73
Radio" section in "Troubleshooting" on page 118 for appropriate remedies. ■ Displaying the SIRIUS Satellite Radio information in the front panel display Press GINFO (or 0INFO) repeatedly to toggle between the following SIRIUS Satellite Radio information display modes. CHANNEL INFO e.g.) 008 Big - Yamaha RX-V863 | Owner's Manual - Page 74
also use the Compressed Music Enhancer mode of this unit to improve the sound quality of the compression artifacts (such as the MP3 format) stored on your iPod (see page 50). Notes • Only iPod (Click and Wheel), iPod nano, and iPod mini are supported. • Some features may not be compatible depending - Yamaha RX-V863 | Owner's Manual - Page 75
can select the amount of time the iPod menu and play information is displayed in the OSD by using the "OSDSOURCE" of this unit. Those characters are replaced with underscores "_". • The "Settings" parameters can on your iPod in the OSD. Use the simple remote mode to enjoy watching the photos or video clips - Yamaha RX-V863 | Owner's Manual - Page 76
the instructions before starting. Note If the Bluetooth adapter is not connected to the DOCK terminal of this unit, "No BT adapter" appears in the front panel display. 4 Check that the Bluetooth component detects the Bluetooth adapter. If the Bluetooth component detects the Bluetooth adapter, "YBA - Yamaha RX-V863 | Owner's Manual - Page 77
) on your DTS-compatible player, follow its operating instructions to make a setting VOLUME settings, the speaker level (see page 52) and the sound field programs (see the same AUDIO OUT (REC) channel. • S-video and composite video copyright laws. y Do a test recording before you start an actual - Yamaha RX-V863 | Owner's Manual - Page 78
then press RPARAMETER on the remote control. The following screen is shown in the OSD. Sound field program category Cursor MOVIE sound field parameter, see page 76. • When you set a sound field parameter to a value other than the initial factory settings, an asterisk mark (*) appears by the sound - Yamaha RX-V863 | Owner's Manual - Page 79
the value of "DSP LEVEL" • The effect sound of the selected sound field program is too weak. • You cannot recognize any difference between the sound field programs. Decrease the value of "DSP LEVEL" • The sound is vague. • You feel that the additional sound effect is excessive. Control range: -6 dB - Yamaha RX-V863 | Owner's Manual - Page 80
and the first reflection heard by the listener. The smaller the value, the closer the sound source seems to the reflection face. y When you adjust the initial delay parameters, we also recommend that you adjust the corresponding room size parameters likewise. This adjustment is especially effective - Yamaha RX-V863 | Owner's Manual - Page 81
room. y When you adjust the room size parameters, we also recommend that you adjust the corresponding initial delay parameters likewise. This adjustment is especially effective for the CINEMA DSP programs. Control range: 0.1 to 2.0 Source sound Early reflections Level Level Level Time Time Time - Yamaha RX-V863 | Owner's Manual - Page 82
a shorter time for "live" sources and listening room environments. Control range: 1.0 to 5.0 s Reverberation 60 dB Source sound Reverberation Early reflections 60 dB 60 dB REV.TIME Sound source Short reverberation REV.TIME REV.TIME Long reverberation REV.DELAY REV.LEVEL 78 En Small value - Yamaha RX-V863 | Owner's Manual - Page 83
and the DSP processors of this unit for pure hi-fi stereo sound when playing 2-channel analog sources. Choices: AUTO, OFF y • Select "AUTO" channel in the 7-channel stereo mode. The available parameters differ depending on the setting of the speakers. Control range: 0 to 100% Straight and 7-channel - Yamaha RX-V863 | Owner's Manual - Page 84
Circle Surround II processing for music sources. Neural Sur. (U.S.A. and Canada models only) Neural Surround processing for any sources. The Neural Surround decoder is compatible with PCM signals and analog 2-channel input sources. When Neural Surround-incompatible signals are being input while - Yamaha RX-V863 | Owner's Manual - Page 85
completely towards the center speaker or towards the front left and right speakers. A larger value moves the center channel output towards the front left and right speakers. Control range: 0 (center channel sound is output only from the center speaker) to 7 (center channel sound is output only from - Yamaha RX-V863 | Owner's Manual - Page 86
Use this feature to automatically adjust speaker and system parameters (see page 32). ■ Manual setup MANUAL SETUP Use this feature to manually adjust speaker and system parameters. Basic menu 1 BASIC MENU Menu A)SPEAKER SET B)SP LEVEL C)SP DISTANCE D)TEST TONE Parameter Functions EXTRA SP ASSIGN - Yamaha RX-V863 | Owner's Manual - Page 87
unit (MANUAL SETUP) Parameter ADAPTIVE DRC ADAPTIVE DSP power of this unit is turned on. Page 91 91 91 91 91 Sound menu 3 SOUND MENU Menu A)EQUALIZER B)LFE LEVEL C)DYNAMIC RANGE D)LIPSYNC E)EXTD SUR. Parameter EQ TYPE SELECT GEQ TEST SPEAKER HEADPHONE SPEAKER HEADPHONE HDMI AUTO AUTO MANUAL - Yamaha RX-V863 | Owner's Manual - Page 88
(see page 29). Sets the SIRIUS Parental Lock code number and the channel lock configuration (see page 67) Page 95 96 96 96 96 96 Pair the connected Yamaha Bluetooth adapter (such as YBA-10, sold separately) with a 97 Bluetooth component (see page 72). Selects the video source played back in the - Yamaha RX-V863 | Owner's Manual - Page 89
VOL. INIT. VOL. Customizing this unit (MANUAL SETUP) Functions Prevents accidental changes to sound field program parameter values and other system settings when you turn on the power of this unit. Page 100 100 100 100 101 101 101 ■ Signal information SIGNAL INFO Use this feature to check audio - Yamaha RX-V863 | Owner's Manual - Page 90
is an example where "LFE LEVEL" is selected. B)LFE LEVEL . SPEAKER;;;;;;0dB HEADPHONE;;-20dB [ p 3 Press 8ENTER to enter "MANUAL SETUP". The "MANUAL SETUP" display appears in the OSD. MANUAL SETUP . 1 BASIC MENU 2 VOLUME MENU 3 SOUND MENU 4 INPUT MENU 5 OPTION MENU [ ]/[ ]: Up/Down [ENTER]: Enter - Yamaha RX-V863 | Owner's Manual - Page 91
MENU Use this feature to manually adjust the basic speaker settings. Most of the "BASIC MENU" parameters are set automatically when you run the automatic setup. 1 BASIC MENU . A)SPEAKER SET B)SP LEVEL C)SP DISTANCE D)TEST TONE [ ]/[ ]: Up/Down [ENTER]: Enter p [ y Set "TEST TONE" to "ON" to - Yamaha RX-V863 | Owner's Manual - Page 92
Customizing this unit (MANUAL SETUP) Measure for the speaker size The woofer section of a speaker is - 16 cm (6.5 in) or larger: large - smaller than 16 cm (6.5 in): small Surround left/right speakers SUR. L/R SP A)SPEAKER SET SUR. L/R SP Front speakers FRONT SP A)SPEAKER SET FRONT SP SMALL > - Yamaha RX-V863 | Owner's Manual - Page 93
subwoofer if bass sounds are lacking or unclear. A)SPEAKER SET SUBWOOFER PHASE >NORMAL REVERSE Choice NORMAL (normal) REVERSE (reverse) Functions Does not change the phase of your subwoofer. Sets the phase of your subwoofer to reverse. Customizing this unit (MANUAL SETUP) ■ Speaker level B)SP - Yamaha RX-V863 | Owner's Manual - Page 94
Customizing this unit (MANUAL SETUP) ■ Speaker distance C)SP DISTANCE Use this feature to manually adjust the distance of each speaker and the delay applied to the respective channel. Ideally, each speaker should be the same distance from the main listening position. However, this is not possible in - Yamaha RX-V863 | Owner's Manual - Page 95
wide Customizing this unit (MANUAL SETUP) Adaptive DSP level ADAPTIVE DSP LEVEL Use this SOUND MENU" (see page 93). • This function is also useful for listening with your headphones. Note The adaptive set the volume level of the main zone when the power of this unit is turned on. Choices: OFF, - Yamaha RX-V863 | Owner's Manual - Page 96
surround back L/R, and surround back speakers with that of the front L/R speakers. You can adjust 7 frequency bands (63 Hz, 160 Hz, 400 Hz, 1 kHz, 2.5 kHz, 6.3 kHz, 16 kHz). Control range: -6.0 dB to +6.0 dB Control step: 0.5 dB A)EQUALIZER 1/2 TEST >OFF ON . CHANNEL;;;;FRONT L 63Hz 0dB 160Hz - Yamaha RX-V863 | Owner's Manual - Page 97
) channel according to the capacity of your subwoofer or headphones. The LFE channel carries MANUAL SETUP) ■ Dynamic range C)DYNAMIC RANGE Use this feature to select the amount of dynamic range compression to be applied to your speakers of the instruction of the input source signals. Preserves - Yamaha RX-V863 | Owner's Manual - Page 98
channel playback for multi-channel sources using the Dolby Pro Logic IIx, Dolby Digital EX, or DTS-ES decoders by using the connected surround back speakers lip sync compatible video monitors. Manual delay MANUAL Use this feature to adjust the delay of the sound output manually to synchronize - Yamaha RX-V863 | Owner's Manual - Page 99
BLUETOOTH L) DVR M) VCR N) MULTI CH [ ]/[ ]: Up/Down [ENTER]: Enter Input source A)SIRIUS (U.S.A. and Canada models only) B)XM (U.S.A. and Canada Customizing this unit (MANUAL SETUP) Input/output assignment remote control). L) DVR . COMPONENT IN;;;[B]* COAXIAL IN;;;;NONE OPTICAL IN;;;;NONE OPTICAL - Yamaha RX-V863 | Owner's Manual - Page 100
MANUAL SETUP only available when the digital audio input jacks (HDMI, OPTICAL, and/or COAXIAL) are assigned to the selected input number for locking the desired SIRIUS Satellite Radio channels. Refer to "Setting the Parental Lock" on also affects the signals output at the audio ZONE OUT jacks. 96 En - Yamaha RX-V863 | Owner's Manual - Page 101
the instructions before starting. 1 Press 8ENTER to start pairing. The connected Bluetooth adapter starts searching Bluetooth components. "Searching..." appears in the video monitor. 2 Check that the Bluetooth component detects the Bluetooth adapter. If the Bluetooth component the Bluetooth adapter - Yamaha RX-V863 | Owner's Manual - Page 102
Amplifier function OSD display time OSD-AMP Use this feature to set the amount of time to display the status information information, SIRIUS Satellite Radio information, or iPod menu (such as song title or channel in "ADVANCED SETUP" to set the parameters in "VIDEO SET" to the factory presets (see - Yamaha RX-V863 | Owner's Manual - Page 103
HDMI upscaling of the analog video signals input at the VIDEO, S VIDEO and COMPONENT VIDEO jacks so that the upscaled video 1080p • 480p/576p → 1080i, 720p, or 1080p B)VIDEO SET HDMI RESOLUTION >*THROUGH * 480p * 720p *1080i *1080p [p]/[[]: Select [ENTER]: Enter Customizing this unit (MANUAL SETUP - Yamaha RX-V863 | Owner's Manual - Page 104
the "MEMORY GUARD" feature. Protects: - sound field program parameters - "AUTO SETUP" items - all speaker levels - "MANUAL SETUP" items Notes • You can change the connected to the DIGITAL INPUT jacks when you turn on the power of this unit. Choice Functions AUTO Automatically detects the type of - Yamaha RX-V863 | Owner's Manual - Page 105
HDMI SET S. AUDIO;;;;;RX-V863 [p]/[[]: Select [ENTER]: Return Support audio S.AUDIO Use the instruction manual of each connected component. [ p Customizing this unit (MANUAL SETUP) ■ this feature to set the volume level of Zone 2 when the power of this unit is turned on. Choices: OFF, MUTE, -80 - Yamaha RX-V863 | Owner's Manual - Page 106
104). When you set the remote control codes for both 4DTV/CBL and 4PHONO, priority is given to the one set for 4DTV/CBL. *1 *2 *1 CODE SET TRANSMIT POWER TV POWER AV STANDBY POWER TUNER DOCK V-AUX XM CBL DTV SIRIUS CD A CD-R DVD DVR VCR PHONO TV VOL TV CH AMP VOLUME SOURCE TV TV - Yamaha RX-V863 | Owner's Manual - Page 107
remote control can operate up to 12 different components. [1] CODE SET TRANSMIT POWER TV POWER AV STANDBY POWER TUNER DOCK V-AUX XM CBL DTV SIRIUS CD A CD-R DVD DVR VCR PHONO TV VOL TV CH AMP backward Search backward Search backward Information *2 Search forward Search forward - Yamaha RX-V863 | Owner's Manual - Page 108
this manual. Remote control code default settings Input source Component category Manufacturer Default code TUNER TUNER Yamaha 82915 XM TUNER Yamaha 82918 SIRIUS TUNER Yamaha 82176 A - - - V-AUX DTV/CBL OTHER AUDIO ACCESSORIES (iPod) - Yamaha - 82981 - CD CD Yamaha 62907 - Yamaha RX-V863 | Owner's Manual - Page 109
control codes previously set and reset all of them to the initial factory settings. 1 Press 2CODE SET using a ballpoint pen or a similar object. The BTRANSMIT indicator on the remote control flashes twice. CODE SET TRANSMIT POWER TV POWER AV STANDBY POWER TRANSMIT Flashes 2 Press the numeric - Yamaha RX-V863 | Owner's Manual - Page 110
own these products, you may not need to use an infrared signal emitter. Up to 6 Yamaha components can be connected as shown below. REMOTE IN REMOTE OUT IN REMOTE OUT IN REMOTE OUT Infrared signal receiver This unit Yamaha component Yamaha component ■ Using the external amplifier Connect the - Yamaha RX-V863 | Owner's Manual - Page 111
low impedance load resulting in amplifier damage. See this owner's manual for correct usage. Compliance with minimum speaker impedance information for all channels must be maintained at all times. This information is found on the back panel of your Receiver. Connect the speakers in the second zone - Yamaha RX-V863 | Owner's Manual - Page 112
use iPod features or Bluetooth features in Zone 2. For details about the iPod operations, see "Using iPod™" on page 70 or "Using Bluetooth™ components" on page BTRANSMIT indicator on the remote control flashes twice. CODE SET TRANSMIT POWER TV POWER AV STANDBY POWER TRANSMIT Flashes 2 Press - Yamaha RX-V863 | Owner's Manual - Page 113
the front panel display. The advanced setup menu offers additional operations to adjust and customize the way the impedance of each speaker must be 8 Ω or higher. The impedance of each speaker must be 6 Ω or higher. * The Canada model cannot use two separate speaker systems (A and B) - Yamaha RX-V863 | Owner's Manual - Page 114
setup. ■ Remote control AMP ID REMOTE AMP Use this feature to set the AMP ID of this unit for remote control recognition. This feature is useful when you operate this unit and the other Yamaha receivers/ amplifiers remote control flashes twice. CODE SET TRANSMIT POWER TV POWER AV STANDBY POWER - Yamaha RX-V863 | Owner's Manual - Page 115
SIRIUS XM 2 Press 2CODE SET using a ballpoint pen or a similar object. The BTRANSMIT indicator on the remote control flashes twice. CODE SET TRANSMIT POWER TV POWER AV STANDBY POWER TRANSMIT Flashes 3 Press the numeric buttons (6) to enter the code number "82918" or "82179". The BTRANSMIT - Yamaha RX-V863 | Owner's Manual - Page 116
Note Even if you set "SR PIN" to "RESET", this unit does not unlock the locked channels. The initial factory setting of the Parental Lock code number is "0000". ■ Bi-amplifier setting BI-AMP Use this feature to activate or deactivate the bi-amplifier function (see page 16). Choices: ON, OFF • Select - Yamaha RX-V863 | Owner's Manual - Page 117
Troubleshooting Refer to the table below when this unit does not function properly. If the problem you are experiencing is not listed below or if the instruction below does not help, turn off this unit, disconnect the power cable, and contact the nearest authorized Yamaha dealer or service - Yamaha RX-V863 | Owner's Manual - Page 118
Troubleshooting Problem Cause Remedy Only the center speaker outputs substantial sound. No sound is heard from the center speaker. No sound is heard from the presence speakers. No sound is heard from the surround speakers. No sound is heard from the surround back speakers. Zone 2 speaker channel - Yamaha RX-V863 | Owner's Manual - Page 119
Problem Cause No picture or sound. The number of the connected HDMI components is over the limit. HDCP authentication failed. Remedy Reduce the number of the connected HDMI components. Check that the connected HDMI components support the HDCP copy protection standards. See page - - ADDITIONAL - Yamaha RX-V863 | Owner's Manual - Page 120
Problem Cause Remedy This unit cannot receive the HD Radio signals of the selected radio station. The radio station provides analog FM/AM radio service only. Tuning mode is set to "MANUAL not provide the information. Select other radio stations that provides the HD Radio service. Set the tuning - Yamaha RX-V863 | Owner's Manual - Page 121
with your XM subscription package. Consult the latest channel guide at http://www.xmradio.com/ (US residents) and http://www.xmradio.ca/ (Canadian residents) for the current list of channels. For information on receiving this channel, visit http://www.xmradio.com/ (US residents) and http://www - Yamaha RX-V863 | Owner's Manual - Page 122
is updating the firmware. The selected channel is not subscribed. The subscription information is updated. The selected channel is currently out of service. lamp, etc.) is striking the remote control sensor of this unit. The batteries are weak. Replace all batteries. The operation mode selector - Yamaha RX-V863 | Owner's Manual - Page 123
is disconnected from the Yamaha Bluetooth adapter (such as YBA-10, sold separately). The Bluetooth adapter is not connected to Connect the Yamaha Bluetooth adapter (such as YBA- the DOCK terminal. 10, sold separately) to the DOCK terminal. See page 25 ADDITIONAL INFORMATION English 119 En - Yamaha RX-V863 | Owner's Manual - Page 124
panel. The optimizer microphone does not detect test tones. Check the microphone setting. Check the speaker connections and placement. The "AUTO SETUP" procedure was cancelled due to user activity. Run "AUTO SETUP" again. An internal error occurred. Run "AUTO SETUP" again. See page 14 14 14 - Yamaha RX-V863 | Owner's Manual - Page 125
problem, then run "AUTO SETUP" again. • If a warning message "W-1", "W-2", or "W-3" appears, corrections are made, but they may not be optimal. • If an error message "E-10" occurs repeatedly, contact a qualified Yamaha service center. See page 14 - - 14 - 32 14 33 ADDITIONAL INFORMATION English - Yamaha RX-V863 | Owner's Manual - Page 126
factory settings. Notes • This procedure completely resets all the parameters of this unit including the "SET MENU" parameters. • The initial factory OFF to turn on this unit. This unit turns on, and the advanced setup menu appears in the front panel display. TONE CONTROL While holding down MAIN - Yamaha RX-V863 | Owner's Manual - Page 127
Digital Plus can carry up to 7.1 discreet audio channels simultaneously. Supported by HDMI version 1.3 and designed for the optical disc players and AV receivers/amplifiers of the future, Dolby Digital Plus also remains fully compatible with the existing multichannel audio systems that incorporate - Yamaha RX-V863 | Owner's Manual - Page 128
channels of 24-bit/96 kHz audio simultaneously. Supported by HDMI version 1.3 and designed for the optical disc players and AV receivers/amplifiers of the future, Dolby TrueHD also remains fully compatible -channel sound on additional commentaries made by the director of a film) on demand by the users - Yamaha RX-V863 | Owner's Manual - Page 129
when converting the sound level into a representing the sound level difference channel matrix surround sound decoding system. It is the next-generation of the original SRS Circle Surround technology, incorporating powerful space standard supported by HDMI While remaining compatible with the color - Yamaha RX-V863 | Owner's Manual - Page 130
such as room size, wall material, number of speakers, and so on, can differ so widely, it is inevitable that there are differences in the sound heard. Based on a wealth of actually measured data, Yamaha CINEMA DSP uses Yamaha original sound field technology to combine Dolby Pro Logic, Dolby Digital - Yamaha RX-V863 | Owner's Manual - Page 131
Power [U.K., Europe, Russia and Asia models] Speaker impedance setting: 8 Ω, 1 kHz, 0.7% THD, 4 155 W • Dynamic Headroom [U.S.A. and Canada models] 8 1.25 dB • IEC Output Power L/R 150 µV or less • Channel Separation (1 kHz/10 kHz) [U.S.A., Canada, [U.S.A. and Canada models 87.5 and Canada models - Yamaha RX-V863 | Owner's Manual - Page 132
Europe, and Russia models AC 230 V, 50 Hz • Power Consumption [U.S.A. and Canada models 400 W/500 VA [Other models 440 W • Standby Power Consumption [U.S.A. and Canada models 0.8 W or less [Other models 0.1 W or less • Maximum Power Consumption [General model only] 6ch, 10% THD 850 W • AC - Yamaha RX-V863 | Owner's Manual - Page 133
cross over, Speaker settings .........89 BGV, Input menu 97 BI-AMP, Advanced setup 112 Bi-Amplifier, Advanced setup ...........112 Bluetooth adapter connection 25 Bluetooth component playback 72 Bluetooth component use 72 Bluetooth, Troubleshooting 119 BT connected, Bluetooth status message - Yamaha RX-V863 | Owner's Manual - Page 134
delay, Sound field parameter 76 INTERNAL ERROR, Automatic setup error message 120 Initial volume, Volume menu 91 INPUT CH, Input menu 97 Input channel and speaker indicators 31 Input channel indicators 31 Input channels, Input menu 97 INPUT MENU, Manual setup 95 Input menu, Manual setup 84 - Yamaha RX-V863 | Owner's Manual - Page 135
-fi sound 52 PVR connection 22 ■R Rear panel 10 REMOTE AMP, Advanced setup ..... 110 Remote control AMP ID, Advanced setup 110 Remote control code default settings 104 Remote control codes iii Remote control codes setting 104 Remote control SIRIUS ID, Advanced setup 111 Remote control TUNER - Yamaha RX-V863 | Owner's Manual - Page 136
51 Straight Enhancer, Sound field program 50 STRAIGHT mode 51 SUB UPDATED, SIRIUS Satellite Radio status message 118 SUBWOOFER PHASE, Speaker settings 89 Subwoofer phase, Speaker settings ......89 SUBWOOFER PRE OUT jack connection 24 Supplied accessories 2 Support audio, HDMI set 101 - Yamaha RX-V863 | Owner's Manual - Page 137
B 43 ZONE2 indicator 31 Index "ASPEAKERS" or "4DVD" (example) indicates the name of the parts on the front panel or the remote control. Refer to the attached sheet or the pages at the end of this manual for the information about each position of the parts. 133 En English ADDITIONAL INFORMATION - Yamaha RX-V863 | Owner's Manual - Page 138
■ Front panel AB CD E FG H I J VOLUME SPEAKERS EDIT SEARCH MODE BAND CATEGORY A/B/C/D/E PRESET/TUNING/CH MEMORY INFO ZONE 2 ON/OFF ZONE 3 4 PROGRAM STRAIGHT PURE DIRECT AUDIO SELECT INPUT EFFECT OPTIMIZER MIC VIDEO AUX S VIDEO VIDEO L AUDIO R OPTICAL KL M NO PQ R S i - Yamaha RX-V863 | Owner's Manual - Page 139
■ Remote control 1 2 3 4 5 6 7 8 9 0 A CODE SET TRANSMIT POWER TV POWER AV STANDBY POWER TUNER DOCK V-AUX XM CBL DTV SIRIUS CD A MD CD-R DVD DVR VCR PHONO TV VOL TV CH AMP VOLUME SOURCE TV TV MUTE TV INPUT MUTE PROG 1 2 ENHANCER SUR. DECODE 3 4 STRAIGHT PURE DIRECT 5 - Yamaha RX-V863 | Owner's Manual - Page 140
List of remote control codes CABLE TV RECEIVER 3M 10033 A-MARK 10008, 10144 ABC 10003, 10007, 10008, 10011, 10014 STAR CHOICE 10869 TIVO 11142, 11442, 11443, 11444 ZENITH 11810 SATELLITE RECEIVER AIWA 11514, 11515 ALPHASTAR 10772 AMSTRAD 10338 AUSTAR 10879 BELL EXPRESSVU 10775 - Yamaha RX-V863 | Owner's Manual - Page 141
MEMOREX 10724 MITSUBISHI 10749 MOTOROLA 10856, 10869 NEC 10496, 11270, 11519 NETSAT 10099 NEXT LEVEL 10869 OPTIMUS 10724 OPTUS 11356 PACE 11356 PANASAT 10879 PANASONIC 10214, 10247, 10701, 11508, 11526, 11527, 11528 PANSAT 11807 PAYSAT 10724 PHILIPS 10099, 10722, 10724, - Yamaha RX-V863 | Owner's Manual - Page 142
HARVARD 20180 HAVERMY 20093 HEATHKIT 20017 HELIOS 20865 HELLO KITTY 20451 HEWLETT PACKARD 21088, 21089, 21101, 21494, 21502, 21642 HISENSE 20748, 21660 HITACHI 20000, 20017, 20036, 20047, 20051, 20054, 20145, 20178, 20179, 21145, 21150, 21245, 21345, 21378, 21445 HP 21088, - Yamaha RX-V863 | Owner's Manual - Page 143
20179, 20236, 20451, 20463, 20623, 20889 WINBOOK 21381 WORLD 20180, 20236, 20451, 20463 WYSE 21365 XR-1000 20154, 20171, 20179, 20180 YAMAHA 20030, 20769, 20833, 20839, 21405, 21406, 21407, 21526, 21522 YORX 20030 ZENITH 20000, 20017, 20030, 20037, 20047, 20092, 20093, 20145 - Yamaha RX-V863 | Owner's Manual - Page 144
ADYSON 30072 AIKO 30278 AIWA 30000, 30037, 30124, 30307, 30348, 30479, 31137, 31284, 31291, 31332, 31336 AKAI 30041, 30049, 30061, 30106, 30175, 30242 ALBA 30072, 30209, 30278, 30295 ALIENWARE 31972 ALLEGRO 30039, 31137 AMERICA ACTION 30278 AMERICAN HIGH 30035, 30081 AMSTRAD - Yamaha RX-V863 | Owner's Manual - Page 145
, 30212, 30240, 30479, 30760 WHARFEDALE 30593 WHITE WESTINGHOUSE 30000, 30072, 30209, 30278, 30479, 30637 WORLD 30002, 30209, 30479 XR-1000 30000, 30035, 30072, 30208, 30240 YAMAHA 30038, 30041 APPENDIX viii - Yamaha RX-V863 | Owner's Manual - Page 146
30209, 30278, 30479, 30637, 31137, 31139, 31479 31972 DVD PLAYER 3D LAB 40503, 40539 ACCURIAN 40675, 41072, 41416, 41737 ACOUSTIC SOLUTIONS 40730 ADCOM 41682 BLAUPUNKT 40717 BLUE PARADE40571 BLUE SKY 40695, 40699 BOSE 41895 BOSS AUDIO SYSTEMS 41680 BRANDT 40651 BROKSONIC 40695, - Yamaha RX-V863 | Owner's Manual - Page 147
40790 VIALTA 41509 VICTOR 41241, 41597 VIEWMAGE 41374 VIZIO 41064, 41126, 41226 VOCOPRO 41027, 41360 WESDER 40699 WINTEL WYSE XBOX XWAVE YAMAHA YAMAKAWA ZENITH ZEUS ZOECE 41131 41652 40522, 41708, 42083 41001 40490, 40497, 40539, 40545, 40817, 41282, 42543, 42544 40872 40503, 40591 - Yamaha RX-V863 | Owner's Manual - Page 148
WARDS 60032, 60053, 60087, 60157, 60179 YAMAHA 60036, 60490, 60868, 60888, 61292, 62907 80224, 80346, 81255 ALCO 81390 AMC 81077 AMPLIFIER TECHNOLOGIES 81584 ANAM 81074, 81609 APEX DIGITAL , 80840 BEL CANTO DESIGN 81584 BK 80702 BOSE 80639, 81229, 81253, 81933 BRIX 81602 - Yamaha RX-V863 | Owner's Manual - Page 149
TOSHIBA 80080, 80135, 80842, 81123, 81788 VENTURER 80849, 81390 VICTOR 80074 WARDS 80014, 80080, 80158, 80189 XM 81406, 81414, 81846 YAMAHA 80176, 80186, 80376, 81023, 81176, 81276, 81331, 81375, 81476, 81815, 81949, 82176, 82177, 82178, 82179, 82908, 82915, 82918, 82919 YBA - Yamaha RX-V863 | Owner's Manual - Page 150
, USA 6660 ORANGETHORPE AVE., BUENA PARK, CALIF. 90620, U.S.A. YAMAHA CANADA MUSIC LTD. 135 MILNER AVE., SCARBOROUGH, ONTARIO M1S 3R1, CANADA YAMAHA ELECTRONIK EUROPA G.m.b.H. SIEMENSSTR. 22-34, 25462 RELLINGEN BEI HAMBURG, GERMANY YAMAHA ELECTRONIQUE FRANCE S.A. RUE AMBROISE CROIZAT BP70 CROISSY - Yamaha RX-V863 | Owner's Manual - Page 151
the Owner's Manual. Les nombres et lettres dans un cercle correspondent à ceux du mode d'emploi. ■ Front panel/Face avant AB C D E FGH I UC RX-V863 J VOLUME SPEAKERS EDIT DIRECT AUDIO SELECT INPUT EFFECT OPTIMIZER MIC VIDEO AUX S VIDEO VIDEO L AUDIO R OPTICAL K L M NO PQ R S - Yamaha RX-V863 | Owner's Manual - Page 152
■ Remote control/Boîtier de télécommande 1 2 3 4 5 6 7 8 9 0 A CODE SET TRANSMIT POWER TV POWER AV STANDBY POWER TUNER DOCK V-AUX XM CBL DTV SIRIUS CD A MD CD-R DVD DVR VCR PHONO TV VOL TV CH AMP VOLUME SOURCE TV TV MUTE TV INPUT MUTE PROG 1 2 ENHANCER SUR. DECODE 3 4
-
 1
1 -
 2
2 -
 3
3 -
 4
4 -
 5
5 -
 6
6 -
 7
7 -
8
-
9
-
10
-
11
-
12
-
13
-
14
-
15
-
16
-
17
-
18
-
19
-
20
-
21
-
22
-
23
-
24
-
25
-
26
-
27
-
28
-
29
-
30
-
31
-
32
-
33
-
34
-
35
-
36
-
37
-
38
-
39
-
40
-
41
-
42
-
43
-
44
-
45
-
46
-
47
-
48
-
49
-
50
-
51
-
52
-
53
-
54
-
55
-
56
-
57
-
58
-
59
-
60
-
61
-
62
-
63
-
64
-
65
-
66
-
67
-
68
-
69
-
70
-
71
-
72
-
73
-
74
-
75
-
76
-
77
-
78
-
79
-
80
-
81
-
82
-
83
-
84
-
85
-
86
-
87
-
88
-
89
-
90
-
91
-
92
-
93
-
94
-
95
-
96
-
97
-
98
-
99
-
100
-
101
-
102
-
103
-
104
-
105
-
106
-
107
-
108
-
109
-
110
-
111
-
112
-
113
-
114
-
115
-
116
-
117
-
118
-
119
-
120
-
121
-
122
-
123
-
124
-
125
-
126
-
127
-
128
-
129
-
130
-
131
-
132
-
133
-
134
-
135
-
136
-
137
-
138
-
139
-
140
-
141
-
142
-
143
-
144
-
145
-
146
-
147
-
148
-
149
-
150
-
151
-
152
 |
 |

RX-V863
AV Receiver
OWNER’S MANUAL
U