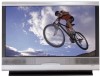
Zenith D60WLCD Operation Manual - Page 12
Vcr+cable Box
 |
UPC - 044642046217
View all Zenith D60WLCD manuals
Add to My Manuals
Save this manual to your list of manuals |
Page 12 highlights
VCR+CABLE BOX 1 Locate the Antenna/Cable 2 jack on the back of your TV. Connect the cable that runs from the wall or antenna to the jack. Now find the Loop Out jack. 2 Connect the cable from this jack to the Input jack on the back of your cable box. 3 Locate the Output jack on the back of your cable box. Connect this to the RF or VHF/UHF/CATV In jack on the back of your VCR. If you want to connect VCR with TV directly, Connect the cable from the Loop Out jack to the RF or VHF/UHF/CATV In jack on the back of yor VCR. 4 Find the composite video and audio jacks on the back of your VCR, and connect them following the instructions provided with your equipment. You may connect either the composite video or the S-Video cables to your Entertainment Machine. (Do not connect BOTH the composite and the S- Video cables. In the event that you connect both composite and the S-Video cables, only the S-Video will work.) Cable box Out In VCR Back AV panel In 3 4 Out Audio Video S-Video LR Antenna Cable TV wall jack OR RF coaxial wire (75 ohm) Round wire (75 ohm) ANT/CABLE2 INPUT LOOP OUT ANT/CABLE1 INPUT A/V cables not included with TV S-VIDEO VIDEO L MONO R MONITOR VIDEO 2 VIDEO 1 OUT INPUT INPUT To hear stereo sound from cable or your VCR, you will need to connect A/V cables as well as the wire that runs from the VCR to your Entertainment Machine. If you want to receive your signals on Channel 3 or 4, locate the Out to TV jack on your VCR. Connect a cable from the Out to TV jack to the Antenna/Cable 1 jack on the back of your Entertainment Machine. After connecting external equipment to the TV, don't display still word for hours. It may be show the split word. PAGE 12 206-3726
-
 1
1 -
2
-
3
-
4
-
5
-
6
-
 7
7 -
 8
8 -
 9
9 -
 10
10 -
 11
11 -
 12
12 -
 13
13 -
 14
14 -
 15
15 -
 16
16 -
 17
17 -
18
-
19
-
20
-
21
-
22
-
23
-
24
-
25
-
26
-
27
-
28
-
29
-
30
-
31
-
32
-
33
-
34
-
35
-
36
-
37
-
38
-
39
-
40
-
41
-
42
-
43
-
44
-
45
-
46
-
47
-
48
-
49
-
50
-
51
-
52
-
53
-
54
-
55
-
56
-
57
-
58
-
59
-
60
 |
 |
