eMachines D732 User Guide - Page 49
Replacing the Thermal Module, IMPORTANT, Quantity, Screw Type
 |
View all eMachines D732 manuals
Add to My Manuals
Save this manual to your list of manuals |
Page 49 highlights
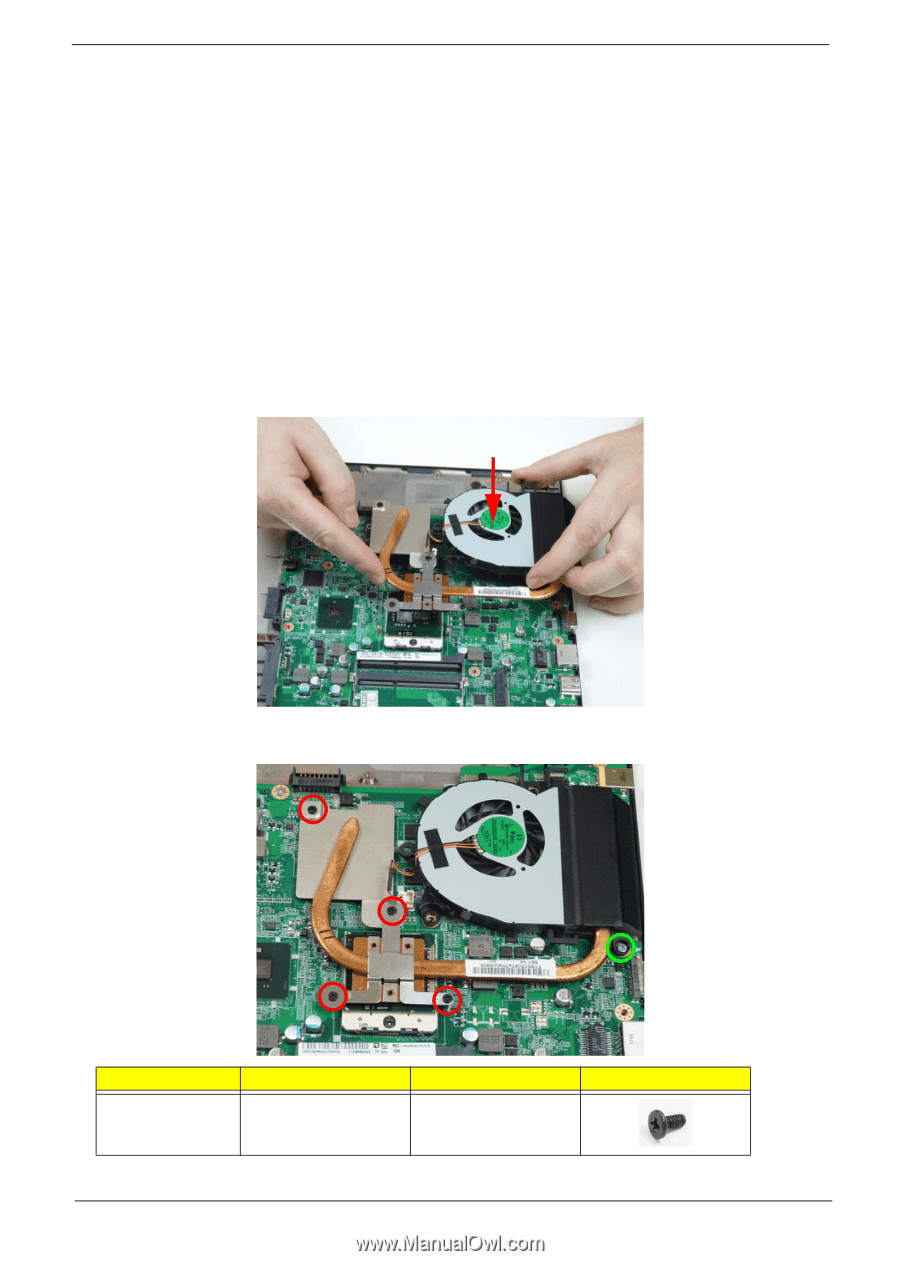
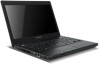
Replacing the Thermal Module IMPORTANT:Apply a suitable thermal grease and ensure all heat pads are in place before replacing the thermal module The following thermal materials are approved for use: • Thermal grease compound • Eapus PSX-D • Thermal pad • LairdTech T-F-7 1. Remove all traces of thermal material from the CPU and thermal module using a lint-free cloth or cotton swab and Isopropyl Alcohol, Acetone, or other approved cleaning agent. 2. Apply a new thermal pad or grease to the center of the processor(s) coming into contact with the thermal module. 3. Align the screw holes on the thermal module to the screw posts on the mainboard, then replace the module. Keep the module as level as possible when replacing. 4. Tighten the four (4) captive screws (in numerical order from 1 to 4) and replace the one (1) screw to secure the CPU thermal module. 4 1 3 2 Step Thermal Module Assembly Size M2.5*4.0 (green callout) Quantity 1 Screw Type Chapter 3 101
-
 1
1 -
2
-
3
-
4
-
5
-
6
-
7
-
8
-
9
-
10
-
11
-
12
-
13
-
14
-
15
-
16
-
17
-
18
-
19
-
20
-
21
-
22
-
23
-
24
-
25
-
26
-
27
-
28
-
29
-
30
-
31
-
32
-
33
-
34
-
35
-
36
-
37
-
38
-
39
-
40
-
41
-
42
-
43
-
 44
44 -
 45
45 -
 46
46 -
 47
47 -
 48
48 -
 49
49 -
 50
50 -
 51
51 -
 52
52 -
 53
53 -
 54
54 -
55
-
56
-
57
-
58
-
59
-
60
-
61
-
62
-
63
-
64
-
65
 |
 |