2000 Ford Expedition Owner's Manual - Page 190
2000 Ford Expedition Manual

Page 190 highlights
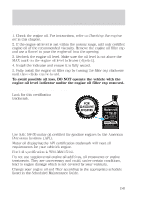
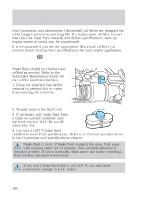
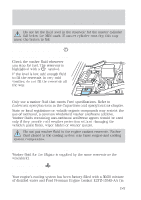
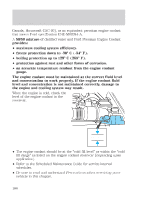
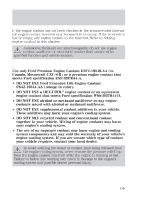
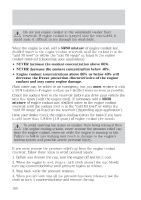
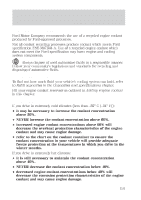
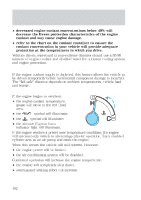
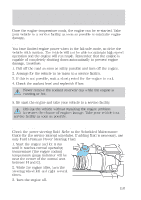
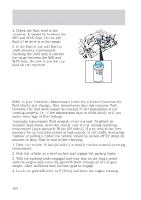
Maintenance and care Do not put engine coolant in the windshield washer fluid reservoir. If engine coolant is sprayed onto the windshield, it could make it difficult to see through the windshield. When the engine is cool, add a 50/50 mixture of engine coolant and distilled water to the engine coolant reservoir, until the coolant is at the "cold fill level" or within the "cold fill range" as listed in the engine coolant reservoir (depending upon application). • NEVER increase the coolant concentration above 60%. • NEVER decrease the coolant concentration below 40%. • Engine coolant concentrations above 60% or below 40% will decrease the freeze protection characteristics of the engine coolant and may cause engine damage. Plain water may be added in an emergency, but you must replace it with a 50/50 mixture of engine coolant and distilled water as soon as possible. Check the coolant level in the reservoir before you drive your vehicle the next few times (with the engine cool). If necessary, add a 50/50 mixture of engine coolant and distilled water to the engine coolant reservoir until the coolant level is at the "cold fill level" or within the "cold fill range" as listed on the reservoir (depending upon application). Have your dealer check the engine cooling system for leaks if you have to add more than 1.0 liter (1.0 quart) of engine coolant per month. To avoid scalding hot steam or coolant from being released from the engine cooling system, never remove the pressure relief cap from the engine coolant reservoir while the engine is running or hot. Failure to follow this warning may result in damage to the engine's cooling system and possible severe personal injury. If you must remove the pressure relief cap from the engine coolant reservoir, follow these steps to avoid personal injury: 1. Before you remove the cap, turn the engine off and let it cool. 2. When the engine is cool, wrap a thick cloth around the cap. Slowly turn cap counterclockwise until pressure begins to release. 3. Step back while the pressure releases. 4. When you are sure that all the pressure has been released, use the cloth to turn it counterclockwise and remove the cap. 190
-
 1
1 -
2
-
3
-
4
-
5
-
6
-
7
-
8
-
9
-
10
-
11
-
12
-
13
-
14
-
15
-
16
-
17
-
18
-
19
-
20
-
21
-
22
-
23
-
24
-
25
-
26
-
27
-
28
-
29
-
30
-
31
-
32
-
33
-
34
-
35
-
36
-
37
-
38
-
39
-
40
-
41
-
42
-
43
-
44
-
45
-
46
-
47
-
48
-
49
-
50
-
51
-
52
-
53
-
54
-
55
-
56
-
57
-
58
-
59
-
60
-
61
-
62
-
63
-
64
-
65
-
66
-
67
-
68
-
69
-
70
-
71
-
72
-
73
-
74
-
75
-
76
-
77
-
78
-
79
-
80
-
81
-
82
-
83
-
84
-
85
-
86
-
87
-
88
-
89
-
90
-
91
-
92
-
93
-
94
-
95
-
96
-
97
-
98
-
99
-
100
-
101
-
102
-
103
-
104
-
105
-
106
-
107
-
108
-
109
-
110
-
111
-
112
-
113
-
114
-
115
-
116
-
117
-
118
-
119
-
120
-
121
-
122
-
123
-
124
-
125
-
126
-
127
-
128
-
129
-
130
-
131
-
132
-
133
-
134
-
135
-
136
-
137
-
138
-
139
-
140
-
141
-
142
-
143
-
144
-
145
-
146
-
147
-
148
-
149
-
150
-
151
-
152
-
153
-
154
-
155
-
156
-
157
-
158
-
159
-
160
-
161
-
162
-
163
-
164
-
165
-
166
-
167
-
168
-
169
-
170
-
171
-
172
-
173
-
174
-
175
-
176
-
177
-
178
-
179
-
180
-
181
-
182
-
183
-
184
-
 185
185 -
 186
186 -
 187
187 -
 188
188 -
 189
189 -
 190
190 -
 191
191 -
 192
192 -
 193
193 -
 194
194 -
 195
195 -
196
-
197
-
198
-
199
-
200
-
201
-
202
-
203
-
204
-
205
-
206
-
207
-
208
-
209
-
210
-
211
-
212
-
213
-
214
-
215
-
216
-
217
-
218
-
219
-
220
-
221
-
222
-
223
-
224
-
225
-
226
-
227
-
228
-
229
-
230
-
231
-
232
-
233
-
234
-
235
-
236
-
237
-
238
-
239
-
240
-
241
-
242
-
243
-
244
-
245
-
246
-
247
-
248
-
249
-
250
-
251
-
252
-
253
-
254
-
255
-
256
 |
 |