2009 Nissan Xterra Owner's Manual - Page 169
2009 Nissan Xterra Manual
Page 169 highlights
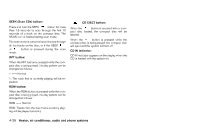
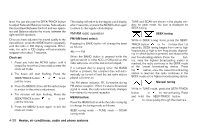
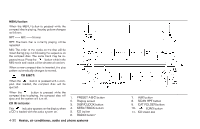
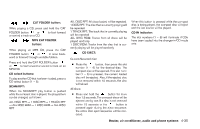
12. CD eject button 13. VOL control knob and PWR button 14. Station and CD select (1 - 6) buttons 15. TUNE/TRACK knob and AUDIO button *No satellite radio reception is available when the RADIO button is pressed to access satellite radio stations unless optional satellite receiver and antenna are installed and an XM satellite radio service subscription is active. Satellite radio can only be installed in vehicles that were factory pre-wired for satellite radio. Satellite radio is not available in Alaska, Hawaii and Guam. pre-wired for satellite radio. Satellite radio is not available in Alaska, Hawaii and Guam. Audio main operation POWER/VOLUME control: Turn the ignition switch to ACC or ON, and then press the PWR/VOL control knob while the system is off to call up the mode (radio or CD) which was playing immediately before the system was turned off. To turn the system off, press the PWR/VOL control knob. Turn the PWR/VOL control knob to adjust the volume. This vehicle may be equipped with Speed Sensitive Volume (SSV) for audio. The audio volume changes as the driving speed changes. AUDIO knob (BASS, MIDRANGE, TREBLE, FADE, BALANCE and SSV if so equipped): Press the AUDIO control knob to change the mode as follows: BASS → MID → TREBLE → FADE → BALANCE → SSV (if so equipped) To adjust Bass, Mid (Midrange), Treble, Fade and Balance, press the AUDIO knob until the desired mode appears in the display. Turn the Tuning knob to adjust Bass and Treble to the desired level. You can also use the Tuning knob to adjust Fader and Balance modes. Fader adjusts the sound level between the front and rear speakers and Balance adjusts the sound between the right and left speakers. To change the SSV mode to OFF, LOW, MID or HIGH, turn the Tuning knob to the right or left. Once you have adjusted the sound quality to the desired level, press the AUDIO knob repeatedly until the radio or CD display reappears. Otherwise, the radio or CD display will automatically reappear after about 10 seconds. Clock set 1. Press the DISP/CLOCK button until it beeps (>1.5 seconds). 2. The hours will start flashing. Press the CAT FOLDER or button or SEEK or button to adjust the TRACK hours. 3. Press the DISP/CLOCK button again to switch to the minute adjustment. 4. Press the CAT FOLDER button or SEEK TRACK button to adjust the minutes. or or FM/AM/SAT RADIO WITH COMPACT DISC (CD) CHANGER (if so equipped) For all operation precautions, see Audio operation precautions earlier in this section. No satellite radio reception is available when the RADIO button is pressed to access satellite radio stations unless optional satellite receiver and antenna are installed and an XM satellite radio service subscription is active. Satellite radio can only be installed in vehicles that were factory 5. Press the DISP/CLOCK button again to exit the clock set mode. Heater, air conditioner, audio and phone systems 4-31
-
 1
1 -
2
-
3
-
4
-
5
-
6
-
7
-
8
-
9
-
10
-
11
-
12
-
13
-
14
-
15
-
16
-
17
-
18
-
19
-
20
-
21
-
22
-
23
-
24
-
25
-
26
-
27
-
28
-
29
-
30
-
31
-
32
-
33
-
34
-
35
-
36
-
37
-
38
-
39
-
40
-
41
-
42
-
43
-
44
-
45
-
46
-
47
-
48
-
49
-
50
-
51
-
52
-
53
-
54
-
55
-
56
-
57
-
58
-
59
-
60
-
61
-
62
-
63
-
64
-
65
-
66
-
67
-
68
-
69
-
70
-
71
-
72
-
73
-
74
-
75
-
76
-
77
-
78
-
79
-
80
-
81
-
82
-
83
-
84
-
85
-
86
-
87
-
88
-
89
-
90
-
91
-
92
-
93
-
94
-
95
-
96
-
97
-
98
-
99
-
100
-
101
-
102
-
103
-
104
-
105
-
106
-
107
-
108
-
109
-
110
-
111
-
112
-
113
-
114
-
115
-
116
-
117
-
118
-
119
-
120
-
121
-
122
-
123
-
124
-
125
-
126
-
127
-
128
-
129
-
130
-
131
-
132
-
133
-
134
-
135
-
136
-
137
-
138
-
139
-
140
-
141
-
142
-
143
-
144
-
145
-
146
-
147
-
148
-
149
-
150
-
151
-
152
-
153
-
154
-
155
-
156
-
157
-
158
-
159
-
160
-
161
-
162
-
163
-
 164
164 -
 165
165 -
 166
166 -
 167
167 -
 168
168 -
 169
169 -
 170
170 -
 171
171 -
 172
172 -
 173
173 -
 174
174 -
175
-
176
-
177
-
178
-
179
-
180
-
181
-
182
-
183
-
184
-
185
-
186
-
187
-
188
-
189
-
190
-
191
-
192
-
193
-
194
-
195
-
196
-
197
-
198
-
199
-
200
-
201
-
202
-
203
-
204
-
205
-
206
-
207
-
208
-
209
-
210
-
211
-
212
-
213
-
214
-
215
-
216
-
217
-
218
-
219
-
220
-
221
-
222
-
223
-
224
-
225
-
226
-
227
-
228
-
229
-
230
-
231
-
232
-
233
-
234
-
235
-
236
-
237
-
238
-
239
-
240
-
241
-
242
-
243
-
244
-
245
-
246
-
247
-
248
-
249
-
250
-
251
-
252
-
253
-
254
-
255
-
256
-
257
-
258
-
259
-
260
-
261
-
262
-
263
-
264
-
265
-
266
-
267
-
268
-
269
-
270
-
271
-
272
-
273
-
274
-
275
-
276
-
277
-
278
-
279
-
280
-
281
-
282
-
283
-
284
-
285
-
286
-
287
-
288
-
289
-
290
-
291
-
292
-
293
-
294
-
295
-
296
-
297
-
298
-
299
-
300
-
301
-
302
-
303
-
304
-
305
-
306
-
307
-
308
-
309
-
310
-
311
-
312
-
313
-
314
-
315
-
316
-
317
-
318
-
319
-
320
-
321
-
322
-
323
-
324
-
325
-
326
-
327
-
328
-
329
-
330
-
331
-
332
-
333
-
334
-
335
-
336
 |
 |