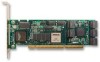
3Ware 9550SXU-8LP User Guide - Page 24
When the I, Write Cache, StorSave Profiles, Drive Locate., Auto-Rebuild. - battery
 |
UPC - 693494978100
View all 3Ware 9550SXU-8LP manuals
Add to My Manuals
Save this manual to your list of manuals |
Page 24 highlights
Chapter 1. Introducing the 3ware® 9000 Series Controller choose a time for these tasks to be run when it will be least disruptive to your system. You can also define the rate at which background tasks are performed, specifying whether I/O tasks should be given more processing time, or background rebuild and verify tasks should be given more processing time. • Write Cache. Write cache can be enabled or disabled using 3BM 2, 3DM 2 and CLI. When write cache is enabled, data will be stored in system cache, 3ware controller cache, and drive cache before the data is committed to disk. This allows the system to process multiple write commands at the same time, thus improving performance. However when data is stored in cache, it could be lost if a power failure occurred. With a Battery Backup Unit (BBU) installed, the cache stored on the 3ware controller can be restored. • StorSave Profiles allow you to set the level of protection versus performance that is desired for a unit when write cache is enabled (9550SX and 9590SE controllers only). For more information, see "Setting the StorSave Profile for a Unit" on page 149. • Drive Locate. When the I2C port on the controller has been connected to a chassis with a Chassis Control Unit (CCU), you can issue drive locate commands that blink the LEDs for particular drives, so that you can quickly identify what drive needs to be checked or replaced (9550SX and 9590SE controllers only). • Auto-Rebuild. For times when you do not have a spare available, setting the auto-rebuild policy allows rebuilds to occur with an available drive or with a failed drive (9550SX and 9590SE controllers only). 14 3ware Serial ATA RAID Controller User Guide
-
 1
1 -
2
-
3
-
4
-
5
-
6
-
7
-
8
-
9
-
10
-
11
-
12
-
13
-
14
-
15
-
16
-
17
-
18
-
 19
19 -
 20
20 -
 21
21 -
 22
22 -
 23
23 -
 24
24 -
 25
25 -
 26
26 -
 27
27 -
 28
28 -
 29
29 -
30
-
31
-
32
-
33
-
34
-
35
-
36
-
37
-
38
-
39
-
40
-
41
-
42
-
43
-
44
-
45
-
46
-
47
-
48
-
49
-
50
-
51
-
52
-
53
-
54
-
55
-
56
-
57
-
58
-
59
-
60
-
61
-
62
-
63
-
64
-
65
-
66
-
67
-
68
-
69
-
70
-
71
-
72
-
73
-
74
-
75
-
76
-
77
-
78
-
79
-
80
-
81
-
82
-
83
-
84
-
85
-
86
-
87
-
88
-
89
-
90
-
91
-
92
-
93
-
94
-
95
-
96
-
97
-
98
-
99
-
100
-
101
-
102
-
103
-
104
-
105
-
106
-
107
-
108
-
109
-
110
-
111
-
112
-
113
-
114
-
115
-
116
-
117
-
118
-
119
-
120
-
121
-
122
-
123
-
124
-
125
-
126
-
127
-
128
-
129
-
130
-
131
-
132
-
133
-
134
-
135
-
136
-
137
-
138
-
139
-
140
-
141
-
142
-
143
-
144
-
145
-
146
-
147
-
148
-
149
-
150
-
151
-
152
-
153
-
154
-
155
-
156
-
157
-
158
-
159
-
160
-
161
-
162
-
163
-
164
-
165
-
166
-
167
-
168
-
169
-
170
-
171
-
172
-
173
-
174
-
175
-
176
-
177
-
178
-
179
-
180
-
181
-
182
-
183
-
184
-
185
-
186
-
187
-
188
-
189
-
190
-
191
-
192
-
193
-
194
-
195
-
196
-
197
-
198
-
199
-
200
-
201
-
202
-
203
-
204
-
205
-
206
-
207
-
208
-
209
-
210
-
211
-
212
-
213
-
214
-
215
-
216
-
217
-
218
-
219
-
220
-
221
-
222
-
223
-
224
-
225
-
226
-
227
-
228
-
229
-
230
-
231
-
232
-
233
-
234
-
235
-
236
-
237
-
238
-
239
-
240
-
241
-
242
-
243
-
244
-
245
-
246
-
247
-
248
-
249
-
250
-
251
-
252
-
253
-
254
-
255
-
256
-
257
-
258
-
259
-
260
-
261
-
262
-
263
-
264
-
265
-
266
-
267
-
268
-
269
-
270
-
271
-
272
 |
 |
