Acer X1120H User Manual - Page 48
Appendices, Troubleshooting - projector manual
 |
View all Acer X1120H manuals
Add to My Manuals
Save this manual to your list of manuals |
Page 48 highlights
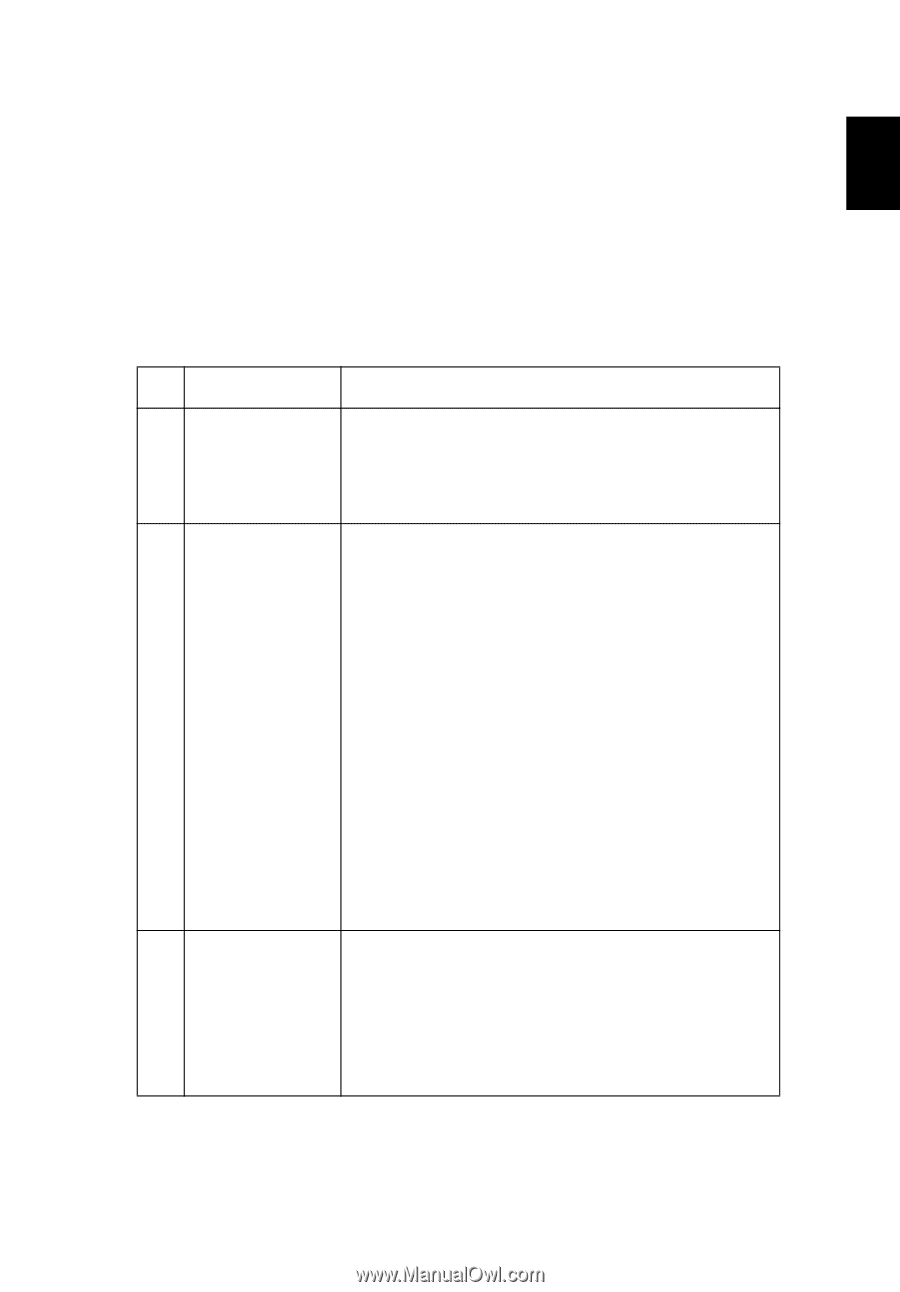
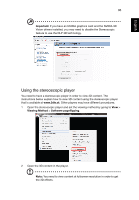
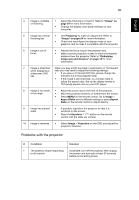
39 Appendices English English Troubleshooting If you experience a problem with your Acer projector, refer to the following troubleshooting guide. If the problem persists, please contact your local reseller or service center. Image problems and solutions # Problem Solution 1 No image appears • Ensure the projector is properly connected as onscreen described in "Getting started" on page 8. • Ensure none of the connector pins is bent or broken. • Check if the projector lamp has been securely installed. Please refer to "Replacing the lamp" on page 44. 2 Partial, scrolling or • Press RESYNC on the remote control. incorrectly • For an incorrectly displayed image: displayed image [For PC (Windows 95/98/2000/XP)] • Open My Computer > Control Panel, and then double-click the Display icon. • Select the Settings tab. • Verify that your display resolution setting is lower than or equal to UXGA (1600 x 1200). If the problem still appears, change the monitor display you are using and follow the steps below: • Verify that the resolution setting is lower than or equal to UXGA (1600 x 1200). • Click the Change button under the Monitor tab. • Click Show all devices. Next, select Standard monitor types under the SP box, and choose the resolution mode you need under the Models box. • Verify that the resolution setting of the monitor display is lower than or equal to UXGA (1600 x 1200). 4 The screen of the • If you are using a Microsoft Windows based notebook: notebook Some notebook PCs may deactivate their own screens computer is not when a second display device is in use. Each has a displaying your different way to be reactivated. Refer to your presentation computer's manual for detailed information. • If you are using an Apple Mac OS based notebook: In System Preferences, open Display and select Video Mirroring On.
-
 1
1 -
2
-
3
-
4
-
5
-
6
-
7
-
8
-
9
-
10
-
11
-
12
-
13
-
14
-
15
-
16
-
17
-
18
-
19
-
20
-
21
-
22
-
23
-
24
-
25
-
26
-
27
-
28
-
29
-
30
-
31
-
32
-
33
-
34
-
35
-
36
-
37
-
38
-
39
-
40
-
41
-
42
-
 43
43 -
 44
44 -
 45
45 -
 46
46 -
 47
47 -
 48
48 -
 49
49 -
 50
50 -
 51
51 -
 52
52 -
 53
53 -
54
-
55
-
56
-
57
-
58
-
59
-
60
-
61
-
62
-
63
-
64
-
65
-
66
-
67
 |
 |