Acer Aspire 4520 Aspire 4220 / 4520 User's Guide EN - Page 75
Time-shift functionality, Recorded TV, Scheduling recordings, Program guide, Sort by Channel
 |
View all Acer Aspire 4520 manuals
Add to My Manuals
Save this manual to your list of manuals |
Page 75 highlights
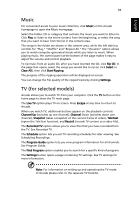
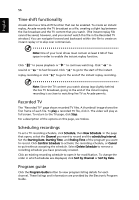
English 56 Time-shift functionality Arcade also has a time-shift function that can be enabled. To create an instant replay, Arcade records the TV broadcast as a file, creating a slight lag between the live broadcast and the TV content that you watch. (The instant replay file cannot be saved, however, and you cannot watch this file in the Recorded TV window.) You can navigate forward and backward within the file to create an instant replay or to skip over commercials. Note: One of your local drives must contain at least 2 GB of free space in order to enable the instant replay function. Click " " to pause playback or " " to continue watching. Click " " to rewind or " " to fast forward. Click " " to go to the start of the instant replay recording or click " " to go to the end of the instant replay recording. Note: Since the TV content you watch always lags slightly behind the live TV broadcast, going to the end of the instant replay recording is as close to watching live TV as Arcade permits. Recorded TV The "Recorded TV" page shows recorded TV files. A thumbnail image shows the first frame of each file. To play a recorded TV file, click it. The video will play at full screen. To return to the TV page, click Stop. For a description of the options on this page, see Videos. Scheduling recordings To set a TV recording schedule, click Schedule, then New Schedule. In the page that opens, select the Channel you want to record and the scheduling Interval. Set the Starting Date, Starting Time, and Ending Time of the program you want to record. Click Confirm Schedule to activate the recording schedule, or Cancel to quit without accepting the schedule. Select Delete Schedule to remove a recording schedule you have previously created. Click an existing recording schedule to open it for modification. To change the order in which schedules are displayed, click Sort by Channel or Sort by Date. Program guide Click the Program Guide button to view program listing details for each channel. These listings and information are provided by the Electronic Program Guide.
-
 1
1 -
2
-
3
-
4
-
5
-
6
-
7
-
8
-
9
-
10
-
11
-
12
-
13
-
14
-
15
-
16
-
17
-
18
-
19
-
20
-
21
-
22
-
23
-
24
-
25
-
26
-
27
-
28
-
29
-
30
-
31
-
32
-
33
-
34
-
35
-
36
-
37
-
38
-
39
-
40
-
41
-
42
-
43
-
44
-
45
-
46
-
47
-
48
-
49
-
50
-
51
-
52
-
53
-
54
-
55
-
56
-
57
-
58
-
59
-
60
-
61
-
62
-
63
-
64
-
65
-
66
-
67
-
68
-
69
-
 70
70 -
 71
71 -
 72
72 -
 73
73 -
 74
74 -
 75
75 -
 76
76 -
 77
77 -
 78
78 -
 79
79 -
 80
80 -
81
-
82
-
83
-
84
-
85
-
86
-
87
-
88
-
89
-
90
-
91
-
92
-
93
-
94
-
95
-
96
-
97
-
98
-
99
-
100
-
101
-
102
-
103
-
104
-
105
-
106
-
107
-
108
-
109
-
110
-
111
-
112
-
113
-
114
 |
 |