Alpine INA-W900 Owner's Manual (English) - Page 74
Tuning in to Categorized Programs, Changing the Display, Checking the SAT Radio ID Number
 |
UPC - 793276100238
View all Alpine INA-W900 manuals
Add to My Manuals
Save this manual to your list of manuals |
Page 74 highlights
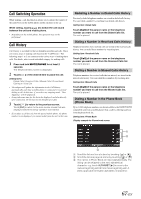
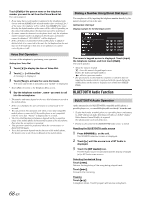
Tuning in to Categorized Programs Quickly find a group of channels in a desired category. The categories are listed in the order designated by Sirius or XM Radio. 1 Touch CATEGORY [ ] or [ ] to select a desired category in the XM or Sirius mode. 2 Touch and hold CATEGORY [ ] or [ ] for at least 2 seconds to activate the category mode. The "Category" indicator lights up. 3 Touch [ NO.] / [NO. ] to select a desired channel. The first channel of the selected category is tuned. • The channels can only be changed within the current category. 4 Touch and hold CATEGORY [ ] or [ ] for at least 2 seconds to turn off the category mode, or if no operation is performed for 13 seconds, the category mode will be automatically canceled. Changing the Display Text information, such as the channel name, artist name/feature, and song/program title, is available with each XM or Sirius channel. The unit can display this text information as explained below. Touch [INFO.] in the XM or Sirius mode. Each time you touch this button, the display changes as shown below. In XM mode: Category name Ch name Title name Artist name * Auxiliary Data Field * If all of Auxiliary Data Field Characters cannot be displayed, touch [INFO.] to display the other characters. In Sirius mode: Category name Ch name Title name Artist name Ch name Title name Artist name Composer name Title name Artist name Checking the SAT Radio ID Number A unique Radio ID number is required to subscribe to SAT Radio programming. Each third party XM or Sirius radio comes with this number. XM Radio: This number is an 8 character alphanumeric number. It is printed on a label found on the SAT Receiver. Sirius Radio: This number is a 12 digits number. It is printed on a label found on the SAT Receiver. It can also be displayed on the screen of the INA-W900 in the following way. 1 While receiving SAT Radio, touch NO. [ ] or [ ] to select channel "0" for XM and channel "0" or "255" for Sirius. The unit displays the ID number. 2 To cancel the ID number display, change the channel. • You can check the ID number printed on a label on your third party, SAT Radio Receiver package. Storing Channel Presets 1 Touch [P1/3] after selecting a desired band. The Function Guide is switched. 2 Touch and hold any one of the preset buttons [P.SET 1] through [P.SET 6] for at least 2 seconds. The selected channel is stored. 3 Repeat the procedure to store up to 5 other channels onto the same band. To use this procedure for other bands, simply select the desired band and repeat the procedure. A total of 18 channels can be stored in the preset memory (6 channels for each band; XM1, XM2 and XM3 or Sirius-1, Sirius-2 and Sirius-3 ). • If you store a channel in a preset already being used, the current channel will be replaced with the new one. Receiving Stored Channels 1 Touch [P1/3] after selecting a desired band. The Function Guide is switched. 2 Touch any one of the preset buttons [P.SET 1] through [P.SET 6] that has your desired satellite channel in memory. 72-EN
-
 1
1 -
2
-
3
-
4
-
5
-
6
-
7
-
8
-
9
-
10
-
11
-
12
-
13
-
14
-
15
-
16
-
17
-
18
-
19
-
20
-
21
-
22
-
23
-
24
-
25
-
26
-
27
-
28
-
29
-
30
-
31
-
32
-
33
-
34
-
35
-
36
-
37
-
38
-
39
-
40
-
41
-
42
-
43
-
44
-
45
-
46
-
47
-
48
-
49
-
50
-
51
-
52
-
53
-
54
-
55
-
56
-
57
-
58
-
59
-
60
-
61
-
62
-
63
-
64
-
65
-
66
-
67
-
68
-
 69
69 -
 70
70 -
 71
71 -
 72
72 -
 73
73 -
 74
74 -
 75
75 -
 76
76 -
 77
77 -
 78
78 -
 79
79 -
80
-
81
-
82
-
83
-
84
-
85
-
86
-
87
-
88
-
89
-
90
-
91
-
92
-
93
-
94
-
95
-
96
-
97
-
98
-
99
-
100
-
101
 |
 |