Apple M9434LL User Guide
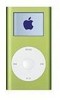
Apple M9434LL - iPod Mini 4 GB Digital Player Manual
 |
UPC - 718908620472
View all Apple M9434LL manuals
Add to My Manuals
Save this manual to your list of manuals |
Apple M9434LL manual content summary:
- Apple M9434LL | User Guide - Page 1
iPod mini User's Guide - Apple M9434LL | User Guide - Page 2
- Apple M9434LL | User Guide - Page 3
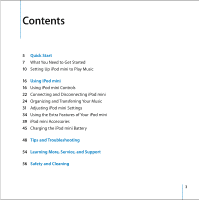
Connecting and Disconnecting iPod mini 24 Organizing and Transferring Your Music 31 Adjusting iPod mini Settings 34 Using the Extra Features of Your iPod mini 39 iPod mini Accessories 45 Charging the iPod mini Battery 48 Tips and Troubleshooting 54 Learning More, Service, and Support 56 Safety and - Apple M9434LL | User Guide - Page 4
- Apple M9434LL | User Guide - Page 5
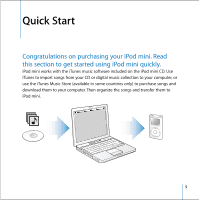
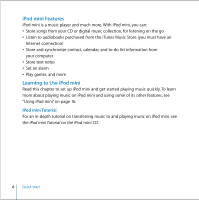
Quick Start 1 Congratulations on purchasing your iPod mini. Read this section to get started using iPod mini quickly. iPod mini works with the iTunes music software included on the iPod mini CD. Use iTunes to import songs from your CD or digital music collection to your computer, or use the iTunes - Apple M9434LL | User Guide - Page 6
notes • Set an alarm • Play games, and more Learning to Use iPod mini Read this chapter to set up iPod mini and get started playing music quickly. To learn more about playing music on iPod mini and using some of its other features, see "Using iPod mini" on page 16. iPod mini Tutorial For an in-depth - Apple M9434LL | User Guide - Page 7
.2 or later (Mac OS X v10.3.3 or later is recommended). • iTunes 4.2 or later (iTunes is included on the iPod mini CD) To be sure you have the latest version of iTunes, go to www.apple.com/itunes. • iSync 1.1 and iCal 1.0.1 or later iSync and iCal are optional for synchronizing contact and calendar - Apple M9434LL | User Guide - Page 8
processor speed • Windows 2000 with Service Pack 4 or later, or Windows XP Home or Professional • iTunes 4.2 or later (iTunes is included on the iPod mini CD) To be sure you have the latest version of iTunes, go to www.apple.com/itunes. • iPod software (included on the iPod mini CD) • Built-in 6-pin - Apple M9434LL | User Guide - Page 9
Your iPod mini includes the following components: iPod mini Belt Clip iPod Dock Connector to FireWire Cable iPod Dock Connector to USB 2.0 Cable iPod Power Adapter Apple Earphones Quick Start 9 - Apple M9434LL | User Guide - Page 10
songs from your music CD collection to your computer. Then you transfer the songs to iPod mini and start listening to music. Step 1: Charge the Battery Connect iPod mini to the iPod Power Adapter using the iPod Dock Connector to FireWire Cable. The built-in battery is 80-percent charged in about - Apple M9434LL | User Guide - Page 11
button and follow the onscreen instructions to set up an account or enter your existing Apple Account or America Online (AOL) account information. For an in-depth tutorial on transferring music to and playing music on iPod mini, see the iPod mini Tutorial on the iPod mini CD. Quick Start 11 - Apple M9434LL | User Guide - Page 12
Step 4: Connect iPod mini and Transfer Music Connect iPod mini to your computer using one of the two included cables. Be sure the connectors on both ends of the cable are oriented correctly. They can - Apple M9434LL | User Guide - Page 13
: If you're using a Windows PC laptop computer with a high-power USB 2.0 port, connect the computer to a power outlet before connecting iPod mini for best results. When you connect iPod mini to your computer, iTunes opens automatically and transfers the songs and playlists in your music library to - Apple M9434LL | User Guide - Page 14
mini through your computer using a 4-pin FireWire port. • If your computer doesn't have a FireWire port or a USB 2.0 port, you can purchase a FireWire card or USB 2.0 card, and install it. For more information on cables and compatible FireWire and USB cards, go to www.apple.com/ipod. 14 Quick Start - Apple M9434LL | User Guide - Page 15
Select button and enjoy! To Learn More Read the next chapter to learn more about using the Click Wheel and the other iPod mini controls, transferring music to and managing music on iPod mini, using other features of iPod mini, charging the battery, and using iPod mini accessories. Quick Start 15 - Apple M9434LL | User Guide - Page 16
, transferring music, charging the battery, and using the extra features of your iPod mini. Using iPod mini Controls Press the Select button (in the center of iPod mini) to turn on iPod mini. The main menu appears. Use the Click Wheel and Select button to navigate through onscreen menus, play - Apple M9434LL | User Guide - Page 17
Hold switch Menu button Previous/Rewind button Click Wheel Apple Earphones iPod Remote port Headphones port Select button Next/Fast-forward button Play/Pause button Dock connector port 17 Using iPod mini - Apple M9434LL | User Guide - Page 18
iPod mini Controls Reset iPod mini (For use during troubleshooting) Turn on iPod mini Turn off iPod mini Turn the backlight on Then press the Menu and Select buttons simultaneously for about 6 seconds, until the Apple logo appears. Press the Select button. Press and hold Play/Pause. Press and hold - Apple M9434LL | User Guide - Page 19
iPod mini Controls Disable iPod mini controls (So you don't press them accidentally) Skip to any point in a song Skip to the next song Start a song over -forward. Press Previous/Rewind. Press Previous/Rewind twice. Press and hold Next/Fast-forward. Press and hold Previous/Rewind. 19 Using iPod mini - Apple M9434LL | User Guide - Page 20
Using the Hold Switch If you're carrying iPod mini in your pocket and you don't want to activate the controls or turn it on accidentally, you can make the controls inactive. n Set the Hold - Apple M9434LL | User Guide - Page 21
song. To clear the On-The-Go playlist: n Select Playlists > On-The-Go > Clear Playlist. To transfer On-The-Go playlists to your computer: n If iPod mini is set to transfer songs automatically (see page 28), and you create an On-The-Go playlist, the playlist automatically transfers to iTunes when you - Apple M9434LL | User Guide - Page 22
or high-power USB 2.0 port on your computer and connect the other end to the Dock. Then put iPod mini in the Dock. The iPod mini Dock is available at www.apple.com/store. By default, iPod mini imports songs automatically when you connect it to your computer. When this automatic transfer is done, it - Apple M9434LL | User Guide - Page 23
Disconnecting iPod mini If you set iPod mini to transfer songs manually (see page 29) or enable iPod mini for use as a hard disk (see page 35), you must eject iPod mini before disconnecting it. If it's not OK to disconnect iPod mini, this screen appears: Important: Don't disconnect iPod mini if you - Apple M9434LL | User Guide - Page 24
squeeze both sides of the Dock connector to disconnect the cable from iPod mini. Organizing and Transferring Your Music For instructions for getting started playing music on iPod mini, see "Setting Up iPod mini to Play Music" on page 10. Read on for more information about organizing and transferring - Apple M9434LL | User Guide - Page 25
to manage the music on your computer and transfer music to iPod mini. When you connect iPod mini to your computer, iTunes opens automatically. Here are some of There are hundreds of thousands of songs available. You can use an Apple Account to sign on to the music store, or if you have an America Online - Apple M9434LL | User Guide - Page 26
choose Help > iTunes and Music Store Help. Audio File Formats Supported by iPod mini • AAC (M4A, M4B, M4P) (up to 320 kbps) • Apple Lossless (a high-quality compressed format, available using iTunes 4.5 or later) • MP3 (up to 320 kbps) • MP3 Variable Bit Rate (VBR) • WAV • AA (Audible spoken word - Apple M9434LL | User Guide - Page 27
MP3 format. This can be useful if you have a library of music encoded in WMA format. For more information, open iTunes and choose Help > iTunes and Music Store Help. iPod mini does not support create a playlist that's no more than 3 gigabytes (GB) in size and includes only songs you have rated 3 - Apple M9434LL | User Guide - Page 28
to transfer only certain songs in the iTunes library. This is useful if you have more music on your computer than will fit on your iPod mini. To update iPod mini with only certain songs: 1 In iTunes, check the boxes next to songs you want to transfer (by default, all songs are checked). 2 Select - Apple M9434LL | User Guide - Page 29
update selected playlists only." Transferring Songs and Playlists to iPod mini Manually You can set iPod mini to transfer songs manually, so you can transfer individual songs and playlists. When iPod mini is set to transfer songs manually, it doesn't synchronize automatically when you connect it to - Apple M9434LL | User Guide - Page 30
on iPod mini. Modifying Playlists on iPod mini Manually If you have set iPod mini to transfer songs manually (see above), you can create new playlists on iPod mini, and add songs to or delete songs from playlists already on iPod mini. To create a new playlist on iPod mini: 1 Select iPod mini in - Apple M9434LL | User Guide - Page 31
left, and other information, select Settings > About in the iPod mini main menu. Adjusting iPod mini Settings You can change settings directly on iPod mini in the Settings menu. Setting iPod mini to Shuffle or Repeat Songs You can set iPod mini to repeat a song over and over, or to repeat a sequence - Apple M9434LL | User Guide - Page 32
the Same Relative Volume Level iTunes can automatically adjust the volume of songs, so they play at the same relative volume level. You can set iPod mini to use the iTunes volume settings. To set iTunes to adjust all songs to play at the same relative sound level: 1 In iTunes, choose iTunes - Apple M9434LL | User Guide - Page 33
turn on the backlight at any time by pressing and holding Menu on the iPod mini Click Wheel or selecting Backlight from the main menu. After a few seconds, the Removing Items From the Main Menu You can add often-used items to the iPod mini main menu. For example, you can add a "Songs" item to the - Apple M9434LL | User Guide - Page 34
. 2 Select the fourth menu item (Settings). 3 Select the last menu item (Reset All Settings). 4 Select the second menu item (Reset) and select a language. Other iPod mini settings, such as song repeat, are also reset. Note: If you have added or removed items from your main menu (see page 33), the - Apple M9434LL | User Guide - Page 35
next available drive letter in Windows Explorer on a Windows PC. Note: Selecting "Manually manage songs and playlists" in the Options window also enables iPod mini to be used as a hard disk. Note: To transfer songs to iPod mini for playing, you must use iTunes. Songs transferred via iTunes do not - Apple M9434LL | User Guide - Page 36
time you want. When you set the sleep timer, a clock icon and the number of minutes left until iPod mini turns off appear in the Now Playing screen on iPod mini. Setting the Alarm You can use iPod mini as an alarm clock. To set an alarm: 1 Select Extras > Clock > Alarm Clock. 2 Set Alarm to On - Apple M9434LL | User Guide - Page 37
want to import using iSync, you can transfer information to iPod mini manually. iPod mini must be enabled as a hard disk (see "Using iPod mini as an External Hard Disk" on page 35). To import contact information manually: 1 Connect iPod mini to your computer and open your favorite email or contacts - Apple M9434LL | User Guide - Page 38
To import appointments and other calendar events manually: 1 Export calendar events from any calendar application that uses the standard iCalendar format (filenames end in .ics) or vCal format (filenames end in .vcs). 2 Drag the files to the Calendars folder on iPod mini. Note: You can only view to- - Apple M9434LL | User Guide - Page 39
Playing Games iPod mini has a number of games. To play a game: n Select Extras > Games and select a game. iPod mini Accessories iPod mini comes with some accessories, and many other accessories are available at www.apple.com/store. Apple Earphones iPod mini comes with a pair of high-quality earbud - Apple M9434LL | User Guide - Page 40
FireWire cable and power adapter. Then put iPod mini in the Dock. Note: Be sure the connectors on the cable are oriented correctly. Each connector can only be inserted one way. Your computer must be on and not in sleep mode (some models of Macintosh can charge iPod mini while in sleep mode). Using - Apple M9434LL | User Guide - Page 41
the speakers or stereo to the Dock Line Out port using an audio cable with a 3.5 millimeter stereo miniplug. Dock connector Line Out port 4 Use the iPod mini controls to play a song. When the Dock is connected to an external audio source, use the volume controls on the external source to change the - Apple M9434LL | User Guide - Page 42
. To use the belt clip, snap iPod mini into the casing, then attach the clip to your belt, purse strap, backpack, or a lanyard. Do not attach the clip directly to clothing. The belt clip may slip off. Snap the iPod mini into the belt clip. Do not slide the iPod mini into the belt clip. Using - Apple M9434LL | User Guide - Page 43
) With the iPod Remote, you can control iPod mini while it's in your pocket. To use the iPod Remote, connect it to the iPod Remote port, then connect the Apple Earphones (or another set of headphones) to the remote. Use the buttons on the remote just as you would use the iPod mini buttons. Use - Apple M9434LL | User Guide - Page 44
Available Accessories To purchase iPod mini accessories, go to www.apple.com/store. Available accessories include: • iPod mini Dock • iPod mini Armband • iPod Remote + Earphones • iPod In-Ear Headphones • iPod Dock Connector to FireWire Cable • iPod Stereo Connection Kit • iPod Power Adapter • World - Apple M9434LL | User Guide - Page 45
to your computer using the included FireWire cable or USB 2.0 cable. The computer must be turned on and not in sleep mode (some models of Macintosh can charge iPod mini while in sleep mode). If the battery icon in the top-right corner of the screen shows a lightning bolt, the battery is charging - Apple M9434LL | User Guide - Page 46
Connect the FireWire cable to the power adapter, and plug the other end of the cable in to iPod mini. 3 Plug the power adapter in to a working electrical outlet. AC plug adapter iPod Dock Connector to FireWire Cable Power adapter Warning Make sure the power adapter is fully assembled before plugging - Apple M9434LL | User Guide - Page 47
Battery about halfway charged If iPod mini is connected to a power source, the battery icon animates to show that the battery is charging. Battery charging If you connect iPod mini ) You can disconnect and use iPod mini before it is fully charged. Note - Apple M9434LL | User Guide - Page 48
Tips and Troubleshooting 1 Most problems with iPod mini can be solved quickly by following the advice in this chapter. Resetting iPod mini Most problems with iPod mini can be solved by resetting iPod mini. To reset iPod mini: 1 Connect iPod mini to a power outlet using the iPod Power Adapter. 2 - Apple M9434LL | User Guide - Page 49
from the desktop to the Trash (if you're using a Mac) or click the Safely Remove Hardware icon in the system tray and select your iPod mini (if you're using a Windows PC). If you still see the "Do Not Disconnect" message, restart your computer and eject iPod mini again. 49 Tips and Troubleshooting - Apple M9434LL | User Guide - Page 50
the FireWire or USB 2.0 ports. Then plug the cable back in securely. Use only Apple iPod cables. Be sure the connectors on the cable are oriented correctly. They can only be inserted one way. • If you're connecting iPod mini to a Windows PC using the USB 2.0 cable, be sure you're connecting it to - Apple M9434LL | User Guide - Page 51
USB 2.0 port, you can purchase a Windows-certified FireWire card or USB 2.0 card and install it. For more information, go to www.apple.com/ipod. • If you're connecting iPod mini to a Windows PC using the USB cable, be sure you're connecting it to a high-power USB 2.0 port. Typically, USB 2.0 high - Apple M9434LL | User Guide - Page 52
• Make sure the remote is plugged firmly in to iPod mini, and that the headphones are plugged firmly in to the remote. The iPod Remote is available for purchase at www.apple.com/store. Software Update and Restore Apple periodically updates iPod software to improve performance or add features. It is - Apple M9434LL | User Guide - Page 53
To update or restore iPod mini with the latest software: 1 Go to www.apple.com/support/ipod and download the iPod Updater application. 2 Double-click the software install file and follow the onscreen instructions to install the iPod Updater application. 3 Connect iPod mini to your computer and open - Apple M9434LL | User Guide - Page 54
playing music on iPod mini, see the iPod mini Tutorial on the iPod mini CD. iPod mini User's Guide This booklet is also included as a file on the iPod mini CD. Online Resources For the latest information on iPod mini, go to www.apple.com/ipodmini. For iPod service and support information, a variety - Apple M9434LL | User Guide - Page 55
resources. If the unit still does not function, go to www.apple.com/support for instructions on how to obtain warranty service. Finding the Serial Number of Your iPod mini The serial number is printed on the back of your iPod mini. You can also find it by selecting Settings > About. 55 Learning - Apple M9434LL | User Guide - Page 56
and Cleaning 1 Read on to learn about using iPod mini safely and cleaning iPod mini. Important Safety Instructions When setting up and using your iPod mini, remember the following: • Read all the installation instructions carefully before you plug your iPod Power Adapter in to a power outlet. • Keep - Apple M9434LL | User Guide - Page 57
volume to a safe level before that happens. If you experience ringing in your ears, reduce the volume or discontinue use of your iPod mini. Do Not Use While Driving Important: Use of headphones while operating a vehicle is not recommended and is illegal in some areas. Be careful and attentive - Apple M9434LL | User Guide - Page 58
is a high-voltage component and should not be opened for any reason, even when the iPod mini is off. If the power adapter needs service, see "Learning More, Service, and Support" on page 54. • Never force a connector into the power adapter FireWire port. If the connector and port do not join with - Apple M9434LL | User Guide - Page 59
. • Take care not to spill any food or liquid on iPod mini or its power adapter. If you do, unplug iPod mini before cleaning up the spill. In case of a spill, you may have to send your equipment to Apple for service. See "Learning More, Service, and Support" on page 54. 59 Safety and Cleaning - Apple M9434LL | User Guide - Page 60
voiding the limited warranty. No user-serviceable parts are inside. For service, see "Learning More, Service, and Support" on page 54. Cleaning Follow these general rules when cleaning the outside of your iPod mini and its components: • Make sure your iPod mini is unplugged. • Use a damp, soft, lint - Apple M9434LL | User Guide - Page 61
See instructions if interference to radio or television reception is suspected. Radio and Television Interference This computer equipment generates, uses necessary, consult an Apple Authorized Service Provider or Apple. See the service and support information that came with your Apple product. Or, - Apple M9434LL | User Guide - Page 62
and products. For more information, go to www.apple.com/about/environment. © 2004 Apple Computer, Inc. All rights reserved. Apple, the Apple logo, Apple Store, FireWire, iCal, iPod, iTunes, Mac, Macintosh, and Mac OS are trademarks of Apple Computer, Inc., registered in the U.S. and other countries - Apple M9434LL | User Guide - Page 63
- Apple M9434LL | User Guide - Page 64
www.apple.com/ipod www.apple.com/support/ipod 034-2596-A Printed in XXXX
-
 1
1 -
 2
2 -
 3
3 -
 4
4 -
 5
5 -
 6
6 -
 7
7 -
8
-
9
-
10
-
11
-
12
-
13
-
14
-
15
-
16
-
17
-
18
-
19
-
20
-
21
-
22
-
23
-
24
-
25
-
26
-
27
-
28
-
29
-
30
-
31
-
32
-
33
-
34
-
35
-
36
-
37
-
38
-
39
-
40
-
41
-
42
-
43
-
44
-
45
-
46
-
47
-
48
-
49
-
50
-
51
-
52
-
53
-
54
-
55
-
56
-
57
-
58
-
59
-
60
-
61
-
62
-
63
-
64
 |
 |

iPod mini
User’s Guide