Asko DC7583 User manual 427000608 ASKO DC7573 EN
Asko DC7583 Manual
 |
View all Asko DC7583 manuals
Add to My Manuals
Save this manual to your list of manuals |
Asko DC7583 manual content summary:
- Asko DC7583 | User manual 427000608 ASKO DC7573 EN - Page 1
Operating instructions DC7573/7583 - Asko DC7583 | User manual 427000608 ASKO DC7573 EN - Page 2
sxsdsdf - Asko DC7583 | User manual 427000608 ASKO DC7573 EN - Page 3
Instructions Drying Cabinet Save these instructions for future reference Dear Customer, Thank you for choosing this quality product from ASKO. out of your new machine, we recommend that you read the operating instructions before using it. The operating instructions also include information on how - Asko DC7583 | User manual 427000608 ASKO DC7573 EN - Page 4
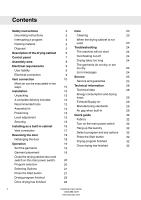
Contents Safety instructions 3 Care 23 Grounding instructions 5 Cleaning 23 Interrupting a program 5 When the drying cabinet is not Packing material 5 used 23 Disposal 5 Troubleshooting 24 Description of the drying cabinet 6 The machine will not start 24 Control panel 7 - Asko DC7583 | User manual 427000608 ASKO DC7573 EN - Page 5
or replace any part of the appliance or perform any servicing unless specifically recommended in this guide. • Do not use fabric softeners or dryer sheets unless the manufacturer gives written assurance that the product will not damage a drying cabinet. • Do not heat-dry items containing: vinyl - Asko DC7583 | User manual 427000608 ASKO DC7573 EN - Page 6
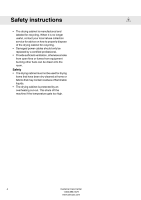
Safety instructions • The drying cabinet is manufactured and labeled for recycling. When it is no longer useful, contact your local refuse collection service for advice on how to properly dispose of the drying cabinet for recycling. • Damaged power cables should only be replaced by a certified - Asko DC7583 | User manual 427000608 ASKO DC7573 EN - Page 7
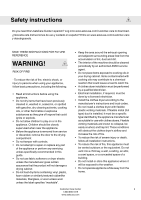
. WARNING! This appliance must be properly grounded. WARNING! Do not allow children to play with the tumble dryer. The drying cabinet does not start prevent personal injury, the drying cabinet must be made inoperable after deciding to take it out of service. Contact your municipality for - Asko DC7583 | User manual 427000608 ASKO DC7573 EN - Page 8
Description of the drying cabinet 1 2 5 3 6 4 7 8 9 10 11 1. Connector 7. Door hanger for light items 2. Control panel 8. Middle hanger section 3. Hanging hooks 9. Glove hanger 4. Serial number plate (inside) 10. Lower hanger section 5. - Asko DC7583 | User manual 427000608 ASKO DC7573 EN - Page 9
Control panel 1 2 1 Main power switch 2 Program selector 3 Options buttons 3 4 56 4 Display window 5 Start 6 Stop Customer Care Center 7 1-800-898-1879 www.askousa.com - Asko DC7583 | User manual 427000608 ASKO DC7573 EN - Page 10
is only intended for installation indoors with a temperature over 32 °F (0 °C). • The drying cabinet must not be placed in environments where high-pressure washers are used for cleaning. 595 127 O102 DC7573 1695-1720 DC7583 1835-1860 600 295 615 8 Customer Care Center 1-800-898-1879 www - Asko DC7583 | User manual 427000608 ASKO DC7573 EN - Page 11
qualified electrician if a power outlet as described in this manual is not available. WARNING! • Connect to a the connection cable is drawn out from the rear of the drying cabinet. If necessary, the connection cable can be drawn out from instructions. Customer Care Center 9 1-800-898-1879 www. - Asko DC7583 | User manual 427000608 ASKO DC7573 EN - Page 12
not be less than 11,8" (300 mm). • The vent pipe must reach outside the recess. • Ensure a good air supply to the drying cabinet's air intake. • The vent holes in the drying cabinet must not be blocked. 1. Moist air out 2. Air intake 2 1 Minimum 300 mm to the ceiling Ventilation out into the room - Asko DC7583 | User manual 427000608 ASKO DC7573 EN - Page 13
, if any, specifically identified for use with the appliance by the manufacturer and which comply with the Outline for Clothes Dryer Transition Duct, Subject 2158A, shall be used. The maximum length of a flexible duct is 40" (1.0m). The drying cabinet can be connected to the exhaust duct in two - Asko DC7583 | User manual 427000608 ASKO DC7573 EN - Page 14
valve must be replaced with a transition section (not supplied). Do not fit valves found in the building's ventilation system inside the drying cabinet. 1. Transition section 1 The drying cabinet is permanently fitted to the exhaust duct 12 Customer Care Center 1-800-898-1879 www.askousa.com - Asko DC7583 | User manual 427000608 ASKO DC7573 EN - Page 15
sharp tools that may damage the product. • Check that the drying cabinet has not been damaged during transport. • After unpacking, check that the drying cabinet shows no sign of fault. Damage, faults, and possibly missing parts must be reported immediately to the dealer. A complete delivery includes - Asko DC7583 | User manual 427000608 ASKO DC7573 EN - Page 16
) 2. Vent hose (not included) 3. Connector with two securing screws, x 1 4. Securing screws for securing against wall, x 2 5. Plastic plug, x 2 6. Cover plugs for cabinet feet, x 4 7. Allen key, x 1 8. Cover plugs for securing screws, x 2 14 Customer Care Center 1-800-898-1879 www.askousa.com - Asko DC7583 | User manual 427000608 ASKO DC7573 EN - Page 17
pull out the top hanger section. 2. Mark the drill holes on the wall through the two pre-drilled holes in the rear panel of the drying cabinet. 3. Pull the cabinet forward and drill the holes in the wall for the securing screws. Use the enclosed plastic plugs or other anchors if necessary. 1. Pre - Asko DC7583 | User manual 427000608 ASKO DC7573 EN - Page 18
be an air gap of at least 0,4" (10 mm) above the drying cabinet (see figure 2) in order to ensure optimum drying performance from the cabinet. 5. Open the door. Align the drying cabinet horizontally by following the instructions in the "Level adjustment" section. 6. Pull out the top hanger section - Asko DC7583 | User manual 427000608 ASKO DC7573 EN - Page 19
built-in, fit the connector through the vent opening in the top section of the recess. The drying cabinet is then installed where it is to stand. 1. Place the connector over the hole in the drying cabinet's top panel, align the screw holes, and secure the connector. 2. Connect the fixed vent pipe if - Asko DC7583 | User manual 427000608 ASKO DC7573 EN - Page 20
Reversing the door WARNING! Be aware of the risk of strain injuries. At least two persons should handle the drying cabinet. Rehanging the door 1. Place the drying cabinet on its back. 2. Loosen the hinge plate, see figure 1. 3. Lift off the door, loosen the glove hanger, and loosen the switch - Asko DC7583 | User manual 427000608 ASKO DC7573 EN - Page 21
shock or injury to persons, read the "Important Safety Instructions" section before operating this appliance. 1Sort the garments • Remove any dry garments from the drying cabinet to reduce the drying time for the remaining garments. • Attempt to dry garments of the same type of fabric to produce an - Asko DC7583 | User manual 427000608 ASKO DC7573 EN - Page 22
the drying cabinet door and switch on the main power switch. 4Program selection Always follow the garment's washing instructions if these are stated. Select the program to suit the most delicate garment. If a softener or antistatic agent are used when laundering, the manufacturer's instructions for - Asko DC7583 | User manual 427000608 ASKO DC7573 EN - Page 23
when you are unable to remove the clothes from the drying cabinet right after drying. Cannot be selected with Cold dry. • Select Air Fluff by pressing the button next is selected. Press the Start button and the machine will count down 1 hour at a time, starting after the selected delay. This option - Asko DC7583 | User manual 427000608 ASKO DC7573 EN - Page 24
Operation Adding or removing garments You can stop the drying cabinet after starting a program by opening the door. Hang mode. 8Once drying has finished Turn off the main power switch. Remove the clothes and close the door to prevent small children from climbing into the machine. 22 Customer Care - Asko DC7583 | User manual 427000608 ASKO DC7573 EN - Page 25
to avoid such problems, vacuum around the air intake and the top of the cabinet at least once a year or more frequently, depending on where the cabinet is installed. When the drying cabinet is not used For shorter or longer periods Always unplug the drying cabinet. When the cabinet is to be moved - Asko DC7583 | User manual 427000608 ASKO DC7573 EN - Page 26
drying cabinet if the temperature is too high. • The overheating cut-off will reset automatically once the machine has cooled down. Drying takes too long • Poorly spun or very wet laundry. • The drying cabinet has been reached. Read "Drying takes too long" in the "Troubleshooting" chapter to find out - Asko DC7583 | User manual 427000608 ASKO DC7573 EN - Page 27
plate, which is found on the inside of the cabinet. 2 Article no. xxxxxxxx 3 Serial no. xxxxxxxx 4 Model xxxxxx 1. Serial number plate (on inside of drying 1 cabinet) 2. Article number 3. Serial number (12 digits) 4. Model Service and guarantee Customer Care Center 25 1-800-898-1879 - Asko DC7583 | User manual 427000608 ASKO DC7573 EN - Page 28
the drying cabinet, thoroughly check the unit for cosmetic damage. For residential installations only ASKO Appliances Inc. will pay for: Length of warranty Two-Year Full From date of purchase. ASKO replacement parts and/or repair labor to correct defect in materials or workmanship. Service must - Asko DC7583 | User manual 427000608 ASKO DC7573 EN - Page 29
during the limited warranty period. • Replacement parts or repair labor costs for units operated outside the continental United States. • Pickup and delivery. ASKO drying cabinets are designed to be repaired in the home. In no event shall ASKO Appliances Inc. be responsible for any incidental or - Asko DC7583 | User manual 427000608 ASKO DC7573 EN - Page 30
. 7,5 lb wash (cotton) Dehumidification: Up to 21 gram (1 oz)/min Electrical connection: 1-Phase, 120V, 60Hz, 15A Motor: 35 W Heater output: 1400W Overheating protection: Yes Fan capacity 6358 ft3 (180 m3)/hour Hanger length: 630" (16 m) Size: Height DC7573: 66,9" (1700 mm) DC7583: 72 - Asko DC7583 | User manual 427000608 ASKO DC7573 EN - Page 31
. 0.3 kWh/kg 1:00 Heat normal temperature low temperature Cold dry 0.06 kWh/kg 8:00 - *) Stated values apply for 7,5 lb wash and 1600 rpm spin. Values vary depending on spin speed and the materials in the load. Exhaust/Supply air When the cabinet is on, 1589 ft3 (45 m3) moist air/hour is - Asko DC7583 | User manual 427000608 ASKO DC7573 EN - Page 32
Notes 30 Customer Care Center 1-800-898-1879 www.askousa.com - Asko DC7583 | User manual 427000608 ASKO DC7573 EN - Page 33
Notes Customer Care Center 31 1-800-898-1879 www.askousa.com - Asko DC7583 | User manual 427000608 ASKO DC7573 EN - Page 34
Quick guide 1Fabrics • Sort and hang fabrics of the same type together to ensure they dry as evenly as possible. 2Turn on the fan will run for three seconds every minute for two hours after the drying program is finished. 7Once drying has finished • Turn off the main power switch and close the door. - Asko DC7583 | User manual 427000608 ASKO DC7573 EN - Page 35
sxsdsdf - Asko DC7583 | User manual 427000608 ASKO DC7573 EN - Page 36
-
 1
1 -
 2
2 -
 3
3 -
 4
4 -
 5
5 -
 6
6 -
 7
7 -
8
-
9
-
10
-
11
-
12
-
13
-
14
-
15
-
16
-
17
-
18
-
19
-
20
-
21
-
22
-
23
-
24
-
25
-
26
-
27
-
28
-
29
-
30
-
31
-
32
-
33
-
34
-
35
-
36
 |
 |

Operating instructions
DC7573/7583