Asko DC7583 User manual 427000608 ASKO DC7573 EN - Page 4
Contents
 |
View all Asko DC7583 manuals
Add to My Manuals
Save this manual to your list of manuals |
Page 4 highlights
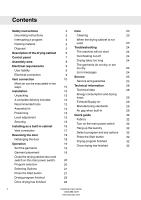
Contents Safety instructions 3 Care 23 Grounding instructions 5 Cleaning 23 Interrupting a program 5 When the drying cabinet is not Packing material 5 used 23 Disposal 5 Troubleshooting 24 Description of the drying cabinet 6 The machine will not start 24 Control panel 7 Overheating cut-off 24 Assembly area 8 Drying takes too long 24 Electrical requirements 9 The garments do not dry, or are too dry 24 User liability 9 Error messages 24 Electrical connection 9 Service 25 Vent connection 10 Service and guarantee 25 Moist air can be evacuated in two ways: 10 Technical information 28 Installation 13 Technical data 28 Unpacking A complete delivery includes Recommended tools Assembly kit Positioning Level adjustment Securing Installing as a built-in cabinet Vent connection 13 Energy consumption and drying times 29 13 Exhaust/Supply air 29 13 Manufacturing standards 29 14 Air gap when built-in 29 15 Quick guide 32 15 Fabrics 32 15 Turn on the main power switch 32 16 Hang up the laundry 32 17 Select a program and any options 32 Reversing the door Rehanging the door Operation Sort the garments 18 Press the Start button 32 18 Drying program finished 32 19 Once drying has finished 32 19 Garment placement 19 Close the drying cabinet door and switch on the main power switch. 20 Program selection 20 Selecting Options 21 Press the Start button 21 Drying program finished 22 Once drying has finished 22 2 Customer Care Center 1-800-898-1879 www.askousa.com
-
 1
1 -
 2
2 -
 3
3 -
 4
4 -
 5
5 -
 6
6 -
 7
7 -
 8
8 -
 9
9 -
 10
10 -
11
-
12
-
13
-
14
-
15
-
16
-
17
-
18
-
19
-
20
-
21
-
22
-
23
-
24
-
25
-
26
-
27
-
28
-
29
-
30
-
31
-
32
-
33
-
34
-
35
-
36
 |
 |
