Asus TS100-E4 PI2 E2791 TS100-E4/PI2 User's Manual - Page 34
hooks inward until the front
 |
View all Asus TS100-E4 PI2 manuals
Add to My Manuals
Save this manual to your list of manuals |
Page 34 highlights
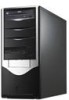
3. Press the front panel cover hook inward until it detaches from the chassis hole. 3 4. O n t h e o t h e r s i d e o f t h e system, locate three front panel cover hooks. Press the hooks inward until the front panel cover detaches from the chassis. 4 5. Carefully remove the front panel cover, then set aside. 5 2-16 Chapter 2: Hardware setup
-
 1
1 -
2
-
3
-
4
-
5
-
6
-
7
-
8
-
9
-
10
-
11
-
12
-
13
-
14
-
15
-
16
-
17
-
18
-
19
-
20
-
21
-
22
-
23
-
24
-
25
-
26
-
27
-
28
-
 29
29 -
 30
30 -
 31
31 -
 32
32 -
 33
33 -
 34
34 -
 35
35 -
 36
36 -
 37
37 -
 38
38 -
 39
39 -
40
-
41
-
42
-
43
-
44
-
45
-
46
-
47
-
48
-
49
-
50
-
51
-
52
-
53
-
54
-
55
-
56
-
57
-
58
-
59
-
60
-
61
-
62
-
63
-
64
-
65
-
66
-
67
-
68
-
69
-
70
-
71
-
72
-
73
-
74
-
75
-
76
-
77
-
78
-
79
-
80
-
81
-
82
-
83
-
84
-
85
-
86
-
87
-
88
-
89
-
90
-
91
-
92
-
93
-
94
-
95
-
96
-
97
-
98
-
99
-
100
-
101
-
102
-
103
-
104
-
105
-
106
-
107
-
108
-
109
-
110
-
111
-
112
-
113
-
114
-
115
-
116
-
117
-
118
-
119
-
120
-
121
-
122
-
123
-
124
-
125
-
126
-
127
-
128
-
129
-
130
-
131
-
132
-
133
-
134
-
135
-
136
-
137
-
138
-
139
-
140
-
141
-
142
-
143
-
144
-
145
-
146
-
147
-
148
-
149
-
150
-
151
-
152
-
153
-
154
-
155
-
156
-
157
-
158
 |
 |

Chapter 2:
Hardware setup
2-16
3. Press the front panel cover
hook inward until it detaches
from the chassis hole.
4. On the other side of the
system, locate three front
panel cover hooks. Press the
hooks inward until the front
panel cover detaches from the
chassis.
5. Carefully remove the front panel
cover, then set aside.
4
5
3