Audiovox ART7 User Manual
Audiovox ART7 - Acoustic Research Clock Radio Manual
 |
UPC - 044476053375
View all Audiovox ART7 manuals
Add to My Manuals
Save this manual to your list of manuals |
Audiovox ART7 manual content summary:
- Audiovox ART7 | User Manual - Page 1
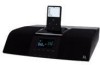
ART7 USER MANUAL INSTRUCCIONES DEL USUARIO INSTRUCTIONS D'UTILISATEUR R - Audiovox ART7 | User Manual - Page 2
- Audiovox ART7 | User Manual - Page 3
on your purchase of the Acoustic Research ART7 Alarm Clock, HD Radio and iPod docking station. This radio is constructed to provide years of reliable, trouble-free service. 1. Read these instructions. 2. Keep these instructions. 3. Heed all warnings. 4. Follow all instructions. 5. Do not use this - Audiovox ART7 | User Manual - Page 4
ART7 the entry point provided for a SERVICE PERSON to gain access to the radio frequency energy and, if not installed and used in accordance with the instructions, may cause harmful interference to radio . • Consult the dealer or an experienced radio/TV technician for help. A Class II APPARATUS - Audiovox ART7 | User Manual - Page 5
Important Battery Precautions • Any battery may present a risk of fire, explosion, or chemical burn if abused. Do not try to charge a battery that is not intended to be recharged, do not incinerate, and do not puncture. • Non-rechargeable batteries, such as alkaline batteries, may leak if left in - Audiovox ART7 | User Manual - Page 6
ART7 PACKAGE CONTENTS • HD Radio Receiver with iPod Docking Station x 1 • Remote Control x 1 • 3.5mm Stereo Input Cable x 1 • iPod adaptor x 6 (as a pack) • #3 iPod Mini • #4 4G iPod & U2 iPod (20 GB) • #5 4G iPod (40 GB) • #6 iPod Photo & Color U2 iPod • #7 - Audiovox ART7 | User Manual - Page 7
broadcasting since the introduction of FM radio more than forty-five years ago. HD Radio technology is the standard for digital FM and AM radio. HD Radio broadcasting offers both FM and AM listeners the selection, quality and interactive data services consumers expect from other digital technologies - Audiovox ART7 | User Manual - Page 8
ART7 COMPATIBILITY CHART The chart below shows iPod options compatible with the ART7. Table 1: N Y Y Y Y Y Y Y Y Y Y Y N *Audio playback on these units works in most cases If you experience problems, please verify that you have the updated software on your iPod. **Special Note: iTunes - Audiovox ART7 | User Manual - Page 9
• ALARM 2 SET • FM PRESETS • AM PRESETS • CLOCK SET • TONE CONTROL • DISPLAY CONTROL • SOFTWARE VERSION • MASTER RESET From the submenu, press to return to the into the ART7 database. You can store up to 100 tags. 7. TUNE /\ (Forward): • During radio mode, press to increase the radio frequency; press - Audiovox ART7 | User Manual - Page 10
alarm time, time setting, tone and display control level. 9. VOLUME /\ (Up): Increase the volume level and cancel Mute mode. 10. VOLUME V (Down): Decrease the volume level and cancel Mute mode. Top View MUTE / SNOOZE 1. MUTE / SNOOZE button: • During Radio/iPod/Aux mode, press to mute audio. Press - Audiovox ART7 | User Manual - Page 11
it fails after improper operation. 3. AUX IN: Connect with a 3.5mm audio cable to an auxiliary music device. 4. Composite VIDEO OUT: Use to connect iPod to a TV. 5. FM ANTENNA: Connect to FM straight wire pigtail antenna. 6. AM ANTENNA: Connect to AM loop antenna. 9 - Audiovox ART7 | User Manual - Page 12
ART7 REMOTE CONTROL Radio Aux iPod 1 2 3 4 5 6 7 8 9 10 ALARM iPOD TAG VOL MENU iPOD MENU TUNE VOL TUNE MUTE SLEEP ENTER R 1. Power button: Turn on the power. 2. iPod button: Go to iPod mode. 3. Aux button: Go to Aux mode. 4. Radio button: Toggle between FM and AM mode. 5. - Audiovox ART7 | User Manual - Page 13
+/- buttons to increase/decrease the alarm time, time setting, tone and display control level. 10. MENU button: • Enter the Main Menu list. • When in +/- Buttons: Increase or decrease volume level. 12. MUTE Button: • Under Radio/iPod/Aux mode, press to mute the sound during normal operation of any - Audiovox ART7 | User Manual - Page 14
Call Letters or Frequency: The station call letters will be displayed when receiving an HD Radio broadcast. The station frequency will be displayed if no HD Radio broadcast is available. 9. Program Data: The ART7 is capable of displaying program associated data, including real- time song titles - Audiovox ART7 | User Manual - Page 15
1.1 Button POWER/ENTER POWER / ENTER Display Setup POWER ON: 1. Press POWER/ENTER button to turn on the ART7. 2. Acoustic Research Logo shown on the display for 2 seconds. The ART7 will stay in the last listening mode (default: FM Mode, 87.5 MHz). 1.2 POWER/ENTER 1.3 VOLUME UP 1.4 VOLUME - Audiovox ART7 | User Manual - Page 16
ART7 Item 1.5 Button SOURCE Table 2: Basic Operation Display Setup SOURCE SELECTION: 1. Press the SOURCE button to press the SLEEP button to set the sleep time in 15 minute increments up to 60 minutes (default: 0). 2. The ART7 will enter standby mode when the sleep timer counts down to zero. 14 - Audiovox ART7 | User Manual - Page 17
- button for 2 seconds to automatically seek the strong station. 3. VOL +/VOL - button: Press to adjust the volume. 2.2 AM Radio Mode AM RADIO: (Auto detect HD mode. See "HD Radio Notes".) 1. Press the SOURCE button to choose the AM music source (AM Frequency: 520~1720 KHz Step 10kHz). 2. Auto - Audiovox ART7 | User Manual - Page 18
ART7 incurs a loss of digital HD Radio signal, the radio mode will automatically change to analog radio mode. If a station's multicast service is interrupted while playing, the ART7 several seconds. This is not a problem with your ART7. This is an HD Radio broadcaster's issue. This will be corrected - Audiovox ART7 | User Manual - Page 19
Item 3.1 Menu Page Menu Page 3.2 ALARM 1/ ALARM 2 MODE TIME SOURCE Table 4: MENU Setup Display Description Main MENU List: 1. MENU page will auto stay at the first setting, which is ALARM1 set. 2. Press the TUNE +/TUNE - button to move UP/DOWN the list. 3. Press the POWER/ENTER button for - Audiovox ART7 | User Manual - Page 20
ART7 Item Menu Page Table 4: MENU Setup Display Description VOLUME ALARM VOLUME SETTING: 1. Press the TUNE+/TUNE- button to increase/decrease the alarm volume. 2. Press the - Audiovox ART7 | User Manual - Page 21
. 4. Press the PLAY/PAUSE button to exit the favorites menu. 5. If you enter the FM presets through the main menu while the radio is in AM mode the ART7 will display an error message (see left). AM PRESETS: (Default: Empty) 1. Press the TUNE +/TUNE - button to select a preset number. 2. Press the - Audiovox ART7 | User Manual - Page 22
ART7 Item 3.6 Menu Page TONE CONTROL TREBLE SET BASS SET Table 4: MENU Setup Display Description ACCESS TONE CONTROL: 1. Select "TONE CONTROL". 2. Press the POWER/ENTER button for confirmation. TONE CONTROL SETTING: 1. Select "TREBLE LEVEL/BASS LEVEL". 2. Press the POWER/ENTER button for - Audiovox ART7 | User Manual - Page 23
to adjust the contrast level (Default: 33%). 2. Press the MENU button to confirm and return to the previous menu. ACCESS BRIGHTNESS CONTROL: 1. Select "BRIGHTNESS". 2. Press the POWER/ENTER button for confirmation. BRIGHTNESS SETTING: 1. Press the TUNE +/TUNE - button to adjust the backlight level - Audiovox ART7 | User Manual - Page 24
menu without initiating the Master Reset. Table 5: Alarm Setup Display Description ALARM SOUNDING, STANDBY: 1. When the ART7 is in standby mode, if alarm set time equals the current radio time, it automatically sounds. 2. Press the POWER/ENTER button to return to standby mode. ALARM SOUNDING - Audiovox ART7 | User Manual - Page 25
6: Preset Station Setup Display Description FM /AM PRESETS ON REMOTE CONTROL: Press and hold 1-10 button to store a preset. When stored the ART7 will display "MEMORY (1-10). RECALL PRESET STATION FROM REMOTE CONTROL: Press the 1-10 button on the remote control to recall a preset station. 23 - Audiovox ART7 | User Manual - Page 26
ART7 Item 5.3 Menu Page MY FAVORITE PRESET/ RECALL Table 6: Preset Station Setup Display Description MY FAVORITE PRESET SETTING: 1. Press the PLAY/PAUSE button during AM or - Audiovox ART7 | User Manual - Page 27
MESSAGE OF TAGS STORAGE TO ART7: 1. "Not enough information..." shows on the screen when iTag fails due to insufficient data retrieved from the station. 2. "Tag cannot be stored" shows on the screen when the iTag button is pressed when not receiving a HD Radio station. SUCCESSFUL STORAGE OF TAGS - Audiovox ART7 | User Manual - Page 28
ART7 Item 6.4 Menu Page iTunes Tagging Tag Full Table 7: iTunes Tagging Setup Display Description TAG FULL MESSAGE: "Unable to store tag" shows on the screen when tags storage is full. 6.5 iPod Tag Feature Not Support iTUNES TAGGING NON-SUPPORTING MESSAGE FOR iPOD: "Not supported..." shows - Audiovox ART7 | User Manual - Page 29
to ship the unit in the future. Contact the Audiovox Consumer Service Center. Table 8: iTunes Tagging Setup Symptom ART7 Does Not Turn On No Sound Remote Control Not Working iPod Does Not Play Poor FM Reception Poor AM Reception Unstable HD Radio Reception Root Cause What to Do • AC power cord - Audiovox ART7 | User Manual - Page 30
ART7 Symptom No Songs in the Tag List Table 8: iTunes Tagging Setup Root Cause • Tags have been transferred to iPod • No tagging The list is deleted once the tags are transferred to an iPod. • Check if the Tag icon is displayed on the screen. HD Radio reception required to get TAG information. 28 - Audiovox ART7 | User Manual - Page 31
SPECIFICATIONS • Average Output Power (R.M.S): 10W (5W x 2) • Driver: 2.5 inch Full Range Driver • Resistance: 4 ohms • Frequency Response: 65Hz ~ 20kHz • Power Supply: AC 120V/60Hz 25W • Magnetically Shielded: NO • Dimensions (W x H x D): 377 x 263 x 85 mm 29 - Audiovox ART7 | User Manual - Page 32
ART7 1-YEAR LIMITED WARRANTY AUDIOVOX CORPORATION (the Company) warrants to the original retail purchaser of does not extend to the elimination of car static or motor noise, to correction of antenna problems, to costs incurred for installation, removal, or reinstallation of the product, or damage to - Audiovox ART7 | User Manual - Page 33
INSTRUCCIONES IMPORTANTES DE SEGURIDAD Felicitaciones por su compra del Reloj Alarma, Radio HD y Estación de Puerto iPod Acoustic Research ART7. Esta radio ha sido fabricada para proveer años de servicio confiable y libre de problemas. 1. Lea estas instrucciones 2. Guarde estas instrucciones 3. - Audiovox ART7 | User Manual - Page 34
ART7 14. Sólo use con un carrito, pedestal, trípode, soporte,o mesa especificada por piezas accesibles del usuario. ADVERTENCIA: EL FABRICANTE NO ES RESPONSABLE POR CUALQUIER INTERFERENCIA DE RADIO O TV CAUSADOS POR MODIFICACIONES NO AUTORIZADAS A ESTE EQUIPO. TALES MODIFICACIONES PODRÍAN ANULAR LA - Audiovox ART7 | User Manual - Page 35
el equipo en un tomacorriente o circuito distinto al que está conectado el receptor. • Consulte al distribuidor o un técnico experimentado en radio/TV para obtener ayuda. Un APARATO Clase II deberá estar marcado permanentemente con las palabras "DOBLE AISLACIÓN" o "Doble Aislado" y "Cuando se - Audiovox ART7 | User Manual - Page 36
ART7 CONTENIDOS DEL EMPAQUE • Receptor de Radio HD con Estación de Puerto de iPod x 1 • Control Remoto x 1 • Cable de la entrada estéreo de 3.5mm x 1 • Anillo de AM x 1 • Antena Flexible de FM x 1 • Manual de Usuario x 1 • Tarjeta de Registro de Producto x 1 • Tarjeta de Descarga de Música x 1 34 - Audiovox ART7 | User Manual - Page 37
área, por favor visite: www.hdradio.com. Tecnología HD Radio™ Fabricado bajo licencia de iBiquity Digital Corp. U.S. y Patentes Extranjeras. Los logos de HD y HD Radio son marcas propietarias de iBiquity Digital Corp. 3. Puerto de Conexión iPod ART7 tiene un puerto para su iPod en la parte superior - Audiovox ART7 | User Manual - Page 38
GRÁFICO DE COMPATIBILIDAD La siguiente tabla muestra las opciones iPod compatibles con el ART7. Tabla 1: Compatibilidad iPod iPod Mini* Video de 4ta Gen* Photo* Nano Video de 5ta Gen* Nano de 2da Gen Nano de 3ra Gen (Video) Classic - Audiovox ART7 | User Manual - Page 39
de FM • MEMORIAS PREDETERMINADAS de AM • FIJAR RELOJ • CONTROL de TONO • CONTROL de PANTALLA • VERSIÓN DE SOFTWARE • RESTAURACIÓN MAESTRA desde ART7. Puede almacenar hasta 100 etiquetas. 7. TUNE (SINTONIZAR) /\ (hacia adelante): • Durante el modo radio, presione para aumentar la frecuencia de radio - Audiovox ART7 | User Manual - Page 40
ART7 • En otros submenús, presione para aumentar el tiempo de alarma, fijación de hora, tono y mostrar el nivel de control. 8. TUNE (SINTONIZAR) V (hacia atrás): • Durante el modo radio, presione para disminuir la frecuencia de radio; presione y mantenga pulsado por 2-3 segundos para buscar automá - Audiovox ART7 | User Manual - Page 41
. 3. AUX IN: Conecta con un cable de audio de 3.5mm a un dispositivo auxiliar de música. 4. SALIDA DE VIDEO Compuesto: Use para conectar un iPod a una TV. 5. ANTENA FM: Conecta a un cable flexible desnudo de antena de FM. 6. ANTENA DE AM: Conectar una antena de AM en forma de anillo. 39 - Audiovox ART7 | User Manual - Page 42
ART7 CONTROL REMOTO Radio Aux iPod 1 2 3 4 5 6 7 8 9 10 ALARM iPOD TAG VOL MENU iPOD MENU TUNE VOL TUNE MUTE SLEEP ENTER R 1. Botón de Encendido: Enciende la unidad. 2. Botón iPod: Va a modo iPod. 3. Botón Aux: Va a modo Aux. 4. Botón Radio: Intercambia entre modo FM y AM. - Audiovox ART7 | User Manual - Page 43
botones TUNE +/- para aumentar/disminuir el tiempo de alarma, fijación de hora, nivel de control de tono y pantalla. 10. Botón MENU: • Ingrese la Lista de Menú principal. de volumen. 12. Botón MUTE: • Durante el modo Radio/iPod/Aux, presione para silenciar el sonido durante el funcionamiento de - Audiovox ART7 | User Manual - Page 44
de Identificación de estación se muestran cuando se recibe una transmisión de Radio HD. La frecuencia de estación se mostrará cuando no hay disponible una transmisión de Radio HD. 9. Información de Programa: El ART7 es capaz de mostrar datos asociados al programa, incluyendo títulos de canciones - Audiovox ART7 | User Manual - Page 45
/ INGRESAR) POWER / ENTER Mostrar Configuración Encendido; 1. Presione el botón POWER/ ENTER para encender el ART7. 2. Logo de Acoustic Research mostrado en la pantalla por 2 segundos. El ART7 permanecerá en el último modo de reproducción (predeterminado: Modo FM, 87.5 MHz). 1.2 POWER/ENTER - Audiovox ART7 | User Manual - Page 46
ART7 Ítem 1.5 Botón SOURCE (FUENTE) Tabla 2: Operación Básica Mostrar Configuración SELECCIÓN DE FUENTE: 1. Presione un tiempo de dormir en incrementos de 15 minutos hasta 60 minutos (predeterminado: 0). 2. El ART7 ingresará al modo espera cuando el contador de dormir decrece hasta cero. 44 - Audiovox ART7 | User Manual - Page 47
para buscar automáticamente la estación fuerte. 3. Botón VOL +/VOL -: Presione para ajustar el volumen. 2.2 Modo de Radio AM: RADIO AM: (detección automática de modo HD. ver "Notas de Radio HD".) 1. Presione el botón SOURCE para seleccionar una fuente de música AM (Frecuencia de AM: 520~1720 KHz - Audiovox ART7 | User Manual - Page 48
para ajustar el volumen. Notas de Estación Radio HD 1. Cuando una estación de radio está transmitiendo una señal de Radio HD, el icono HD ( ) parpadeará para indicar que el ART7 está adquiriendo la señal de Radio HD. Cuando la señal es adquirida, el icono HD dejará de parpadear y aparecerá en la - Audiovox ART7 | User Manual - Page 49
ógica actual sólo está presente en el canal principal. Si selecciona un canal HD predeterminado y sintoniza directamente un canal multitransmisión digital de la estación de Radio HD, el ART7 demorará aproximadamente cinco segundos para comenzar la reproducción. Esto es funcionamiento normal. Ítem - Audiovox ART7 | User Manual - Page 50
ART7 Ítem Menú de Página TIME SOURCE (Fuente) Tabla 4: MENÚ de Configuración Mostrar Descripción FIJACIÓN DE HORA DE ALARMA 1. Presione el botón POWER/ ENTER para seleccionar - Audiovox ART7 | User Manual - Page 51
para almacenar una estación prefijada. 4. Presionar el botón PLAY/PAUSE para salir del menú favoritos. 5. Si ingresa FM predeterminadas a través del menú principal mientras la radio está en modo AM el ART7 mostrará un mensaje de error (ver a la izquierda). 49 - Audiovox ART7 | User Manual - Page 52
4. Presione el botón PLAY/PAUSE para salir del menú favoritos. 5. Si ingresa AM predeterminadas a través del menú principal mientras la radio está en modo FM el ART7 mostrará un mensaje de error (ver a la izquierda). FIJACIÓN DE RELOJ: Presione el botón POWER/ENTER para confirmar. FIJACIÓN DE HORA - Audiovox ART7 | User Manual - Page 53
de TONO". 2. Presione el botón POWER/ ENTER para confirmar. FIJACIÓN DE AGUDOS FIJACIÓN DE GRAVES FIJACIÓN del CONTROL de TONO: 1. Seleccione "TREBLE LEVEL/ BASSLEVEL" (nivel de agudos/ nivel de graves). 2. Presione el botón POWER/ ENTER para confirmar. FIJACIÓN DE NIVEL DE AGUDOS: 1. Presione - Audiovox ART7 | User Manual - Page 54
ART7 Ítem 3.7 Menú de Página CONTROL de PANTALLA CONTRASTE Tabla 4: MENÚ de Configuración Mostrar Descripción FIJACIÓN del CONTROL de PANTALLA: 1. Seleccione "CONTROL de PANTALLA". 2. Presione el botón POWER/ ENTER para confirmar. FIJACIÓN DE CONTRASTE: 1. Seleccione "CONTRAST". 2. Presione - Audiovox ART7 | User Manual - Page 55
el botón TUNE +/TUNE - para seleccionar MASTER RESET (restauración maestra). 2. Presione el botón POWER/ ENTER para confirmar. RESTAURACIÓN MAESTRA: 1. El ART7 preguntará "Are you sure to restore to the factory default?" (¿está seguro que desea restaurar los valores predeterminados de fábrica - Audiovox ART7 | User Manual - Page 56
ELEVACIÓN DE VOLUMEN Tabla 5: Fijación de Alarma Mostrar Descripción SONORIDAD DE ALARMA, ESPERA: 1. Cuando el ART7 está en modo espera, si la hora de fijación de alarma es igual a la hora de la radio actual, sonará automáticamente. 2. Presione el botón POWER/ ENTER para volver al modo de espera - Audiovox ART7 | User Manual - Page 57
el botón 1-10 para almacenar una prefijada. Cuando está almacenada el ART7 mostrará MEMORY (1-10). 5.2 RECUPERAR RECUPERAR ESTACIONES PREFIJADAS DESDE EL CONTROL REMOTO: Presione el botón 1-10 en el control remoto para recuperar una estación prefijada. 5.3 PREFIJAR/ RECUPERAR MIS FAVORITOS - Audiovox ART7 | User Manual - Page 58
después de ser enviada al iPod (cuando el iPod está conectado al ART7). 3. "Tag Already Stored" (Etiqueta ya almacenada) se muestra cuando ya botón iTag cuando no se está recibiendo una estación de Radio HD. ALMACENAMIENTO EXITOSO DE ETIQUETAS AL iPOD: El número de Etiquetas transferidas al iPod es - Audiovox ART7 | User Manual - Page 59
cuando el almacenamiento de etiquetas está lleno. 6.5 Función Etiquetado iPod No Soportado ETIQUETADO iTUNES MENSAJE, DE NO SOPORTADO PARA iPOD: "Not supported..." (No soportado) se muestra en pantalla cuando su iPod no soporta la función de etiquetado iPod. (Ver "Gráfico de Compatibilidad - Audiovox ART7 | User Manual - Page 60
en caso que deba enviar la unidad en un futuro. Contacte al Centro de Atención al Cliente de Audiovox. Tabla 8: Fijación de Etiquetado iTunes Síntoma ART7 No enciende Sin Sonido Control Remoto No Funciona iPod No Reproduce Mala Recepción de FM Causa principal Qué hacer • Cable de Alimentación no - Audiovox ART7 | User Manual - Page 61
adecuadamente o trate de mover la antena para lograr una mejor recepción. • Podría estar en un área con señales de AM débiles. La recepción de Radio HD requiere buena recepción de FM. • Podrían haberse transferido a su iPod cuando se conectó. La lista es borrada una vez que es transferida a un iPod - Audiovox ART7 | User Manual - Page 62
ART7 ESPECIFICACIONES • Potencia Promedio de salida (R.M.S.): 10W (5W x 2) • Controlador: Controlador de Rango Completo de 2.5 pulgadas • Resistencia: 4 ohms • Respuesta a Frecuencias: 65Hz ~ 20kHz • Fuente de Alimentación: CA 120V/ - Audiovox ART7 | User Manual - Page 63
ón de la compañía) sin cargo por partes y mano de obra. Para obtener reparaciones o reemplazos dentro de los términos de esta Garantía, por favor contacte a Audiovox al número telefónico provisto abajo. Esta Garantía no se extiende a la eliminación de estática del automóvil o ruido de motor, a la - Audiovox ART7 | User Manual - Page 64
ART7 62 - Audiovox ART7 | User Manual - Page 65
d'avoir acheté une stations d'amarrage, une radio HD, un réveil-matin ART 7 d'Acoustic Research. Cette radio est construite pour fournir des années de service fiable sans problèmes. 1. Lisez ces instructions. 2. Gardez ces instructions. 3. Faites attention à tous les avertissements. 4. Suivez - Audiovox ART7 | User Manual - Page 66
ART7 14. N'utilisez qu'avec un chariot; un guéridon, un trépieds; une equerre et peut irradier une énergie de fréquence radio et; s'il n'est pas installée et utilisée selon les instructions, peuvent causer des interférences nuisibles aux communications radio. Cependant, il n'y a aucune garantie que - Audiovox ART7 | User Manual - Page 67
le récepteur est branché. • Consultez le concessionnaire ou un technicien de radio/TV pour aide. Un APPAREIL Classe II sera marqué à permanence avec les mots « DOUBLE INSULATION » ou « Double Insulated » et « When servicing use only identical replacement parts ». A NOTER: Cet appareil numérique de - Audiovox ART7 | User Manual - Page 68
ART7 CONTENU DU PAQUET • Récepteur radio HD avec station d'amarrage iPod x 1 • Télécommande x 1 • Câble d'entrée de stéréo de 3.5mm x 1 • Adaptateur iPod x 6 (comme un paquet) • #3 iPod minii • #4 4G iPod & U2 iPod (20 GB) • #5 4G - Audiovox ART7 | User Manual - Page 69
et les services de données interactif que les consommateurs attendent des autres technologies digitales et c'est gratuit, tout est d'adhésion gratuite. 2. Des avantages HD Radio • Les logos HD et Radio HD sont les marques déposées propriétaire d'iBiquity Digital Corp. 3. Amarrage d'iPod ART7 a une - Audiovox ART7 | User Manual - Page 70
TABLEAU DE COMPATIBILITE Le tableau ci-dessous montre les options iPod compatibles avec le ART7. Table 1: Compatibilité iPod Mini* 4th Gen Video* Photo* Nano 5th Gen Video 2nd Gen Nano 3rd Gen Nano (Video) Classic Touch Reproducton Audio Y Y Y Y Y Y Y Reproduction Video N N N N Y Y Y - Audiovox ART7 | User Manual - Page 71
2 SET • FM PRESETS • AM PRESETS • CLOCK SET • TONE CONTROL • DISPLAY CONTROL • SOFTWARE VERSION • MASTER RESET Depuis le sous-menu, pressez pour ART7. Vous pouvez mettre jusqu'à 100 chansons en mémoire. 7. TUNE /\ (En avant): • Durant le mode radio, pressez pour augmenter la fréquence de radio - Audiovox ART7 | User Manual - Page 72
ART7 • Dans le menu principal et la liste des préréglés, pressez pour vous et annuler le mode mise en sourdine. Top View MUTE / SNOOZE 1. Bouton MUTE / SNOOZE : • Durant le mode Radio/iPod/Aux, pressez pour mettre l'audio en sourdine. Pressez de nouveau pour annuler la mise en sourdine. • Lorsque le - Audiovox ART7 | User Manual - Page 73
Back View 120V 60Hz / 25W OFF POWER ON ANTENNA AUX IN VIDEO OUT 75Ω FM AM 1. Câble puissance: Branchez le câble puissance à une sortie électrique. 2. POWER OFF/ON Interrupteur mécanique: Pressez pour recharger le système lorsqu'il fait faillite après une opération abusive. 3. AUX IN: Branchez - Audiovox ART7 | User Manual - Page 74
ART7 TELECOMMANDE Radio Aux iPod 1 2 3 4 5 6 7 8 9 10 ALARM iPOD TAG VOL MENU iPOD MENU TUNE VOL TUNE MUTE SLEEP ENTER R 1. Bouton Puissance: Allumez la puissance. 2. Bouton iPod : Allez au mode iPod. 3. Bouton Aux : Allez au mode Aux. 4. Bouton Radio : Basculer entre les - Audiovox ART7 | User Manual - Page 75
sous-menu, pressez pour revenir à la couche précédente. 11. Boutons VOL +/- : Augmenter ou diminuer le volume. 12. Bouton MUTE : • Sous le mode Radio/iPod/Aux, pressez pour mettre l'audio en sourdine pendant l'opération normale depuis n'importe quelle source. Pressez de nouveau pour annuler la mise - Audiovox ART7 | User Manual - Page 76
lettres d'émission de la station seront affichées lorsque l'on reçoit une émission HD Radio. La fréquence de la station sera affichée si aucune émission HD Radio n'est disponible. 9. Données du programme : Le ART7 est capable d'afficher des données associées au programme, y compris des titres de - Audiovox ART7 | User Manual - Page 77
/ENTER POWER / ENTER Affichage Configuration Puissance Allumée: 1. Pressez le bouton POWER/ ENTER pour allumer le ART7. 2. Le logo Acoustic Research est montré sur l'affichage pendant 2 secondes. Le ART7 restera dans le mode d'écoute le plus récent (par defaut: FM Mode, 87.5 MHz). 1.2 POWER - Audiovox ART7 | User Manual - Page 78
ART7 Item 1.5 Bouton SOURCE Table 2: Basic Operation Affichage Configuration Sélection de Source: 1. heure de sommeil par tranches de 15 minutes jusqu'à 60 minutes (par défaut: 0). 2. Le ART7 va entrer le mode d'attente lorsque la minuterie de sommeil compte en descendant jusqu'à zéro. 76 - Audiovox ART7 | User Manual - Page 79
secondes pour chercher automatiquement des stations fortes. 3. Bouton VOL +/VOL -: Pressez pour ajuster le volume. 2.2 AM Radio Mode AM RADIO: (Mode HD détection automatique. Voir See « HD Radio Notes ».) 1. Pressez le bouton SOURCE pour choisir la source de musique AM (AM Frequency: 520~1720 KHz - Audiovox ART7 | User Manual - Page 80
sports. Ces stations multidiffusion sont trouvées « entre » les stations qui sont déjà sur la bande de la fréquence. (A Noter: Des stations de radio le ART7 encourt une perte de signal digital HD radio, le mode radio va automatiquement changer au mode de radio analogue. Si le service multidiffusion - Audiovox ART7 | User Manual - Page 81
d'aujourd'hui n'est présent que sur la chaîne principale. Si vous sélectionnez une chaîne HD préréglée et syntonisez directement à la chaîne de multidiffusion digitale de la station HD Radio, le ART7 va prendra à peu près cinq secondes pour commencer à jouer: C'est une opération normale. Table - Audiovox ART7 | User Manual - Page 82
ART7 Article Page Menu SOURCE Table 4: Configuration MENU Affichage Description SOURCE AUDIO DU REVEIL: 1. Choisissez Buzzer ou AM/FM pour le son du réveil (AM/FM - Audiovox ART7 | User Manual - Page 83
PLAY/PAUSE pour sortir du menu des favorits. 5. Si vous entrez des préréglés FM à travers votre menu principal, alors que la radio est en mode AM, le ART7 va afficher un message d'erreur. (voir gauche). Préréglés AM : (Par défaut: Vide) 1. Pressez le bouton TUNE +/TUNE - pour sélectionner un num - Audiovox ART7 | User Manual - Page 84
ART7 Article Page Menu 3.5 CLOCK SET Table 4: Configuration MENU Affichage Description Régler et revenir au menu précédent. CONTROLE DE TONALITE D'ACCES : 1. Sélectionner « TONE CONTROL ». 2. Pressez le bouton POWER/ ENTER pour confirmation. REGLAGE DE CONTROLE DE TONALITE : 1. Sélectionner « - Audiovox ART7 | User Manual - Page 85
le niveau du contraste (Par défaut: 33%). 2. Pressez le bouton MENU pour confirmer et revenir au menu précédent. ACCEDER AU CONTROLE DE LUMINOSITE: 1. Sélectionnez « BRIGHTNESS ». 2. Pressez le bouton POWER/ ENTER pour confirmation. REGLAGE DE LUMINOSITE: 1. Pressez le bouton TUNE +/TUNE - pour - Audiovox ART7 | User Manual - Page 86
: 1. Pressez le bouton TUNE +/TUNE - pour choisir MASTER RESET. 2. Pressez le bouton POWER/ ENTER pour confirmation. REINITIALISATION DU MAITRE: 1. Le ART7 demandera, « Etes vous sûr de vouloir rétablir les réglages par défaut d'usine? » 2. Choisir « YES » pour rétablir tous les réglages par défaut - Audiovox ART7 | User Manual - Page 87
est en mode d'attente, si le réglage de l'heure du réveil égale l'heure de la radio actuelle, il sonne automatiquement. 2. Pressez le bouton POWER/ ENTER pour revenir au mode d'attente. SONNERIE DE REVEIL, AUDIO: 1. Lorsque le ART7 est en mode audio (Buzzer/FM/AM), si le réglage de l'heure du réveil - Audiovox ART7 | User Manual - Page 88
SUR LA TELECOMMANDE: Pressez et maintenez un bouton 1 à 10 pour mettre un préréglé en mémoire. Lorsqu'il est mis en mémoire le ART7 va afficher MEMORY (1-10). 5.2 RECALL RAPPELER UNE STATION PREREGLEES DEPUIS LA TELECOMMANDE : Pressez le bouton 1-10 sur la télécommande pour rappeler une station - Audiovox ART7 | User Manual - Page 89
DATA MESSAGE ECHOUE DE LA MISE EN MEMOIRE DES BALISES A L'ART7: 1. « Not enough information...» se montre sur l'écran lorsque le le bouton iTag est pressé alors qu'on ne reçoit pas une station de radio HD. 6.3 iTunes Tagging - TAG SENT TO iPod MISE EN MEMOIRE REUSSIE DES BALISES A - Audiovox ART7 | User Manual - Page 90
ART7 Table 7: Configuration de balisagte de iTunes Articl e Page Menu 6.4 iTunes Tagging - Tag Full Affichage Description MESSAGE COMPLET DE BALISE: « Unable to store tag » se montre sur l'écran lorsque la mémoire des balise est pleine. 6.5 iPod Tag Feature Not Support MESSAGE DE NON- - Audiovox ART7 | User Manual - Page 91
matériau d'emballage originels au cas où vous auriez besoin d'expédier l'appareil dans l'avenir. Prenez contact avec Audiovox Consumer Service Center. Table 8: iTunes Tagging Setup Symptôme ART7 ne s'allume pas Pas de Son Cause fondamentale • Le câble d'alimentation AC n'est pas bien branché • La - Audiovox ART7 | User Manual - Page 92
ART7 Table 8: iTunes Tagging Setup Symptôme Cause fondamentale Que faire? Réception AM de mauvaise qualité Réception de Radio HD instable Pas de chansons dans la liste des balises • Antenne AM n'est pas bien installée • Des facteurs environnementaux peuvent être la cause d'une réception AM - Audiovox ART7 | User Manual - Page 93
SPECIFICATIONS • Puissance de sortie moyenne (R.M.S): 10W (5W x 2) • Pilote: 2.5 inch Pilote à gamme pleine • Résistence: 4 ohms • Réponse en fréquence: 65Hz ~ 20kHz • Alimentation: AC 120V/60Hz 25W • Protégé magnetiquement: NON • Dimensions (W x H x D): 377 x 263 x 85 mm 91 - Audiovox ART7 | User Manual - Page 94
ART7 GARANTIE LIMITEE D'UN AN AUDIOVOX CORPORATION (la Société) garantit à l'acheteur originel auprès du . Pour obtenir réparation ou remplacement dans des termes de cette garantie, veuillez prendre contact avec Audiovox au numéro de téléphone donné ci-dessous. . Cette Garantie ne s'étend pas à - Audiovox ART7 | User Manual - Page 95
- Audiovox ART7 | User Manual - Page 96
Audiovox Electronics Corporation 150 Marcus Blvd Hauppauge, New York 11788 © 2009 Audiovox Electronics Corporation Acoustic Research is a registered trademark of Audiovox Electronics Corporation. PRINTED IN CHINA. www.acoustic-research.com V1.0
-
 1
1 -
 2
2 -
 3
3 -
 4
4 -
 5
5 -
 6
6 -
 7
7 -
8
-
9
-
10
-
11
-
12
-
13
-
14
-
15
-
16
-
17
-
18
-
19
-
20
-
21
-
22
-
23
-
24
-
25
-
26
-
27
-
28
-
29
-
30
-
31
-
32
-
33
-
34
-
35
-
36
-
37
-
38
-
39
-
40
-
41
-
42
-
43
-
44
-
45
-
46
-
47
-
48
-
49
-
50
-
51
-
52
-
53
-
54
-
55
-
56
-
57
-
58
-
59
-
60
-
61
-
62
-
63
-
64
-
65
-
66
-
67
-
68
-
69
-
70
-
71
-
72
-
73
-
74
-
75
-
76
-
77
-
78
-
79
-
80
-
81
-
82
-
83
-
84
-
85
-
86
-
87
-
88
-
89
-
90
-
91
-
92
-
93
-
94
-
95
-
96
 |
 |
USER MANUAL
INSTRUCCIONES DEL USUARIO
INSTRUCTIONS D'UTILISATEUR
R
ART7