Behringer DDM4000 Manual - Page 20
Sampler - midi setup
 |
View all Behringer DDM4000 manuals
Add to My Manuals
Save this manual to your list of manuals |
Page 20 highlights
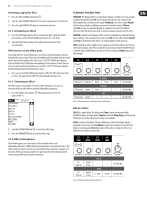
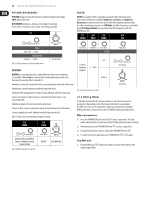
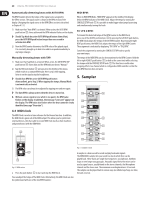
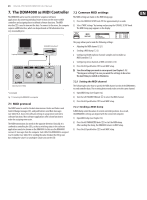
20 DIGITAL PRO MIXER DDM4000 User Manual Automatically detecting beats with AUTO BPM: The BPM Counter detects the tempo of the signal source assigned to the Effect section. The signal source is shown in the BPM section of the display. (Assigning the signal source to the BPM/Effect section is described in Chapter 4.1.1.) 1) Make sure that "Auto BPM" is activated. When active, the AUTO BPM push button (50) shines yellow and the BPM indicator flashes on the display. ◊ Should Tap Mode be active (AUTO BPM push button shines blue), press the AUTO BPM push button longer than one second to activate Auto BPM. 2) Now the BPM Counter determines the BPM value of the played signal. It is constantly brought up to date to be able to respond immediately to any tempo changes. Manually detecting beats with TAP: 1) Make sure that Tap Mode is activated. When active, the AUTO BPM/TAP push button (50) shines blue and the BPM indicator shows "Manual." 2) Tap the TAP push button (50) (at least 2x) in the rhythm of the music, which results in a constant BPM value. Here's a tip: while tapping, listen in on the signal using the headphones. ◊ Should Auto BPM be active (AUTO BPM push button shines yellow), go to Step 2. When tapping the tempo, Manual Mode is automatically activated. 3) The BPM value can always be readjusted by tapping over and over again. ◊ The Auto BPM is always active when the device is turned on. ◊ Without a music signal (or one which is too quiet), the BPM value flashes on the display. In addition, the message "Low Level" appears on the display. The BPM value also flashes when the beat cannot be clearly identified (message "Uncertain"). 4.3 MIDI clock The MIDI Clock is used as a time reference for the Bounce function. In addition, the MIDI Clock is given out at the MIDI output. This allows you to synchronize external devices, which are able to receive MIDI Clock (such as drum machines and grooveboxes) with the DDM4000. MIDI BPM: When in MIDI BPM Mode, "MIDI BPM" appears in the middle of the display below the BPM indicator of the MIDI Clock. Adjust the tempo by turning the CONSOLE SETUP knob (51). It is possible to make bigger value jumps by pressing and simultaneously turning the knob. FX 1/FX 2 BPM: To transmit the detected tempo of the BPM Counter to the MIDI Clock, press one of the ADJUST push buttons (53). By pressing the left BEAT push button, the MIDI Clock adopts the tempo of the left BPM Counter. By pressing the right BEAT push button, the MIDI Clock adopts the tempo of the right BPM Counter. The assignment is indicated by displaying "FX 1 BPM" or "FX 2 BPM." Cancel the assignment by turning the CONSOLE SETUP knob to specify your own tempo. The tempo of the MIDI BPM can also be transmitted to the BPM Counter. Hold the left or right ADJUST push button (53) (or both at the same time) while selecting the tempo with the CONSOLE SETUP knob (51). This function is useful when assigning effects to a channel which is configured as MIDI controller so that the Auto BPM function does not work. 5. Sampler (55) (54) (56) (57) (58) (59) (60) (62) (61) (51) (63) (64) (65) (66) (52) (53) Fig. 4.7: BPM section • Press the push button (52) to start and stop the MIDI Clock. You can adjust the tempo of the MIDI Clock. Alternatively, the MIDI Clock can also be synchronized with one of the two BPM Counters: Fig. 5.1: Sampler section A sampler is a device used to record and play back audio signals. The DDM4000's sampler lets you record two tracks which then can be played back. These tracks are single short sequences, vocal phrases, rhythmic loops or even longer song passages. Any audio signal fed to the mixer can be used as signal source, usually found on the stereo channels, the Microphone channel and the stereo sum. The maximum recording duration is 32 seconds. The samples can be played back in various ways (as infinite loop/loop, one time, forward, reverse).
-
 1
1 -
2
-
3
-
4
-
5
-
6
-
7
-
8
-
9
-
10
-
11
-
12
-
13
-
14
-
 15
15 -
 16
16 -
 17
17 -
 18
18 -
 19
19 -
 20
20 -
 21
21 -
 22
22 -
 23
23 -
 24
24 -
 25
25 -
26
-
27
-
28
-
29
-
30
-
31
-
32
 |
 |
