Behringer DDM4000 Manual - Page 24
Installation
 |
View all Behringer DDM4000 manuals
Add to My Manuals
Save this manual to your list of manuals |
Page 24 highlights
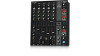
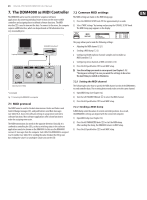
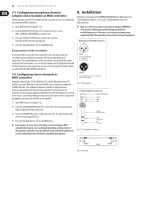
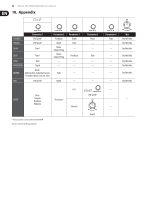
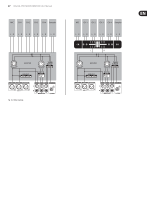
24 DIGITAL PRO MIXER DDM4000 User Manual 7.3 Configuring microphone channel, sampler and crossfader as MIDI controller The Microphone channel, the Sampler and the crossfader section can individually be converted to MIDI controllers. 1) Open MIDI Setup (see Chapter 7.2). 2) Turn the CONSOLE SETUP knob (51) to select the mixer section (MIC, SAMPLER, CROSSFADER) you want to use. 3) Press the CONSOLE SETUP knob to confirm the selection. The LEDs of the selected section go out. 4) Press the ESC push button (52) to exit MIDI Setup. Particularities of the crossfader: It is not possible to assign the stereo channels to the crossfader when the crossfader section is defined as controller. The Assign push buttons are inoperative. The routing behaves as if the crossfader is deactivated: the signals are directly fed to the mixer's sum. As for the Sampler, the CF Assign function and CF Start function are also inoperative. As usual, the routing of the Sampler signal is realized with the REC SOURCE push button. 7.4 Configuring stereo channels as MIDI controller Using the channel fader (8), the EQ knobs (4) and the kill push buttons (5) and (6) generates MIDI data when one of the 4 stereo channels is configured as MIDI controller. The configured channel is still able to play back music, however, the equalizer, the channel fader and the CF Assign function are not active. In case an audio signal is being fed to the selected channel, it is routed to the mixer's sum without being processed and at full volume level. Simply mute the signal in case the audio function is not required. 1) Open MIDI Setup (see Chapter 7.2). 2) Turn the right PARAMETER knob (45) to select the stereo channel you want (and, if required, the Mute function). 3) Press the PARAMETER knob to confirm the selection. The push-button LEDs of the selected channel go out. 4) Press the ESC push button (52) to exit MIDI Setup. ◊ Level jumps can occur when activating or deactivating the MIDI controller function in a stereo channel depending on the position of the equalizer and fader! Turn the OUTPUT knob in the Main and Phones section completely to the left before activating this function. 8. Installation The inputs and outputs of the BEHRINGER DDM4000 are RCA connectors. The Headphone output is a stereo jack. The Microphone inputs are XLR connectors. ◊ Make sure that only competent people install your DDM4000. They must be sufficiently earthed during and after the installation process. Otherwise, electrostatic discharges may negatively affect the operating characteristics of your equipment. Balanced use with XLR connectors 21 3 input 1 = ground/shield 2 = hot (+ve) 3 = cold (-ve) 12 3 output For unbalanced use, pin 1 and pin 3 have to be bridged Fig. 8.1: XLR connector ¼" TRS headphones connector strain relief clamp sleeve ring tip sleeve ground/shield ring right signal tip left signal Fig. 8.2: 1/4" headphones connector tip sleeve shield tip sleeve Fig. 8.3: RCA cable
-
 1
1 -
2
-
3
-
4
-
5
-
6
-
7
-
8
-
9
-
10
-
11
-
12
-
13
-
14
-
15
-
16
-
17
-
18
-
 19
19 -
 20
20 -
 21
21 -
 22
22 -
 23
23 -
 24
24 -
 25
25 -
 26
26 -
 27
27 -
 28
28 -
 29
29 -
30
-
31
-
32
 |
 |
