Behringer SHARK DSP110 Manual - Page 23
Rackmount Optional
 |
View all Behringer SHARK DSP110 manuals
Add to My Manuals
Save this manual to your list of manuals |
Page 23 highlights
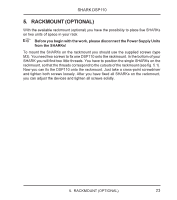
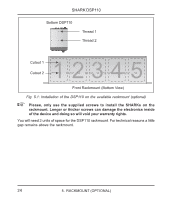
SHARK DSP110 5. RACKMOUNT (OPTIONAL) With the available rackmount (optional) you have the possibility to place five SHARKs on two units of space in your rack. + Before you begin with the work, please disconnect the Power Supply Units from the SHARKs! To mount the SHARKs on the rackmount you should use the supplied screws (type M3). You need two screws to fix one DSP110 onto the rackmount. In the bottom of your SHARK you will find two little threads. You have to position the single SHARKs on the rackmount, so that the threads correspond to the cutouts of the rackmount (see fig. 5.1). Now you can fix the DSP110 onto the rackmount. Just take a cross-point screwdriver and tighten both screws loosely. After you have fixed all SHARKs on the rackmount, you can adjust the devices and tighten all screws solidly. 5. RACKMOUNT (OPTIONAL) 23
-
 1
1 -
2
-
3
-
4
-
5
-
6
-
7
-
8
-
9
-
10
-
11
-
12
-
13
-
14
-
15
-
16
-
17
-
 18
18 -
 19
19 -
 20
20 -
 21
21 -
 22
22 -
 23
23 -
 24
24 -
 25
25 -
 26
26
 |
 |