Belkin F1DA116Z User Manual
Belkin F1DA116Z - OmniView PRO3 USB Manual
 |
UPC - 722868631249
View all Belkin F1DA116Z manuals
Add to My Manuals
Save this manual to your list of manuals |
Belkin F1DA116Z manual content summary:
- Belkin F1DA116Z | User Manual - Page 1
OmniView® PRO3 KVM Switch UK FR DE NL ES IT User Manual F1DA104Zea F1DA108Zea F1DA116Zea - Belkin F1DA116Z | User Manual - Page 2
to the PRO3 KVM Switch 14 Connecting Servers to the PRO3 KVM Switch 16 Connecting Multiple PRO3 KVM Switches (Daisy-Chaining) .......20 Powering Up the Systems 25 4. Using your PRO3 KVM Switch 26 Selecting a Server or BANK Using Hot-Key Commands 26 Selecting a Server Using Direct-Access Port - Belkin F1DA116Z | User Manual - Page 3
video resolution support, and flash-upgradeable firmware. 6 PRO3 KVM Switches can be daisy-chained together easily to enable management of up to 256 PS/2 and/or USB servers from a single console. The PRO3 KVM Switch also comes with an unparalleled Belkin 3-Year Warranty. This User Manual will - Belkin F1DA116Z | User Manual - Page 4
Resolution The PRO3 KVM Switch supports video resolutions of up to 1920x1440@75Hz. • Security Allows you to specify user names and passwords to prevent unauthorized users from accessing the OSD and KVM Switch. • Dedicated Daisy-Chain Port Up to 16 KVM switches can be daisy-chained together using - Belkin F1DA116Z | User Manual - Page 5
to that port. 3 • 7-Segment LED Display When daisy-chaining multiple PRO3 KVM Switches together, the 7-segment 4 LED display serves as a quick indicator of the selected BANK. 5 • Flash Upgrade Flash-upgradeable firmware allows you to install the latest firmware on your PRO3 KVM Switch. This - Belkin F1DA116Z | User Manual - Page 6
Overview Equipment Requirements Cables: Connecting the PRO3 KVM Switch to a server requires a Belkin Dual-Port Micro-Cable Kit. Belkin Dual-Port Micro-Cable Kits: F1D9400-XX (PS/2-style) F1D9401-XX (USB-style) 4 - Belkin F1DA116Z | User Manual - Page 7
section Overview Belkin PRO3 Daisy-Chain Cable: F1D108-CBL 1 Note: Product codes and availability may vary. 2 3 4 5 ����F�1�D�1�0�8-�C�B�L� 6 7 8 5 - Belkin F1DA116Z | User Manual - Page 8
The PRO3 KVM Switch is compatible with CPUs running on, but not limited to, the following OS platforms • Windows® NT®, 95, 98, 2000, Me, XP, Server 2003, or VistaTM • Microsoft® DOS 5.x and above • Red Hat® Linux® 8.x and above • Novell® NetWare® 5.x • Mac OS® X and above (with USB support) • SunTM - Belkin F1DA116Z | User Manual - Page 9
View of the PRO3 KVM Switch: AutoS�c�a��n��b�u�t�t�o�n���� LED for selected p��o��r��t���i��d����e��n���t���i��f�i��c��a����ti��on 7-segment LED for selected BAN��K��i�d�en��ti�f��ic�a�t�i�o�n�� 2 3 4 5 6 Dir�e�c�t�-�a��c�c�e�s�s por�t�s��e��le��c�t�o��r� 7 Manual BA�N�K��s�c�r��o�ll - Belkin F1DA116Z | User Manual - Page 10
Overview Unit Display Diagrams Back View of the PRO3 KVM Switch: D�a�i�s�y���c�h�a�i�n��o�u�t B�a�n��k��s�e�l�e�c�t��D��IP��S�w��i�t�ch �D�C��p�o�w�e�r���ja�c�k S�C�S�I�-�5�0�d��u�a�l-��h�o�s�t �p��o�rt�s�� F�l�a��s�h�-�u�p�g�r�a�d�e��p�o��rtand DIP select s�w��it��ch �Co��n�s�o�l�e�:VGA, PS/2 - Belkin F1DA116Z | User Manual - Page 11
: F1DA104Zea, F1DA108Zea, F1DA116Zea Metal enclosure with high-impact plastic 2 faceplate 12V DC, 1A power adapter, center-pin-positive 3 polarity Daisy-Chain: Maximum of 16 OmniView KVM Switches 4 No. of Servers Supported: 4, 8, and 16 respectively for 4-, 8-, and 16-port models (256 - Belkin F1DA116Z | User Manual - Page 12
cables while servers are powered on may cause irreversible damage of the servers and/or the PRO3 KVM Switches. Belkin is not responsible for damage caused in this way. You are now ready to begin installation of your PRO3 KVM Switch. The following sections (pages 11-19) provide complete instructions - Belkin F1DA116Z | User Manual - Page 13
the PRO3 KVM Switch 1 Bracket Installation (F1DA108Zea and F1DA116Zea) 2 Eight- or 16-Port PRO3 KVM Switches include adjustable mounting brackets ideal for installation in 19-inch racks. The mounting brackets feature three adjustment positions to allow you to set the PRO3 KVM Switch's face - Belkin F1DA116Z | User Manual - Page 14
Installation Note: If this PRO3 KVM Switch will be daisy-chained to another KVM switch, set the BANK address prior to installing on a rack. Refer to the section in this User Manual titled "Connecting Multiple PRO3 KVM Switches (Daisy-Chaining)". Your PRO3 KVM Switch is now mounted securely into the - Belkin F1DA116Z | User Manual - Page 15
BANK address prior to installing on a rack. Refer to the section titled 1 "Connecting Multiple PRO3 KVM Switches (Daisy-Chaining)" in this User Manual. Your PRO3 KVM Switch is now mounted securely to the rack and you are ready 2 to connect the console. Note for Belkin PRO3 Generation 1 Series - Belkin F1DA116Z | User Manual - Page 16
the console. Step 1 Connect the VGA monitor cable to the HDDB15 female port on the back of the PRO3 KVM Switch in the "Console" section. (Refer to diagram below.) Step 2 Connect the PS/2 or USB keyboard cable to the keyboard port on the back of the PRO3 KVM Switch in the "Console" section. (Refer to - Belkin F1DA116Z | User Manual - Page 17
section Installation Step 3 1 Connect the PS/2 or USB mouse cable to the mouse port on the back of the PRO3 KVM Switch in the "Console" section. (Refer to diagram below.) 2 3 4 5 6 7 Note: Either use all USB input devices or all PS/2 input devices when connecting to the console. Using a - Belkin F1DA116Z | User Manual - Page 18
Installation Connecting Servers to the PRO3 KVM Switch (PS/2 Connection): Step 1 Make sure your server is powered off. Step 2 Using the Belkin Dual-Port Micro-Cable Kit for PS/2 (F1D9400-XX), connect the VGA connector to the monitor port on your server. (Refer to diagram below.) Step 3 Connect the - Belkin F1DA116Z | User Manual - Page 19
section Installation Step 4 1 Connect the Belkin Dual-Port Micro-Cable Kit for PS/2 to the desired host ports on the PRO3 KVM Switch. (Refer to diagram below.) 2 3 4 5 6 Step 5 7 Power up your server. Step 6 8 Repeat Steps 1 through 5 for each additional PS/2 server you wish to - Belkin F1DA116Z | User Manual - Page 20
the PRO3 KVM Switch (USB Connection): Step 1 Make sure your server is powered on. Step 2 Using the Belkin Dual-Port Micro-Cable Kit for USB (F1D9401-XX), connect the VGA connector to the monitor port on your server. (Refer to diagram below.) Step 3 Connect the USB connector to an available USB port - Belkin F1DA116Z | User Manual - Page 21
section Installation Step 4 1 Connect the Belkin Dual-Port Micro-Cable Kit for USB to the desired host ports on the PRO3 KVM Switch. (Refer to diagram below.) Your server should 2 recognize the KVM-Switch connection and automatically install the HID USB driver, if necessary. 3 4 5 6 Step - Belkin F1DA116Z | User Manual - Page 22
OmniView PRO3 KVM Switches with standard cabling (F1DA104Tea, F1DA108Tea, F1DA116Tea). In a daisy-chain configuration, the PRO3 KVM Switch with microcabling (F1DA104Zea, F1DA108Zea, F1DA116Zea) must be designated as the primary KVM switch. (Refer to the diagram below.) cable 1 Primary unit (BANK - Belkin F1DA116Z | User Manual - Page 23
14 SECONDARY ON ON OFF OFF OFF OFF BANK 15 SECONDARY ON = Up Position, OFF = Down Position Example: Four 8-Port PRO3 KVM Switches (F1DA108Zea) are daisy-chained together to manage up to 32 servers. The DIP switch on the primary KVM switch is set to "BANK 00" (factory default) and the secondary - Belkin F1DA116Z | User Manual - Page 24
Example of Daisy-Chain Configuration cable 1 Primary unit (BANK 00) cable 2 Secondary unit (BANK 01) cable 3 Secondary unit (BANK 02) Secondary unit (BANK 03) Getting Started: Step 1: Make sure that all servers and PRO3 KVM Switches are powered off and that each PRO3 KVM Switch has been - Belkin F1DA116Z | User Manual - Page 25
port of the next secondary KVM switch(for example, BANK 01). 6 Step 4 Repeat Step 3 for additional PRO3 KVM Switches you wish to daisy-chain together. 7 Note: Your PRO3 KVM Switch is backward-compatible with Belkin OmniView PRO3 KVM Switches with standard cabling (F1DA104T, F1DA108T, F1DA116T - Belkin F1DA116Z | User Manual - Page 26
the "BANK +" and "BANK -" buttons. You can also reset the primary KVM switch to detect newly added secondary KVM switches. If the KVM switches still do not enumerate correctly, check that all KVM switches have the correct BANK address assigned to them and that all daisy-chain cables are connected - Belkin F1DA116Z | User Manual - Page 27
Up the Systems 1 Verify that all servers connected to the PRO3 KVM Switch are powered on. If any connected servers have not been powered on, it is okay to do so at this time 2 (servers can be powered on simultaneously). The PRO3 KVM Switch emulates both a mouse and keyboard on each port and - Belkin F1DA116Z | User Manual - Page 28
a single-switch configuration (no daisy-chained KVM switches), you can switch directly to any port by entering the 2-digit number of the port you wish to access. For example, if you press "Scroll Lock", "Scroll Lock", "02", the PRO3 KVM Switch will switch to the server on Port 2 located on BANK 00 - Belkin F1DA116Z | User Manual - Page 29
can switch between BANKs (KVM switches) by pressing "Scroll Lock", "Scroll Lock", "Page Up", to switch to the 1 previous BANK. Press "Scroll Lock", "Scroll Lock", "Page Down", to switch to the next BANK. 2 3 4 With a daisy-chain switch configuration, you can switch directly to any port - Belkin F1DA116Z | User Manual - Page 30
select which server you wish to control by pressing the direct-access port selector next to the corresponding port. The LED will illuminate to indicate the port is currently selected. If you are installing multiple PRO3 KVM Switches that are daisy-chained, use the BANK scroll keys located on the - Belkin F1DA116Z | User Manual - Page 31
on the keyboard. 7 Note: There is no mouse or keyboard control in AutoScan mode. This is necessary to prevent data and synchronization errors. If the user is using the 8 mouse or keyboard when the PRO3 KVM Switch is switching between ports, data flow may become interrupted and could result in - Belkin F1DA116Z | User Manual - Page 32
operating system, or software function. Main OSD Page The main OSD menu displays the current selected BANK and connected servers to that BANK. If you have only one PRO3 KVM Switch in your configuration, the OSD menu will display "BANK 00". A " " symbol indicates that the connected server is powered - Belkin F1DA116Z | User Manual - Page 33
Using your PRO3 KVM Switch To switch servers using the main OSD menu, use the arrow keys on your keyboard to navigate to the desired server, and press the "Enter" key. 1 A " " symbol indicates which server is currently being accessed on your 2 console. To select a different BANK, press the - Belkin F1DA116Z | User Manual - Page 34
Using your PRO3 KVM Switch Main-Menu-Page Keyboard port. Press "Enter" again to save the entry. User Setting This option allows you to specify an administrator/user name and passwords to prevent unauthorized users from accessing the OSD and KVM Switch. One administrator and eight users : belkin 32 - Belkin F1DA116Z | User Manual - Page 35
your PRO3 KVM Switch Access List 1 This feature allows you to discretely specify the user access at a port level. Only the administrator can set up the access list. The column on the left lists the port names. The users are listed by their number (1 to 8). Navigate to the user and 2 port, and - Belkin F1DA116Z | User Manual - Page 36
be used for your PRO3 KVM Switch: Command Space Bar [01,02.,,,16] port [00,01.,,,15] BANK [01,02.,,,16] port PgUP PgDown B S P A Delete Function Activate OSD Previous host Next host Non-daisy-chain KVM switch Daisy-Chain Config: First and second digit specifies BANK Daisy-Chain: Third and fourth - Belkin F1DA116Z | User Manual - Page 37
Using your PRO3 KVM Switch Sun Combo and Mac® Key Mapping 1 The USB keyboard connected to the PRO3 KVM Switch does not support the Sun keypad to perform special functions in the Sun operating-system 2 environment. When the KVM Switch is connected to a Sun server, the KVM Switch emulates the - Belkin F1DA116Z | User Manual - Page 38
firmware file and utility from www.belkin.com/support/. The utility will guide you through the process of updating the firmware on your PRO3 KVM Switch. Warning! We strongly recommend that you update your firmware only if you are experiencing mouse and keyboard problems with your PRO3 KVM Switch - Belkin F1DA116Z | User Manual - Page 39
See the "Updating Firmware" section in this User Manual. 8 Q: Does the PRO3 KVM Switch support Microsoft IntelliMouse®? A: The PRO3 KVM Switch supports USB and PS/2 mice from Microsoft, Logitech®, Kensington®, etc., and Belkin. Please contact Belkin Technical Support for compatibility issues you - Belkin F1DA116Z | User Manual - Page 40
all your servers to the Belkin KVM Cable Kits, and then attach one keyboard, monitor, and mouse to the console port, and it is ready for use. Q: Does the PRO3 KVM Switch require an AC adapter? A: Yes, the PRO3 KVM Switch requires a 12-volt DC, 1-Amp power adapter in order to function properly - Belkin F1DA116Z | User Manual - Page 41
a keyboard error reported at boot up. • Check that the keyboard cable on the PRO3 KVM Switch is completely connected to your server. Tighten any loose connections. • Check whether USB-keyboard legacy support is enabled in the system BIOS. • If you are using the keyboard software that was included - Belkin F1DA116Z | User Manual - Page 42
Troubleshooting The mouse is lost when I switch to a different port. • Check that the mouse you are using is connected properly to the console port of the PRO3 KVM Switch. • Tighten any loose cable connections. • If you are using a mouse driver that was included with your mouse, uninstall it and - Belkin F1DA116Z | User Manual - Page 43
Troubleshooting USB 1 I am connecting the USB Cable Kit to a USB server, and my keyboard and mouse do not work. 2 • Prior to connecting the PRO3 KVM Switch, make sure that the HID USB driver is installed on each server. (To install the HID USB driver, connect a USB mouse and USB keyboard to - Belkin F1DA116Z | User Manual - Page 44
control and configure the KVM switch. Port: An interface receptor on a server through which you can attach a device or plug in a device cable. Primary KVM Switch: The KVM switch that is connected to the console and is set to BANK address 00. Secondary KVM Switch: Any KVM switch that is daisy-chained - Belkin F1DA116Z | User Manual - Page 45
1 DECLARATION OF CONFORMITY WITH FCC RULES FOR 2 ELECTROMAGNETIC COMPATIBILITY We, Belkin International, Inc., of 501 West Walnut Street, Compton CA 90220, declare under our sole responsibility that the products: 3 F1DA104Z, F1DA108Z, F1DA116Z to which this declaration relates: 4 Comply - Belkin F1DA116Z | User Manual - Page 46
receipt. 2. Your Belkin Customer Service Representative will then instruct you on how to forward your receipt and Belkin product and how to proceed with your claim. Belkin reserves the right to review the damaged Belkin product. All costs of shipping the Belkin product to Belkin for inspection shall - Belkin F1DA116Z | User Manual - Page 47
section Information 1 2 3 4 5 6 7 8 45 - Belkin F1DA116Z | User Manual - Page 48
OmniView® PRO3 KVM Switch Belkin International Inc. 501 West Walnut Street, Compton, CA 90220-5221 USA +1 310 898 1100 +1 310 898 1111 fax Belkin Ltd. Express Business Park Shipton Way, Rushden NN10 6GL, United Kingdom +44 (0) 1933 35 2000 +44 (0) 1933 31 2000 fax Belkin B.V. Boeing Avenue 333 1119 - Belkin F1DA116Z | User Manual - Page 49
Switch KVM PRO3 OmniView® UK FR DE NL ES IT Manuel de lutilisateur F1DA104Zea F1DA108Zea F1DA116Zea - Belkin F1DA116Z | User Manual - Page 50
des serveurs au switch KVM PRO3 16 Raccordement de plusieurs switchs KVM PRO3 (par montage en série 20 Mise en route des systèmes 25 4. Utilisation du switch KVM PRO3 26 Sélection dun serveur ou dun BANK à laide des raccourcis clavier26 Sélection dun serveur à laide des sélecteurs de port à acc - Belkin F1DA116Z | User Manual - Page 51
rencontreriez un problème. Pour une installation rapide et simple, reportez-vous au Guide dinstallation rapide fourni avec votre switch KVM PRO3. Merci davoir choisi le Switch KVM PRO3 OmniView de Belkin. Nous apprécions votre confiance et sommes persuadés que vous constaterez rapidement pourquoi - Belkin F1DA116Z | User Manual - Page 52
à lautre et dassigner des raccourcis clavier. Le menu sur écran est également disponible dans différentes langues. Bouton de la face avant Des sélecteurs de port à accès direct, placés sur la face avant du switch KVM PRO3, permettent une sélection du port en toute facilité. 2 - Belkin F1DA116Z | User Manual - Page 53
. Ce témoin clignote pour indiquer 3 quaucun serveur nest connecté à ce port. • Afficheur à 7 segments 4 Si plusieurs switchs KVM PRO3 sont montés en série, lafficheur DEL à 7 segments sert d'indicateur rapide pour le BANK sélectionné. 5 • Mise à niveau Flash La fonction de mise à niveau du - Belkin F1DA116Z | User Manual - Page 54
Présentation Matériel requis Câbles : Le raccordement du switch KVM PRO3 à un serveur nécessite un kit de microcâblage double port Belkin. Kits de microcâblage double port de Belkin : F1D9400-XX (connecteurs PS/2) F1D9401-XX (connecteurs USB) 4 - Belkin F1DA116Z | User Manual - Page 55
section Présentation Câble de montage en série PRO3 de Belkin : F1D108-CBL 1 Remarque : Les références et la disponibilité des produits peuvent varier. 2 3 4 5 ����F�1�D�1�0�8-�C�B�L� 6 7 8 5 - Belkin F1DA116Z | User Manual - Page 56
sentation Configuration requise Systèmes dexploitation Le switch KVM PRO3 est compatible avec les unités centrales versions ultérieures (avec prise en charge USB) • SunTM SolarisTM 8.x et versions ultérieures Claviers • Compatible PS/2 • Compatible USB • Prise en charge des claviers 101, - Belkin F1DA116Z | User Manual - Page 57
section Présentation Illustrations de lappareil 1 Face avant du switch KVM PRO3 : Bouto�n��A��u�t�o�S��c�a�n��� Témoin dd��iud���pe��no r�tit��f�� 2 3 4 5 6 Sél�e�c��te��u�r��d�e��p���ort à a�c�c�è�s���d�i�r�e�c�t� 7 Boutons de�d�é��fi�l�e��m�e�n�t� manuel des BANK 8 (F1DA108Zea) 7 - Belkin F1DA116Z | User Manual - Page 58
Présentation Illustrations de lappareil Face arrière du switch KVM PRO3 : S�o�r��ti�e��d�e��m���o�n�tage en série �F�ic�h��e�p�o�u��r��a�limentation CC C�o�m��m��u�t��a�te��u�r��D��IP��d��e�sélection de BANK S�C�S�I�-�5�0�d��u�a�l-��h�o�s�t �p��o�rt�s�� P�o��r�t�d�e��m��is�e n�i�v�eau Flashet - Belkin F1DA116Z | User Manual - Page 59
Maximum de 16 switchs KVM OmniView 4 Nombre de serveurs pris en charge : 4, 8 et 16 respectivement pour les modèles à 4, 8 et 16 ports (maximum de 44,5 mm x 190 mm (F1DA116Zea) 438 mm x 89 mm x 190 mm Poids : (F1DA104Zea) 2,4 kg (F1DA108Zea) 4,2 kg (F1DA116Zea) 5,5kg Remarque : Ces spé - Belkin F1DA116Z | User Manual - Page 60
des signaux USB entre le switch KVM PRO3 et le serveur est possible jusquà 4,5 mètres. Au-delà, les risques de dégradation du signal USB augmentent, ce qui peut entraîner une défaillance de lappareil. Remarque :Le Module dextension CAT5 OmniView de Belkin (F1D084) permet de rallonger la portée de - Belkin F1DA116Z | User Manual - Page 61
Installation Montage du switch KVM PRO3 1 Installation des fixations de montage (F1DA108Zea et F1DA116Zea) 2 Les switchs KVM PRO3 à 8 ou 16 ports sont livrés avec des fixations de montage réglables parfaitement adaptées à une installation dans des baies 3 de 19 pouces. Les supports de fixation - Belkin F1DA116Z | User Manual - Page 62
laide du Kit de montage en baie OmniView (F1D005) disponible en option. Étape 1 Fixez le support de montage en baie sur le switch KVM PRO3 à 4 ports à laide des vis cruciformes fournies (reportez-vous à lillustration ci-dessous). Étape 2 Fixez le switch KVM PRO3 à 4 ports sur le système de rails de - Belkin F1DA116Z | User Manual - Page 63
: Si vous devez monter ce switch KVM PRO3 en série avec un autre switch KVM, réglez ladresse BANK avant de linstaller dans la baie. 1 Reportez-vous à la section « Raccordement de plusieurs switchs KVM PRO3 (par montage en série) » de ce manuel. 2 Le switch KVM PRO3 est maintenant solidement fix - Belkin F1DA116Z | User Manual - Page 64
Branchez le câble du moniteur VGA au port femelle HDDB15 à larrière du switch KVM PRO3, dans la partie « Console » (reportez-vous à lillustration ci-dessous). Étape 2 Branchez le câble du clavier PS/2 ou USB sur le port clavier à larrière du switch KVM PRO3, dans la partie « Console » (reportez-vous - Belkin F1DA116Z | User Manual - Page 65
Étape 3 1 Branchez le câble de la souris PS/2 ou USB sur le port souris à larrière du switch KVM PRO3, dans la partie « Console » (reportez-vous à lillustration ci-dessous). 2 3 4 5 6 7 Remarque : Utilisez uniquement des périphériques dentrées USB ou des périphériques dentrées PS/2 pour le - Belkin F1DA116Z | User Manual - Page 66
Installation Raccordement des serveurs au switch KVM PRO3 (Branchement PS/2) : Étape 1 Assurez-vous que le serveur est éteint. Étape 2 À laide du Kit de microcâblage double port pour PS/2 de Belkin (F1D9400XX), branchez le connecteur VGA au port moniteur de votre serveur (reportez-vous à - Belkin F1DA116Z | User Manual - Page 67
section Installation Étape 4 1 Branchez le Kit de microcâblage double port pour PS/2 de Belkin aux ports hôtes du switch KVM PRO3 (reportez-vous à lillustration ci-dessous). 2 3 4 5 6 Étape 5 7 Allumez le serveur. Étape 6 8 Répétez les étapes 1 à 5 pour chaque serveur PS/2 supplé - Belkin F1DA116Z | User Manual - Page 68
Installation Raccordement des serveurs au switch KVM PRO3 (Branchement USB) : Étape 1 Assurez-vous que le serveur est allumé. Étape 2 À laide du Kit de microcâblage double port pour USB de Belkin (F1D9401XX), branchez le connecteur VGA au port moniteur de votre serveur (reportez-vous à lillustration - Belkin F1DA116Z | User Manual - Page 69
le Kit de microcâblage double port pour USB de Belkin aux ports hôtes du switch KVM PRO3 (reportez-vous à lillustration ci-dessous). 2 Le serveur devrait reconnaître le switch KVM et, si nécessaire, installer automatiquement le pilote HID USB. 3 4 5 6 7 Étape 5 Répétez les étapes 1 à 4 pour - Belkin F1DA116Z | User Manual - Page 70
Belkin munis dun câblage standard (F1DA104Tea, F1DA108Tea, F1DA116Tea). Dans une configuration en chaîne, le switch KVM PRO3 à microcâblage (F1DA104Zea, F1DA108Zea, F1DA116Zea) doit être désigné en tant que switch KVM principal (reportezvous à lillustration ci-dessous). cable 1 Primary unit (BANK - Belkin F1DA116Z | User Manual - Page 71
Commutateur vers le Haut, Éteint = Commutateur vers le Bas Exemple : Quatre switchs KVM PRO3 à 8 Ports (F1DA108Zea) sont montés en série pour contrôler jusquà 32 serveurs. Le commutateur DIP du switch KVM principal est réglé sur « BANK 00 » (par défaut) et les unités secondaires sont toutes réglées - Belkin F1DA116Z | User Manual - Page 72
de configuration en chaîne cable 1 Primary unit (BANK 00) cable 2 Secondary unit (BANK 01) cable 3 Secondary unit (BANK 02) Secondary unit (BANK 03) Pour commencer : Étape 1 : Assurez-vous que tous les serveurs et switchs KVM PRO3 sont éteints et que chaque switch KVM PRO3 possède une adresse - Belkin F1DA116Z | User Manual - Page 73
é au port « Daisy-Chain Out » du switch KVM secondaire suivant (par exemple, BANK 01). 6 Étape 4 Répétez létape 3 pour chaque switch KVM PRO3 supplémentaire à monter en série. 7 Remarque : Votre switch KVM PRO3 propose une rétrocompatibilité avec les switchs KVM PRO3 OmniView de Belkin munis - Belkin F1DA116Z | User Manual - Page 74
» pour indiquer son adresse BANK. Remarque : Si les switchs KVM PRO3 ne saffichent pas dans lordre correct, réinitialisez le switch KVM principal (BANK 00) en appuyant simultanément sur les boutons « BANK + » et « BANK - ». Vous pouvez également réinitialiser le switch KVM principal afin de détecter - Belkin F1DA116Z | User Manual - Page 75
le faire 2 maintenant (les serveurs peuvent être allumés simultanément). Le switch KVM PRO3 émule une souris et un clavier sur chaque port et permet au serveur de démarrer normalement. 3 Le serveur connecté au port « 1 » saffiche sur le moniteur. Vérifiez si le 4 clavier, le moniteur et - Belkin F1DA116Z | User Manual - Page 76
à un seul switch (pas de switch KVM monté en série), vous pouvez passer directement au port souhaité en entrant le numéro à deux chiffres de ce port. Par exemple, si vous appuyez sur « Arrêt défil », « Arrêt défil », « 02 », le switch KVM PRO3 passe au serveur connecté au port 2 situé au BANK 00 - Belkin F1DA116Z | User Manual - Page 77
section Utilisation du switch KVM PRO3 Dans une configuration en série, vous pouvez changer de BANK (switch KVM) en appuyant sur « Arrêt défil », « Arrêt défil », « Pg préc. » pour passer 1 au BANK précédent. Appuyez sur « Arrêt défil », « Arrêt défil », « Pg suiv. » pour passer au BANK suivant - Belkin F1DA116Z | User Manual - Page 78
contrôler en appuyant sur le sélecteur de port à accès direct à côté du port correspondant. Le témoin sallume pour indiquer que le port est correctement choisi. Si vous installez plusieurs switchs KVM PRO3 connectés en chaîne, utilisez les touches de défilement des BANK situées sur la face avant du - Belkin F1DA116Z | User Manual - Page 79
Pour activer la fonction AutoScan, appuyez sur le bouton AutoScan sur le switch KVM PRO3. Vous pouvez aussi lactiver sur votre clavier en appuyant 6 sur « utilisation de la souris ou du clavier pendant une commutation de port du switch pourrait avoir comme effet d'interrompre le flux de données - Belkin F1DA116Z | User Manual - Page 80
. Page principale du menu sur écran La page principale du menu affiche le BANK sélectionné et les serveurs branchés à ce BANK. Si votre configuration se compose dun seul switch KVM PRO3, le menu affiche « BANK 00 ». Le symbole « » indique que le serveur branché est sous tension. Commandes clavier - Belkin F1DA116Z | User Manual - Page 81
switch KVM PRO3 BANK suivant. 3 Page principale du menu Les options suivantes du « Menu principal » sont uniquement accessibles par ladministrateur. 4 5 6 7 8 Le « Menu principal » permet de : • 01 - Choisir la langue du menu sur écran • 02 - Modifier les noms assignés aux différents ports - Belkin F1DA116Z | User Manual - Page 82
switch KVM PRO3 port. Appuyez à nouveau sur « Entrée » pour enregistrer le nom. User Settings [Paramètres utilisateur] Ce menu permet de définir un administrateur/nom dutilisateur et des mots de passe pour empêcher les utilisateurs non autorisés daccéder au menu sur écran et au switch KVM belkin 32 - Belkin F1DA116Z | User Manual - Page 83
section Utilisation du switch KVM PRO3 Access List [Liste des accès] 1 Cette fonction permet de définir les droits daccès des utilisateurs aux ports. Seul ladministrateur peut modifier la liste des droits daccès. La colonne de gauche présente une liste des noms de ports. Les utilisateurs sont - Belkin F1DA116Z | User Manual - Page 84
de raccourci clavier pouvant être utilisées avec le switch KVM PRO3 : Commande Fonction Barre despacement Activer le menu sur écran Hôte précédent Hôte suivant [01,02,,,16] port Switch KVM non monté en série [00,01,,,15] BANK [01,02,,,16] port Configuration en chaîne : le premier et le - Belkin F1DA116Z | User Manual - Page 85
switch KVM PRO3 Touches combo Sun et touches Mac® 1 Le clavier USB branché au switch KVM PRO3 ne prend pas en charge le pavé numérique Sun pour certaines fonctions spéciales dans 2 lenvironnement dexploitation Sun. Lorsque le switch KVM F12 Power [Alimentation] Power [Alimentation] Touche Windows - Belkin F1DA116Z | User Manual - Page 86
serveurs. Les mises à niveau du micrologiciel sont gratuites pour toute la durée de vie du switch KVM PRO3. Pour mettre à jour le micrologiciel, téléchargez le fichier et lutilitaire correspondants sur www.belkin.com/support/. Lutilitaire vous guidera tout au long de la procédure de mise à jour du - Belkin F1DA116Z | User Manual - Page 87
KVM PRO3 prend en charge les souris USB et PS/2 de Microsoft, Logitech®, Kensington®, etc., et Belkin. Veuillez contacter le service dassistance technique de Belkin pour tout problème de compatibilité. Q : Comment le switch KVM PRO3 permet-il à lutilisateur de changer de port ? R : Le switch KVM - Belkin F1DA116Z | User Manual - Page 88
fonctionner, le switch KVM PRO3 doit détecter lalimentation sur les ports PS/2 et USB des serveurs. Q : Puis-je utiliser le switch KVM PRO3 avec un serveur Sun équipé dun port USB ? R : Oui, le switch KVM PRO3 peut fonctionner avec nimporte quel serveur USB. Q : Le switch KVM PRO3 est-il compatible - Belkin F1DA116Z | User Manual - Page 89
é et quil est correctement branché sur le serveur et le port approprié du switch KVM. • Bougez la souris et vérifiez sil est nécessaire douvrir PRO3 est bien branché au serveur. Au besoin, enfoncez le connecteur sil nest pas correctement branché. • Vérifiez que la prise en charge USB est activée - Belkin F1DA116Z | User Manual - Page 90
souris USB ou PS/2 standard ou une souris USB ou PS/2 compatible Microsoft. • Assurez-vous quaucun pilote de souris nest chargé dans vos fichiers « CONFIG.SYS » ou « AUTOEXEC.BAT ». • Ne déplacez pas la souris et nappuyez pas sur ses boutons lorsque vous changez de port sur le switch KVM PRO3. 40 - Belkin F1DA116Z | User Manual - Page 91
et la souris ne fonctionnent pas. 2 • Avant de brancher le switch KVM PRO3, assurez-vous que le pilote USB HID est installé sur tous les serveurs. (Pour installer le pilote USB HID, branchez une souris et un clavier USB sur le serveur. Windows devrait 3 installer les pilotes automatiquement - Belkin F1DA116Z | User Manual - Page 92
îne de switchs utilise des paramètres communs pour permettre facilement des interactions complexes entre les différentes consoles et permettre ainsi le contrôle de plusieurs serveurs. HID :Human Interface Device, classe de périphériques USB comprenant les claviers et les souris. KVM :Littéralement - Belkin F1DA116Z | User Manual - Page 93
switch KVM. 2 Port : Récepteur dinterface sur un serveur au moyen duquel vous pouvez connecter un périphérique ou brancher un câble de périphérique. Switch KVM principal : Le switch KVM branché à la console et défini sur 3 ladresse de BANK 00. Switch KVM secondaire : Nimporte quel switch KVM - Belkin F1DA116Z | User Manual - Page 94
interférences pouvant entraîner un fonctionnement non souhaité. Déclaration de conformité CE Belkin International, Inc., déclare sous sa propre et unique responsabilité que les produits F1DA104Z, F1DA108Z et F1DA116Z, auxquels se réfère la présente déclaration, ont été élaborés en conformité avec - Belkin F1DA116Z | User Manual - Page 95
demande dintervention 2 Procédez comme suit pour obtenir une réparation de votre produit Belkin : 1. Contactez Belkin International, Inc., au 501 W. Walnut St., Compton CA 90220, États-Unis, À lattention de : Customer Service (service clientèle) ou appelez le (800)- 3 223-5546 dans un délai de - Belkin F1DA116Z | User Manual - Page 96
Switch KVM PRO3 OmniView® Belkin International Inc. 501 West Walnut Street Compton, CA 90220-5221 États-Unis +1 310 898 1100 +1 310 898 1111 Fax Belkin Ltd. Express Business Park Shipton Way, Rushden NN10 6GL, Royaume-Uni +44 (0) 1933 35 2000 +44 (0) 1933 31 2000 Fax Belkin B.V. Boeing Avenue 333 - Belkin F1DA116Z | User Manual - Page 97
OmniView® PRO3 KVM-Switch UK FR DE NL ES IT Benutzerhandbuch F1DA104Zea F1DA108Zea F1DA116Zea - Belkin F1DA116Z | User Manual - Page 98
der Computer 25 4. Verwenden des PRO3 KVM-Switch 26 Auswählen eines Servers oder einer BANK mit Tastaturbefehlen (Hotkeys 26 Auswählen eines Servers über Direktwahlschalter 28 Auswählen einer BANK über Umschalttasten 28 AutoScan-Modus 29 Bildschirm-Menüsystem (OSD 30 Tastaturbefehle 34 Sun - Belkin F1DA116Z | User Manual - Page 99
und Firmware mit Flash-Upgrade. 6 Durch Kaskadierung der PRO3 KVM-Switches können Sie bis zu 256 PS/2-, USB- und Sun-Server über eine einzige PS/2-Konsole steuern. Zudem gewährt Belkin auf den PRO3 KVM-Switch fünf Jahre Garantie. 7 Dieses Handbuch beschreibt Ihren PRO3 KVM-Switch detailliert - Belkin F1DA116Z | User Manual - Page 100
und den Switch. • Dedizierter Kaskadierungsanschluss Bis zu 16 KVM-Switches können über dedizierte Ports kaskadiert werden, so dass Sie Ihre KVM-Konfiguration einfach erweitern können, wenn Ihre Serverumgebung dies erfordert. • Bildschirm-Menüsystem (OSD) Das Bildschirm-Menüsystem vereinfacht die - Belkin F1DA116Z | User Manual - Page 101
Firmware installieren können. Dadurch bleibt der KVM- Switch mit Geräten und Servern kompatibel, die künftig auf den Markt 7 kommen. Firmware-Aktualisierungen sind für die gesamte Lebensdauer des KVM-Switch kostenlos als Download auf der Support-Website von Belkin unter www.belkin.com/support - Belkin F1DA116Z | User Manual - Page 102
Übersicht Systemvoraussetzungen Kabel: Der Anschluss des KVM-Switch an einen Server erfordert einen Dual-PortMikrokabelsatz von Belkin. Belkin Dual-Port Mikrokabelsätze: F1D9400-xx (PS/2-Ausführung) F1D9401-xx (USB-Ausführung) 4 - Belkin F1DA116Z | User Manual - Page 103
Kapitel Übersicht Belkin PRO3 Kaskadierungskabel: F1D108-CBL 1 Hinweis: Produktbezeichnungen und Verfügbarkeit können variieren. 2 3 4 5 ����F�1�D�1�0�8-�C�B�L� 6 7 8 5 - Belkin F1DA116Z | User Manual - Page 104
Übersicht Systemanforderungen Betriebssysteme Der KVM-Switch ist kompatibel mit Computern, die mit folgenden Betriebssystemen kompatibel • USB-kompatibel: • Unterstützt Tastaturen mit 101/102/104 Tasten Mäuse • PS/2- und USB-kompatible Mäuse (mit PS/2-Adapter) mit 2, 3, 4 oder 5 Tasten • USB- und PS - Belkin F1DA116Z | User Manual - Page 105
Kapitel Übersicht Bestandteile KVM-Switch-Vorderseite: AutoS�c�a��n�-�T�a�s��t�e���� LED für P��o��r��t E����r��k���e���n���n���u���n����g 1 7-teilige LED zur Anzeige 2 der�g��e�w��äh�l�t�e��n��B�A��N�� K 3 4 5 6 Dir�e�k��tw��a��h�l�t�a�s�t��e 7 Manuelle B�A�N��K�-�A��u�s�w�a� - Belkin F1DA116Z | User Manual - Page 106
Übersicht Bestandteile KVM-Switch-Rückseite: K�a�s��k�a��d�ie��r�u��n�g�aus �A�n�s�c�h�l�u�s�s��f�ü�r Netzteil D�I�P�-�S��c�h�a�l�t�e��r�f�ü��r�B�A��N�K-Auswahl S�C�S�I�-�5�0�d��u�a�l-��h�o�s�t �p��o�rt�s�� S�c��h�n�i�t�ts�t�e�l�le��f�ü�r��F�lash-Aktualisierungund D��IP�-��A�u�s��w�a��h�l�s��c� - Belkin F1DA116Z | User Manual - Page 107
äuse: Stromversorgung: F1DA104Zea, F1DA108Zea, F1DA116Zea Metallgehäuse mit stoßfester 2 Kunststofffrontplatte Netzteil (12 V, 1 A), Mittenkontakt positiv 3 Kaskadierung: Anzahl unterstützter Server: Maximal 16 OmniView KVM-Switches 4, 8, 16 bei 4-, 8-, bzw. 16-Port-Ausführung 4 (max. 256 - Belkin F1DA116Z | User Manual - Page 108
Rack befestigt werden. Die 8-Port und 16-Port KVM-Switches sind bereits mit Vorrichtungen für die Montage in einem standardmäßigen 19-Zoll-Rack versehen. Die entsprechenden Befestigungen sind im Lieferumfang enthalten. Für den Switch ist ein entsprechender OmniView Einbausatz (F1D005) erhältlich - Belkin F1DA116Z | User Manual - Page 109
Kapitel Installation Einbau des PRO3 KVM-Switch 1 Einbau in den Rack (nur F1DA108Zea und F1DA116Zea) 2 Die 8fach- und 16fach-Switches enthalten einstellbare Halterungen für den Einbau in einen 19"-Rack. Die Halterungen ermöglichen die Einstellung von drei Befestigungspositionen, sodass Sie - Belkin F1DA116Z | User Manual - Page 110
KVM-Switch mit einem anderen KVM-Switch kaskadiert werden soll, stellen Sie die BANK-Adresse vor dem Einbau ins Rack ein. Weitere Informationen hierzu finden Sie im Abschnitt „Verbinden mehrerer PRO3 KVMSwitches (Kaskadierung)". Der KVM-Switch PRO3 4-Port KVM-Switch kann wahlweise mit einem OmniView - Belkin F1DA116Z | User Manual - Page 111
Sie im Abschnitt „Verbinden mehrerer PRO3 KVM- Switches (Kaskadierung)". 2 Der KVM-Switch ist jetzt sicher am Rack befestigt. Sie können Ihn an die Konsole anschließen. 3 Hinweis für Benutzer von Geräten aus der PRO3-Serie (Generation 1) von Belkin (F1DA104Tea, F1DA108Tea, F1DA116Tea): Die - Belkin F1DA116Z | User Manual - Page 112
Installation Anschließen des PRO3 KVM-Switch an die Konsole Sie müssen für Tastatur und Maus dieselbe Plattform verwenden. Wenn Sie beispielsweise eine USB-Tastatur verwenden, müssen Sie auch eine USB-Maus an die Konsole anschließen. Schritt 1 Schließen Sie das VGA-Bildschirmkabel an die HDDB15- - Belkin F1DA116Z | User Manual - Page 113
nur PS/2-Geräte. Eine Kombination aus USB- und PS/2-Geräten hat eine 2-sekündige Verzögerung zwischen den Geräten 8 zur Folge. Schritt 4 Schließen Sie das Netzteil an die Netzbuchse mit der Aufschrift „12VDC, 1A" an, die sich auf der Rückseite des KVM-Switch befindet. Benutzen Sie nur das im - Belkin F1DA116Z | User Manual - Page 114
Installation Anschließen des PRO3 KVM-Switch an die Server (PS/2-Anschluss): Schritt 1 Stellen Sie sicher, dass der Server abgeschaltet ist. Schritt 2 Verwenden Sie den Dual-Port Mikrokabelsatz für PS/2 von Belkin (F1D9400-XX) und schließen Sie den VGA-Stecker an den Monitor-Port des Servers an. ( - Belkin F1DA116Z | User Manual - Page 115
Kapitel Installation Schritt 4 1 Verbinden Sie den Dual-Port Mikrokabelsatz für PS/2 von Belkin mit den entsprechenden Host-Ports am Switch. (Siehe Abbildung unten.) 2 3 4 5 6 Schritt 5 7 Fahren Sie den Server hoch. Schritt 6 8 Wiederholen Sie Schritt 1 bis 5 für jeden weiteren - Belkin F1DA116Z | User Manual - Page 116
Installation Anschließen des PRO3 KVM-Switch an die Server (USB-Anschluss): Schritt 1 Stellen Sie sicher, dass der Server abgeschaltet ist. Schritt 2 Verwenden Sie den Dual-Port Mikrokabelsatz für USB von Belkin (F1D9401-XX) und schließen Sie den VGA-Stecker an den Monitor-Port des Servers an. ( - Belkin F1DA116Z | User Manual - Page 117
Kapitel Installation Schritt 4 1 Verbinden Sie den Dual-Port Mikrokabelsatz für USB von Belkin mit den entsprechenden Host-Ports am Switch. (Siehe Abbildung unten.) Ihr Server 2 sollte den Switch automatisch erkennen und automatisch den HID-USB-Treiber installieren, wenn das erforderlich ist - Belkin F1DA116Z | User Manual - Page 118
den Belkin OmniView PRO3 KVM-Switches mit Standardverkabelung F1DA104Tea, F1DA108Tea, F1DA116Tea). In einer Kaskadierung muss der Switch mit Mikroverkabelung (F1DA104Zea, F1DA108Zea, F1DA116Zea) als primärer Switch einrichtet werden. (Siehe Abbildung unten.) cable 1 Primary unit (BANK 00) cable - Belkin F1DA116Z | User Manual - Page 119
SEKUNDÄR Aktiviert = obere Schalterstellung; Aus = untere Schalterstellung Beispiel: Vier 8-Port KVM-Switches (F1DA108Zea) sind kaskadiert, um 32 Server zu kontrollieren. Der DIP-Schalter am Primär-KVM-Switch wird auf BANK 00 gesetzt (Werksstandard) und die Sekundär-Einheiten auf eine eindeutige - Belkin F1DA116Z | User Manual - Page 120
eine Kaskadierung cable 1 Primary unit (BANK 00) cable 2 Secondary unit (BANK 01) cable 3 Secondary unit (BANK 02) Secondary unit (BANK 03) Vorbereitungen: Schritt 1: Stellen Sie sicher, dass alle Server und KVM-Switches abgeschaltet sind und dass auf jedem Switch eine eindeutige BANK-Adresse - Belkin F1DA116Z | User Manual - Page 121
(Daisy-Chain IN) des nächsten Sekundär-KVM-Switches an (z. B. BANK 02). 6 Schritt 4 Wiederholen Sie Schritt 3 für weitere KVM-Switches, die Sie miteinander kaskadieren möchten. 7 Hinweis: Ihr KVM-Switch ist rückwärtskompatibel mit den Belkin OmniView PRO3 KVM-Switches mit - Belkin F1DA116Z | User Manual - Page 122
ßen des PRO3 KVM-Switch an die Konsole" auf Seite 16. Schritt 2: Fahren Sie die Sekundär-Switches nacheinander hoch, indem Sie die Stecker wieder in die Netzsteckdosen stecken. Beginnen Sie dabei mit der höchsten BANK. Für jeden KVM-Switch müsste beim Hochfahren die BANK-Adresse angezeigt werden - Belkin F1DA116Z | User Manual - Page 123
jetzt tun (die Server können gleichzeitig hochgefahren werden). Der Switch emuliert an jedem Port eine Tastatur und eine Maus und ermöglicht dem Server des betreffenden Servers, und starten Sie ihn neu. Bleibt das Problem bestehen, finden Sie weitere Hinweise im Abschnitt „Fehlerbehebung" in - Belkin F1DA116Z | User Manual - Page 124
Bei Verwendung eines einzelnen KVM-Switches (ohne Kaskadierung) können Sie direkt zur gewünschten Schnittstelle wechseln, indem Sie die zweistellige Schnittstellennummer eingeben. Wenn Sie zum Beispiel „Rollen", „Rollen", „02" drücken, schaltet der Switch zum Server an Schnittstelle 2 von BANK 00 um - Belkin F1DA116Z | User Manual - Page 125
Kapitel Verwenden des PRO3 KVM-Switch Bei einer Kaskadierung können Sie zwischen den BANKs umschalten, indem Sie die Tastenfolge „Rollen", „Rollen", "Bild nach oben" drücken. Dadurch gelangen 1 Sie zur vorherigen BANK. Mit „Rollen", „Rollen", "Bild nach unten" schalten Sie zur nächsten BANK um. - Belkin F1DA116Z | User Manual - Page 126
Verwenden des PRO3 KVM-Switch Auswählen eines Servers ü KVM-Switches auf andere Server zugreifen, die an die Sekundär-KVM-Switches angeschlossen sind. Auswählen einer BANK über Umschalttasten Mit den Tasten „BANK +" und „BANK -" am Primär-KVM-Switch können Sie zwischen den kaskadierten KVM-Switches - Belkin F1DA116Z | User Manual - Page 127
PRO3 KVM-Switch AutoScan-Modus 1 Mit der AutoScan-Funktion kann der Switch die Aktivitäten aller betriebsbereiten Server einzeln abfragen und überwachen, die am Switch angeschlossen sind. 2 Der Switch während des Umschaltens zu einem anderen Port betätigt, wird der Datenfluss möglicherweise - Belkin F1DA116Z | User Manual - Page 128
Verwenden des PRO3 KVM-Switch Bildschirmmenü (OSD) Über das Bildschirmmenü können Sie zwischen Servern umschalten, die ( ): Schaltet zu anderen Servern an derselben BANK um (Bild auf/Bild ab): Schaltet zur nächsten oder vorherigen BANK um (Eingabetaste): Zwischen Servern umschalten, Aktion beenden - Belkin F1DA116Z | User Manual - Page 129
Kapitel Verwenden des PRO3 KVM-Switch Wenn Sie mit Hilfe des Hauptmenüs zwischen Servern umschalten wollen, verwenden Sie dazu die Pfeiltasten auf Ihrer Tastatur, um zu dem gewünschten 1 Server zu - Belkin F1DA116Z | User Manual - Page 130
Verwenden des PRO3 KVM-Switch Tastaturbefehle auf der Hauptmenüseite ( ):: Navigation zum speichern. Bearbeiten des Port-Namens Mit dieser Option können Sie jedem Port einen Namen mit maximal 10 Zeichen zuordnen. Zur Benennung des Ports müssen Sie die lauten: Benutzername: admin Kennwort: belkin 32 - Belkin F1DA116Z | User Manual - Page 131
Verwenden des PRO3 KVM-Switch Kapitel Zugriffsliste 1 Mit dieser Funktion können Sie den den Benutzerport und drücken Sie die Eingabetaste, um den Zugriff für jeden Benutzer und jede Port- 3 Kombination zu erlauben/zu verweigern. „X" steht für die Verweigerung eines Zugriffs und die - Belkin F1DA116Z | User Manual - Page 132
Verwenden des PRO3 KVM-Switch Tastaturbefehle In der Tabelle unten finden Sie eine komplette Liste mit Tastaturbefehlen, die Sie für Ihren Switch verwenden können: Befehl Leertaste [01, 02.,,,16] Port [00, 01.,,,15] BANK [01, 02.,,,16] Port PgUP Bild runter B S P A Löschen Funktion Aktiviert das - Belkin F1DA116Z | User Manual - Page 133
Kapitel Verwenden des PRO3 KVM-Switch Sun Combo- and Mac®-Funktionstastenbelegung 1 Die USB-Tastatur, die an den Switch angeschlossen ist, unterstützt spezielle Funktionen des Sun-Betriebsystems, die durch die Sun-Tastatur aktiviert 2 werden können, nicht. Wenn ein KVM-Switch mit einem Sun - Belkin F1DA116Z | User Manual - Page 134
unserer Internetseite www.belkin.com/ support herunterladen. Das Dienstprogramm führt Sie durch die Aktualisierung der Firmware in Ihrem Switch. Achtung! Wir empfehlen dringend, eine Aktualisierung der Firmware nur dann durchzuführen, wenn Sie derzeit an Ihrem PRO3 KVM-Switch Probleme mit der Maus - Belkin F1DA116Z | User Manual - Page 135
Switch unterstützt jede Kombination von PS/2- und USB-Geräten auf Host-Servern. 6 F: Was versteht man unter einer Flash-Aktualisierung? A: Die Firmware des KVM-Switch den technischen Support von Belkin. F: Wie kann ich zwischen den verschiedenen Ports umschalten? A: Sie können Ports auf drei - Belkin F1DA116Z | User Manual - Page 136
der PS/2- und USB-Ports auf Ihrem Computer, um ordnungsgemäß funktionieren zu können. F: Kann ich den Switch an meinem USB-fähigen SUN-Servern einsetzen? A: Ja, der Switch ist mit allen USB-fähigen Servern kompatibel. F: Unterstützt der PRO3 KVM-Switch Linux? A: Ja. Der Switch eignet sich für Red - Belkin F1DA116Z | User Manual - Page 137
und überprüfen Sie, ob das Problem weiterhin auftritt. Der Bildschirm bleibt dunkel. korrekt am Server und an der entsprechenden KVM-Schnittstelle angeschlossen ist. • Bewegen Sie die Switch korrekt mit Ihrem Server verbunden ist. Befestigen Sie lose Verbindungen. • Überprüfen Sie, ob im System - Belkin F1DA116Z | User Manual - Page 138
ordnungsgemäß an die Konsolenschnittstelle des Switch angeschlossen wurde. • Befestigen Sie Sie die Energiesparmodi der Computer, an denen die Probleme auftreten. • Probieren Sie eine andere Maus aus. für eine Standard-PS/2-, USB- oder eine Microsoft-Server-kompatible PS/2-, USB-Maus geeignet ist. - Belkin F1DA116Z | User Manual - Page 139
und Maus funktionieren nicht. 2 • Vor dem Anschließen des Switch müssen Sie sicherstellen, dass auf jedem Server der HID-USB-Treiber installiert ist. (Zur Installation des HID-USBTreibers schließen Sie eine USB-Maus und eine USB-Tastatur an den Server 3 an. Die Treiber müssten vom Windows - Belkin F1DA116Z | User Manual - Page 140
äche, über die der KVM Switch gesteuert und konfiguriert wird. Port: Anschluss an einen Server für ein Gerät oder ein Gerätekabel. Primär-KVM-Switch: Der KVM-Switch, der mit der Konsole verbunden ist und für den die BANK-Adresse 00 eingestellt ist. Sekundär-KVM-Switch: Jeder KVM-Switch, der über - Belkin F1DA116Z | User Manual - Page 141
, die einen unerwünschten Betrieb verursachen könnten. 6 CE-Konformitätserklärung 7 Wir, Belkin International, Inc., erklären hiermit in alleiniger Verantwortung, dass die Artikel F1DA104Z, F1DA108Z und F1DA116Z, auf die sich diese Erklärung 8 bezieht, in Einklang mit der Fachgrundnorm St - Belkin F1DA116Z | User Manual - Page 142
erlaubte Programm- oder Systemänderungen. Wie Sie Unterstützung bekommen. Um Unterstützung von Belkin zu bekommen, gehen Sie nach folgenden Schritten vor: 1. Wenden Sie sich schriftlich an Belkin International, Inc., 501 W. Walnut St., Compton CA 90220, Attn: Customer Service oder wenden Sie sich - Belkin F1DA116Z | User Manual - Page 143
3 FOLGESCHÄDEN WIE, ABER NICHT AUSSCHLIESSLICH, ENTGANGENES GESCHÄFT ODER PROFITE, DIE IHNEN DURCH DEN VERKAUF ODER DIE BENUTZUNG VON EINEM BELKIN-PRODUKT ENTGANGEN SIND, AUCH 4 WENN SIE AUF DIE MÖGLICHKEIT SOLCHER SCHÄDEN AUFMERKSAM GEMACHT WORDEN SIND. Diese Garantie räumt Ihnen spezifische - Belkin F1DA116Z | User Manual - Page 144
OmniView® PRO3 KVM-Switch Belkin International Inc. 501 West Walnut Street, Compton, CA 90220-5221 USA +1 310 898 1100 +1 310 898 1111 Fax Belkin Ltd. Express Business Park Shipton Way, Rushden NN10 6GL, Großbritannien +44 (0) 1933 35 2000 +44 (0) 1933 31 2000 Fax Belkin B.V. Boeing Avenue 333 1119 - Belkin F1DA116Z | User Manual - Page 145
OmniView® PRO3 KVM-switch UK FR DE NL ES IT Handleiding F1DA104Zea F1DA108Zea F1DA116Zea - Belkin F1DA116Z | User Manual - Page 146
10 De PRO3 KVM-switch monteren 11 De console op de PRO3 KVM-switch aansluiten 14 Servers op de PRO3 KVM-switch aansluiten 16 Meerdere PRO3 KVM-switches aansluiten (in serie koppelen) ....20 De systemen inschakelen 25 4. De PRO3 KVM-switch gebruiken 26 Een server of een BANK met - Belkin F1DA116Z | User Manual - Page 147
met de aankoop van deze Belkin OmniView PRO3 1 KVM-switch (de KVM-switch). Ons gevarieerde programma KVM-oplossingen illustreert onze 2 inzet om duurzame producten van hoge kwaliteit te leveren voor een 3 aantrekkelijke prijs. Belkin heeft deze KVM-switch speciaal voor de serverbeheerder - Belkin F1DA116Z | User Manual - Page 148
de AutoScan-functie kunt u ervoor zorgen dat de PRO3 KVM-switch de activiteiten van alle aangesloten servers afzonderlijk scant en KVM-switch openen. • Speciale daisychainpoort U kunt tot 16 KVM-switches onderling via speciale poorten in serie koppelen zodat u bij een groeiende serveromgeving uw KVM - Belkin F1DA116Z | User Manual - Page 149
op uw PRO3 KVM-switch installeren. Zo kunt u ervoor zorgen dat uw KVM- switch compatibel blijft met de nieuwste apparaten en servers. De firmware 7 van uw PRO3 KVM-switch kan tijdens de hele levensduur van dit product gratis worden gedownload van de support-website van Belkin op www.belkin. com - Belkin F1DA116Z | User Manual - Page 150
Overzicht Vereiste apparatuur Kabels: Voor het aansluiten van de PRO3 KVM-switch op een server hebt u dual-port KVM-kabels van Belkin nodig. Belkin dual-port KVM-kabelsets: F1D9400-XX (PS/2-uitvoering) F1D9401-XX (USB-uitvoering) 4 - Belkin F1DA116Z | User Manual - Page 151
hoofdstuk Overzicht Belkin PRO3 daisychainkabel: F1D108-CBL 1 Let op: Artikelnummers en beschikbaarheid kunnen variëren. 2 3 4 5 ����F�1�D�1�0�8-�C�B�L� 6 7 8 5 - Belkin F1DA116Z | User Manual - Page 152
PRO3 KVM-switch is compatibel met centrale verwerkingseenheden (CPUs) die ondermeer gebruik maken van volgende OS-platformen: • Windows® NT®, 95, 98, 2000, Me, XP, Server 2003 of VistaTM • Microsoft® DOS 5.x en hoger • Red Hat® Linux® 8.x en hoger • Novell® NetWare® 5.x • Mac OS® X en hoger (met USB - Belkin F1DA116Z | User Manual - Page 153
hoofdstuk Overzicht De PRO3 KVM-switch in beeld 1 Vooraanzicht van de PRO3 KVM-switch: AutoS�c�a��n�-�t�o�e��ts Statuslampje voor ivd��ae��n�n��dt����ie��fi��cg���ae���ts��i��ee���l�e���c��t��eerde poort Zevendelig LED-display voo�r��h�e�r�k�e�n�n��i�n�g��v�a��n de ges�e�l�e�c��t�e�e��rd - Belkin F1DA116Z | User Manual - Page 154
Overzicht De PRO3 KVM-switch in beeld Achteraanzicht van de PRO3 KVM-switch: U�i�tg��a�n��g��d�a�i�s�y�c� hain D�I�P�-�s��c�h�a�k�e��l�a�a�r��v�o�o��r�keuze van muis/ �to�e�t�s��e�n�b�o��rd�p�o�o�r��te�n��,U�S��B�-�m��u�i�s�/� �to�e�ts��en��b�o�r�d�p�o�o�r�t�e�n In�g�a��n�g���d�a�i�s�y��chain 8 - Belkin F1DA116Z | User Manual - Page 155
F1DA116Zea Metalen behuizing met slagvast kunststof front 2 Voeding: 12V DC, 1A netvoedingsadapter met positieve polariteit op de middenpin 3 Daisychain: Maximaal 16 OmniView KVM-switches : PS/2 (miniDIN6), USB (type A) Muisingang: PS/2 (miniDIN6), USB (type A) 7 Monitorpoort - Belkin F1DA116Z | User Manual - Page 156
-signalen mag de verbindingskabel tussen de PRO3 KVM-switch en de servers niet langer zijn dan 4,5 m. Bij een grotere kabellengte kunnen storingen in het USB-signaal optreden waardoor het systeem defect kan raken. Let op: Met de CAT5-extender van Belkin (artikelnummer F1D084) kunt u de afstand tot - Belkin F1DA116Z | User Manual - Page 157
hoofdstuk Aansluiting De PRO3 KVM-switch monteren 1 Beugels monteren (F1DA108Zea en F1DA116Zea) 2 Acht- en zestienpoorts PRO3 KVM-switches worden geleverd inclusief verstelbare montagebeugels die zich uitstekend lenen voor de installatie in 19- inch rekken. De montagebeugels zijn op drie - Belkin F1DA116Z | User Manual - Page 158
Let op:Als u deze PRO3 KVM-switch wilt doorverbinden naar een andere KVMswitch, moet u het BANK-adres instellen voordat u de KVM-switch in een rek monteert. Zie in deze handleiding het hoofdstuk met de titel "Meerdere PRO3 KVM-switches aansluiten (daisychaining)". De PRO3 KVM-switch is nu stevig in - Belkin F1DA116Z | User Manual - Page 159
het hoofdstuk met de titel "Meerdere PRO3 KVM-switches aansluiten (daisychaining)". 2 De PRO3 KVM-switch is nu stevig in de beugels bevestigd. Nu kunt u de console aansluiten. 3 Opmerking voor bezitters van een Belkin PRO3 van serie Generation 1 (F1DA104Tea, F1DA108Tea en F1DA116Tea): De - Belkin F1DA116Z | User Manual - Page 160
aan op de female HBBB15-poort aan de achterzijde van de PRO3 KVM-switch in het consolegedeelte. (Zie onderstaande afbeelding.) Stap 2 Sluit de PS/2- of USB-toetsenbordkabel aan op de toetsenbordpoort aan de achterzijde van de PRO3 KVM-switch in het consolegedeelte. (Zie onderstaande afbeelding.) 14 - Belkin F1DA116Z | User Manual - Page 161
aan op de muispoort aan de achterzijde van de PRO3 KVM-switch in het consolegedeelte. (Zie onderstaande afbeelding.) 2 3 4 5 6 7 Let op: Gebruik voor de aansluitingen op de console ofwel uitsluitend USB-invoerapparaten of uitsluitend PS/2-invoerapparaten. Het gebruik van een combinatie - Belkin F1DA116Z | User Manual - Page 162
Aansluiting Servers op de PRO3 KVM-switch aansluiten (PS/2-verbinding): Stap 1 Zorg ervoor dat de server uitgeschakeld is. Stap 2 Sluit de VGA-connector met Belkin dual-port KVM-kabels voor PS/2 (F1D9400XX) aan op de monitorpoort van de server. (Zie onderstaande afbeelding.) Stap 3 Sluit de stekkers - Belkin F1DA116Z | User Manual - Page 163
hoofdstuk Aansluiting Stap 4 1 Sluit de Belkin dual-port KVM-kabels voor PS/2 aan op de gewenste hostpoorten van de PRO3 KVM-switch. (Zie onderstaande afbeelding.) 2 3 4 5 6 Stap 5 7 Schakel de server in. Stap 6 8 Herhaal stap 1 t/m 5 voor elke extra PS/2-server die u wilt aansluiten - Belkin F1DA116Z | User Manual - Page 164
Servers op de PRO3 KVM-switch aansluiten (USB-verbinding): Stap 1 Zorg ervoor dat de server is ingeschakeld. Stap 2 Sluit de VGA-connector met Belkin dual-port KVM-kabels voor USB (F1D9401XX) aan op de monitorpoort van de server. (Zie onderstaande afbeelding.) Stap 3: Sluit de USB-stekker aan op - Belkin F1DA116Z | User Manual - Page 165
hoofdstuk Aansluiting Stap 4: 1 Sluit de Belkin dual-port KVM-kabels voor USB aan op de gewenste hostpoorten van de PRO3 KVM-switch. (Zie onderstaande afbeelding.) De server moet 2 de verbinding met de KVM-switch herkennen en zonodig het HID USB- stuurprogramma automatisch installeren. 3 4 - Belkin F1DA116Z | User Manual - Page 166
unit (BANK 00) cable 2 Secondary unit (BANK 01) cable 3 Secondary unit (BANK 02) Secondary unit (BANK 03) Let op: Een daisychainkabel (F1D108-CBL) is nodig om elke PRO3 KVM-switch door te verbinden en deze is verkrijgbaar bij de leverancier van Belkin producten of online via www.belkin.com - Belkin F1DA116Z | User Manual - Page 167
een BANK-adres 1 Alle PRO3 KVM-switches zijn voorzien van een "BANK DIP"-schakelaar. De "BANK DIP"-schakelaar wordt gebruikt om aan elke PRO3 KVM-switch een eigen BANK-adres toe te wijzen. 2 • Stel bij een uit één eenheid bestaande configuratie de "BANK DIP"-schakelaar van de PRO3 KVM-switch in - Belkin F1DA116Z | User Manual - Page 168
een daisychainconfiguratie cable 1 Primary unit (BANK 00) cable 2 Secondary unit (BANK 01) cable 3 Secondary unit (BANK 02) Secondary unit (BANK 03) Voorbereiding: Stap 1: Zorg ervoor dat alle servers en KVM-switches uitgeschakeld zijn en dat u aan elke PRO3 KVM-switch een uniek BANK-adres - Belkin F1DA116Z | User Manual - Page 169
de "Daisy-Chain Out"-poort van de volgende secundaire KVM-switch (bijvoorbeeld BANK 01). 6 Stap 4 Herhaal stap 3 bij alle extra PRO3 KVM-switches die u onderling in serie (als daisychain) wilt doorverbinden. 7 Let op: De PRO3 KVM-switch is backward-compatibel met OmniView PRO3 KVM-switches van - Belkin F1DA116Z | User Manual - Page 170
alle daisychainkabels op de juiste wijze zijn aangesloten. Stap 4: Controleer of de primaire KVM-switch alle secundaire KVM-switches heeft herkend door met de knoppen "BANK +"- en "BANK -" alle BANKen te doorlopen. Als alle secundaire KVM-switches correct zijn herkend, registreert en toont het led - Belkin F1DA116Z | User Manual - Page 171
De systemen inschakelen 1 Controleer of alle op de PRO3 KVM-switch aangesloten servers zijn ingeschakeld. Als er aangesloten servers zijn die niet zijn ingeschakeld, mag 2 u deze nu inschakelen (servers mogen tegelijkertijd worden ingeschakeld). De PRO3 KVM-switch emuleert op elke poort - Belkin F1DA116Z | User Manual - Page 172
KVM-switches) kunt u rechtstreeks naar elke poort overschakelen door het uit twee cijfers bestaande nummer van de betreffende poort in te voeren. Typt u bijvoorbeeld de combinatie "ScrollLock", "ScrollLock", "02" in, dan schakelt de PRO3 KVM-switch over naar de server op poort 2 op BANK - Belkin F1DA116Z | User Manual - Page 173
Uw PRO3 KVM-switch gebruiken Bij in serie gekoppelde KVM-switchconfiguraties kunt u met de toetsencombinatie "ScrollLock", "ScrollLock", "PageUp" naar de vorige BANK 1 (ofwel KVM-switch) overschakelen. Met de toetscombinatie "ScrollLock", "ScrollLock", "PageDown" schakelt u naar de volgende BANK - Belkin F1DA116Z | User Manual - Page 174
Door de scroll-knoppen "BANK+" en "BANK-" van de primaire KVM-switch in te drukken, kunt u overschakelen tussen de in serie gekoppelde PRO3 KVMswitches. Als u de beide knoppen tegelijk indrukt, wordt de PRO3 KVM-switch gereset. Via de knop "BANK+" komt u bij de volgende BANK. Wanneer u zich op de - Belkin F1DA116Z | User Manual - Page 175
annuleren om de besturing van de server weer over te nemen. Om de AutoScan-functie te activeren, drukt u AutoScan-toets van de PRO3 6 KVM-switch in. U kunt AutoScan ook met het toetsenbord activeren door achtereenvolgens op de toetsen "Scroll Lock", "Scroll Lock" en "A" te drukken. 7 Om de - Belkin F1DA116Z | User Manual - Page 176
gegenereerd door de PRO3 KVM-switch en heeft geen invloed op de werking van de server, het besturingssysteem of de software. OSD-hoofdpagina Het hoofdmenu van het OSD-beeldschermmenu toont de thans geselecteerde BANK en de op deze BANK aangesloten servers. Als u slechts één PRO3 KVMswitch in uw - Belkin F1DA116Z | User Manual - Page 177
hoofdstuk Uw PRO3 KVM-switch gebruiken Om met het OSD-hoofdmenu naar een bepaalde server , drukt u op de toets "Page Up" of "Page Down" voor de volgende of de vorige BANK. 3 Hoofdmenupagina De volgende opties in het hoofdmenu zijn alleen voor de systeembeheerder beschikbaar. 4 5 6 7 - Belkin F1DA116Z | User Manual - Page 178
opgeven om te voorkomen dat gebruikers zonder toegangsrechten het OSD- beeldschermmenu en de PRO3 KVM-switch openen. Zo kunt u de namen van één systeembeheerder en acht gebruikers opslaan. De standaardaanduidingen voor systeembeheerder en wachtwoord zijn: Gebruikersnaam: admin Wachtwoord: belkin 32 - Belkin F1DA116Z | User Manual - Page 179
" (Sneltoetsen) en drukt u op "Enter" om uw keus te selecteren en op te slaan. AutoScan-tijd De scantijd is de tijd dat de PRO3 KVM-switch in de AutoScan-modus bij een bepaalde server blijft alvorens hij naar de volgende server overschakelt. U kunt voor het scantijdinterval elke waarde tussen 5 en - Belkin F1DA116Z | User Manual - Page 180
de sneltoetscommandos die u voor de PRO3 KVM-switch kunt gebruiken. Commando Spatiebalk [01,02.,,,16] poort [00,01.,,,15] BANK [01,02.,,,16] poort PgUP PgDown B S P A Verwijderen Functie OSD activeren Vorige host Volgende host Niet in serie gekoppelde KVM-switch Configuratie van daisychain: Het - Belkin F1DA116Z | User Manual - Page 181
1 Het USB-toetsenbord dat op de PRO3 KVM-switch is aangesloten ondersteunt niet het Sun toetsenblok voor het uitvoeren van speciale functies in de Sun 2 besturingsomgeving. Wanneer u de PRO3 KVM-switch op een Sun server aansluit, emuleert de KVM-switch de Sun toetsen door middel van een serie - Belkin F1DA116Z | User Manual - Page 182
hele levensduur van de PRO3 KVM-switch. Voor het bijwerken van de firmware moet u het betreffende firmwarebestand en firmwarehulpprogramma downloaden van www.belkin.com/support/. Het hulpprogramma begeleidt u bij de procedure van het bijwerken van de firmware op de PRO3 KVM-switch. Waarschuwing! Wij - Belkin F1DA116Z | User Manual - Page 183
van PS/2en USB-hostservers. 6 V: Wat houdt de flash-upgrademogelijkheid in? A: Door middel van flash-upgrades kunt u op elk moment de firmware van de 7 PRO3 KVM-switch via een eenvoudige seriële aansluiting bijwerken. Dankzij de mogelijkheid tot bijwerken kan de PRO3 KVM-switch altijd met de - Belkin F1DA116Z | User Manual - Page 184
-poorten van de servers detecteren. V: Kan ik de PRO3 KVM-switch op een SUN server gebruiken die USB ondersteunt? A: Ja, de PRO3 KVM-switch werkt samen met alle servers die geschikt zijn voor USB. V: Ondersteunt de PRO3 KVM-switch Linux? A: Ja, de PRO3 KVM-switch werkt samen met Red Hat- en andere - Belkin F1DA116Z | User Manual - Page 185
bestaan. Op mijn monitor krijg ik een zwart scherm. • Controleer of alle videokabels goed zijn aangesloten. • Controleer of de toetsenbordkabel is aangesloten en op de juiste punten tussen de server en de betreffende poort op de PRO3 KVM-switch is vastgezet. • Verplaats de muis en kijk of het - Belkin F1DA116Z | User Manual - Page 186
naar een andere poort. • Controleer of de muis die u gebruikt correct op de consolepoort van de PRO3 KVM-switch is aangesloten. • Zet eventuele gebruikte stuurprogramma ofwel voor een standaard PS/2- of USB-muis is of voor een servercompatibele PS/2- of USB-muis van Microsoft. • Zorg ervoor dat er - Belkin F1DA116Z | User Manual - Page 187
, werken mijn toetsenbord en muis niet. 2 • Controleer voordat u de PRO3 KVM-switch aansluit of het HID USB- stuurprogramma correct op elke server is geïnstalleerd. (Om het HID USBstuurprogramma te installeren, moet u een USB-muis en een USB-toetsenbord 3 op de server aansluiten. Het Windows - Belkin F1DA116Z | User Manual - Page 188
-switches die met elkaar in serie zijn geschakeld. Een daisychain van KVM-switches gebruikt algemeen gebruikelijke instellingen om naadloze complexe interacties tussen meerdere consoles mogelijk te maken voor de besturing van een groot aantal servers. HID: Human Interface Device, de klasse van USB - Belkin F1DA116Z | User Manual - Page 189
waaronder stoorsignalen die een ongewenste werking kunnen veroorzaken. 7 CE-conformiteitsverklaring Wij, Belkin International, Inc., verklaren dat de producten met de artikelnummers 8 F1DA104Z, F1DA108Z en F1DA116Z, waarop deze verklaring van toepassing is, voldoen aan de emissienorm EN55022 en - Belkin F1DA116Z | User Manual - Page 190
te komen gaat u als volgt te werk: 1. Neem binnen 15 dagen na het voorval schriftelijk contact op met Belkin International, Inc., 501 W. Walnut St., Compton CA 90220, t.a.v.: Customer Service (Klantenservice) of bel +1 (800)-223-5546. Houd er rekening mee dat u de volgende gegevens moet kunnen - Belkin F1DA116Z | User Manual - Page 191
te beperken in welk geval de bovenstaande garantiebeperkingen 1 wellicht niet voor u gelden. ONDER TOEPASSELIJK RECHT IS BELKIN INTERNATIONAL, INC. NIET 2 AANSPRAKELIJK VOOR INCIDENTELE, BIJZONDERE, DIRECTE, INDIRECTE, BIJKOMENDE OF MEERVOUDIGE SCHADE ZOALS ONDERMEER SCHADE TEN GEVOLGE - Belkin F1DA116Z | User Manual - Page 192
OmniView® PRO3 KVM-switch Belkin International, Inc. 501 West Walnut Street, Compton, CA 90220-5221 Verenigde Staten +1 310 898 1100 +1 310 898 1111 fax Belkin Ltd. Express Business Park Shipton Way, Rushden NN10 6GL, Verenigd Koninkrijk +44 (0) 1933 35 2000 +44 (0) 1933 31 2000 fax Belkin B.V. - Belkin F1DA116Z | User Manual - Page 193
Conmutador KVM PRO3 OmniView® UK FR DE NL ES IT Manual del usuario F1DA104Zea F1DA108Zea F1DA116Zea - Belkin F1DA116Z | User Manual - Page 194
KVM PRO3 11 Conexión de la consola al conmutador KVM PRO3 14 Conexión de los servidores al conmutador KVM PRO3 16 Conexión de múltiples conmutadores KVM PRO3 (encadenamiento en margarita 20 Encendido de los sistemas 25 4. Utilización del conmutador KVM PRO3 26 Selección de un servidor o BANK - Belkin F1DA116Z | User Manual - Page 195
y firmware actualizable por flash. 6 Los conmutadores KVM PRO3 pueden ser encadenados en margarita, permitiendo así 7 gestionar hasta 256 servidores de tipo USB desde una única consola. El conmutador PRO3 viene acompañado de una incomparable garantía de tres años de Belkin. 8 El presente manual - Belkin F1DA116Z | User Manual - Page 196
servidor de entre hasta 256 de forma instantánea. • AutoScan La propiedad de búsqueda automática AutoScan le permite configurar su conmutador KVM PRO3 para escanear y controlar las actividades de todos los servidores conectados, uno por uno. El intervalo de tiempo asignado a cada servidor puede ser - Belkin F1DA116Z | User Manual - Page 197
á a su conmutador KVM mantener una compatibilidad constante con los más modernos dispositivos y ordenadores. Las actualizaciones de firmware son gratuitas durante toda la vida útil del 8 conmutador KVM PRO3 y se pueden descargar de la página de asistencia de Belkin en www.belkin.com/support. 3 - Belkin F1DA116Z | User Manual - Page 198
Generalidades Requisitos del equipo Cables: Para conectar el conmutador KVM PRO3 a un servidor se requiere un puerto doble de Belkin Kit de micro-cableado. Kits de microcableado de puerto doble de Belkin: F1D9400-XX (estilo PS/2) F1D9401-XX (estilo USB) 4 - Belkin F1DA116Z | User Manual - Page 199
sección Generalidades Cable para cadena margarita PRO3 de Belkin: F1D108-CBL 1 Nota: Los números de artículo y la disponibilidad están sujetos a posibles cambios. 2 3 4 5 ����F�1�D�1�0�8-�C�B�L� 6 7 8 5 - Belkin F1DA116Z | User Manual - Page 200
Generalidades Requisitos del sistema Sistemas operativos El conmutador KVM PRO3 es compatible, pero no exclusivamente, con CPUs ® X y superior (con soporte de USB) • SunTM SolarisTM 8.x y versiones superiores Teclados • Compatible con PS/2 • Compatible con USB • Compatible con teclados de 101/102/ - Belkin F1DA116Z | User Manual - Page 201
indicadores de la unidad 1 Vista frontal del conmutador KVM PRO3: Botón��A�u��to��S�c�a��n���� LED para ipd��ue��e�n�r�t��t��i�o�fi��sc���a���c���i n d��e los LED de 7 segmentos para la id��e�n�t�i�fic�a��c�i�ó�n��d��e��l BANK sele��c�c�i�o�n��a�d�o 2 3 4 5 6 Sel�e�c��to��r��d�e pue - Belkin F1DA116Z | User Manual - Page 202
Diagramas de los indicadores de la unidad Vista posterior del conmutador KVM PRO3: S�a�l�i�d�a��d�e���e�n�c�a�denamiento en margarita �To�m���a�d�e��a��li�m� entación CC S�e�l�e�c�c�i�ó��n�d��e��B�a��n�k��C�o�nmutador DIP S�C�S�I�-�5�0�d��u�a�l-��h�o�s�t �p��o�rt�s�� P�u��e�r�t�o�p��a�r�a�a�c��tu - Belkin F1DA116Z | User Manual - Page 203
F1DA104Zea, F1DA108Zea, F1DA116Zea Carcasa de metal con placa de cubierta de 2 plástico de gran resistencia a impactos Adaptador de alimentación 12V CC, 1A con 3 clavija central de polaridad positiva Encadenamiento de margarita: Máximo de 16 conmutadores KVM 4 OmniView N° de servidores - Belkin F1DA116Z | User Manual - Page 204
un kit de montaje en bastidor OmniView (F1D005) opcional que se puede utilizar con el conmutador KVM PRO3 de 4 puertos. Tenga en Belkin recomienda que la longitud de los cables entre el conmutador KVM PRO3 y los servidores conectados no supere los 7,6 metros. Para servidores USB: Las señales USB - Belkin F1DA116Z | User Manual - Page 205
sección Instalación Montaje del conmutador KVM PRO3 1 Instalación de los engarces (F1DA108Zea y F1DA116Zea) 2 Los conmutadores KVM PRO3 de 8 ó 16 puertos incluyen engarces ajustables para montaje en bastidor apropiados para la instalación en bastidores de 19 pulgadas. Los soportes de montaje - Belkin F1DA116Z | User Manual - Page 206
margarita este conmutador KVM PRO3 con otro conmutador KVM, configure la dirección BANK antes de montarlo en el bastidor. Consulte la sección titulada "Conexión de múltiples conmutadores KVM PRO3 (encadenamiento margarita)" del presente manual del usuario. Ahora, su conmutador KVM PRO3 está montado - Belkin F1DA116Z | User Manual - Page 207
para conectar la consola. 3 Advertencia para los propietarios de la Serie PRO3 de Belkin (F1DA104Tea, F1DA108Tea, and F1DA116Tea): La instalación del conmutador KVM PRO3 se ha modificado. Por favor siga atentamente 4 este manual de instalación para asegurar una instalación correcta. En caso de - Belkin F1DA116Z | User Manual - Page 208
HDDB15 hembra ubicado en la parte posterior del conmutador KVM PRO3 en la sección "Consola". (Consulte el siguiente diagrama). Paso 2 Conecte el cable del teclado PS/2 o USB al puerto para teclado ubicado en la parte posterior del conmutador KVM PRO3, en la sección "Consola". (Consulte el siguiente - Belkin F1DA116Z | User Manual - Page 209
Instalación Paso 3 1 Conecte el cable del ratón PS/2 o USB al puerto para ratón ubicado en la parte posterior del conmutador KVM PRO3, en la sección "Consola". (Consulte el siguiente diagrama). 2 3 4 5 6 7 Nota: Utilice o bien todos los dispositivos de entrada USB o bien todos los PS/2 al - Belkin F1DA116Z | User Manual - Page 210
Instalación Conexión de los servidores al conmutador KVM PRO3 (Conexión PS/2): Paso 1 Asegúrese de que su servidor esté apagado. Paso 2 Mediante el kit de microcableado de puerto doble de Belkin para PS/2 (F1D9400-XX), conecte el conector VGA al puerto monitor de su servidor. (Consulte el siguiente - Belkin F1DA116Z | User Manual - Page 211
sección Instalación Paso 4 1 Conecte el kit de microcableado de puerto doble de Belkin para PS/2 a los puertos deseados del host en el conmutador KVM PRO3. (Consulte el siguiente diagrama). 2 3 4 5 6 7 Paso 5 Encienda su servidor. Paso 6 8 Repita los pasos del 1 al 5 para cada - Belkin F1DA116Z | User Manual - Page 212
Instalación Conexión de los servidores al conmutador KVM PRO3 (Conexión USB): Paso 1 Asegúrese de que su servidor esté encendido. Paso 2 Mediante el kit de microcableado de puerto doble de Belkin para USB (F1D9401XX), conecte el conector VGA al puerto monitor de su servidor. (Consulte el siguiente - Belkin F1DA116Z | User Manual - Page 213
de microcableado de puerto doble de Belkin para USB a los puertos deseados del host en el conmutador KVM PRO3. (Consulte el siguiente 2 diagrama). Su servidor debería reconocer la conexión del conmutador KVM e instalar automáticamente el controlador USB HID si es necesario. 3 4 5 6 7 Paso - Belkin F1DA116Z | User Manual - Page 214
OmniView de Belkin con cableado estándar (F1DA104Tea, F1DA108Tea, F1DA116Tea). En una configuración de encadenamiento en margarita, el conmutador KVM PRO3 (F1DA104Zea, F1DA108Zea, F1DA116Zea) debe designarse como el conmutador KVM primario. (Utilice como referencia el siguiente diagrama.) cable - Belkin F1DA116Z | User Manual - Page 215
Instalación sección Cómo asignar una dirección BANK 1 Todos los conmutadores OmniView KVM PRO3 incorporan un interruptor "BANK DIP". El interruptor "BANK DIP" se emplea para asignar la dirección BANK correcta a cada conmutador KVM PRO3. 2 • Para configurar una sola unidad, establezca para el - Belkin F1DA116Z | User Manual - Page 216
en margarita cable 1 Primary unit (BANK 00) cable 2 Secondary unit (BANK 01) cable 3 Secondary unit (BANK 02) Secondary unit (BANK 03) Para comenzar: Paso 1: Asegúrese de que todos los servidores y conmutadores KVM PRO3 se encuentren apagados y de que cada conmutador KVM PRO3 tenga asignada - Belkin F1DA116Z | User Manual - Page 217
"Daisy-Chain Out" del siguiente conmutador KVM secundario (por ejemplo, BANK 01). 6 Paso 4 Repita el paso 3 para encadenar en margarita los 7 conmutadores KVM PRO3 que desee. Nota: Su conmutador KVM PRO3 es compatible con versiones anteriores de 8 los conmutadores KVM PRO3 OmniView de Belkin - Belkin F1DA116Z | User Manual - Page 218
gitos "00" que indican la dirección BANK. Nota: Si los conmutadores KVM PRO3 no muestran la dirección correcta, reinicie el conmutador KVM primario (BANK 00) presionando al mismo tiempo los botones "BANK +" y "BANK -" También podrá reiniciar el conmutador KVM primario para detectar los conmutadores - Belkin F1DA116Z | User Manual - Page 219
, hágalo ahora (los servidores pueden encenderse al mismo tiempo). El conmutador KVM PRO3 emula un ratón y un teclado en cada puerto y permitirá a su correctamente. Si detecta un error, compruebe las conexiones de los cables del servidor afectado y reinícielo. Si el problema continúa, consulte - Belkin F1DA116Z | User Manual - Page 220
(sin conmutadores KVM en cadena de margarita), puede conmutar directamente a cualquier puerto introduciendo el número de dos dígitos del conmutador al que desea pasar. Por ejemplo, si pulsa "Bloq Despl", "Bloq Despl", "02", el conmutador KVM PRO3 pasará al servidor del puerto 2 ubicado en BANK 00 - Belkin F1DA116Z | User Manual - Page 221
sección Utilización del conmutador KVM PRO3 Si utiliza una configuración de encadenamiento de margarita, puede cambiar de BANK (conmutadores KVM) presionando "Bloq Despl", "Bloq Despl", "Av Pág" 1 para cambiar al BANK anterior. Pulse "Bloq Despl", "Bloq Despl", "Re Pág" para pasar al siguiente - Belkin F1DA116Z | User Manual - Page 222
los botones de desplazamiento "BANK +" y"BANK -" del conmutador KVM primario, podrá cambiar entre los conmutadores KVM PRO3 encadenados en margarita. Si presiona ambos botones simultáneamente, el conmutador KVM PRO3 se reiniciará. El botón "BANK +" le llevará al BANK siguiente. Por ejemplo, cuando - Belkin F1DA116Z | User Manual - Page 223
(teclado y ratón) no se transmitirá al servidor deseado. Cancele AutoScan para volver a obtener el control del servidor. 6 Para activar la función AutoScan, pulse el botón AutoScan del conmutador KVM PRO3. También podrá activar la función AutoScan mediante su teclado. Para 7 ello, pulse "Bloq - Belkin F1DA116Z | User Manual - Page 224
alguno. Página OSD principal El menú principal OSD muestra el BANK seleccionado actualmente así como los servidores conectados a dicho BANK. Si sólo tiene un conmutador KVM PRO3 en su configuración, el menú OSD mostrará "BANK 00". El símbolo " " indica que el servidor conectado está encendido - Belkin F1DA116Z | User Manual - Page 225
PRO3 Para conmutar entre servidores mediante el menú principal OSD, utilice las teclas de flechas de su teclado para dirigirse al servidor deseado. Luego, pulse 1 la tecla "INTRO". El símbolo " " indica a qué servidor está accediendo en ese momento desde 2 su consola. Para seleccionar un BANK - Belkin F1DA116Z | User Manual - Page 226
Utilización del conmutador KVM PRO3 Teclas de la página del menú principal ( ):: Dirigirse al campo siguiente (Intro): Para seleccionar una opción (F3): contraseña tienen ocho caracteres. El nombre y la contraseña predeterminados del administrador son: Nombre de usuario: admin Contraseña: belkin 32 - Belkin F1DA116Z | User Manual - Page 227
directo" y pulse "Intro" para seleccionar y guardar el ajuste. Tiempo de búsqueda automática (AutoScan) Especifica la cantidad de tiempo que el conmutador KVM PRO3 permanecerá en cada servidor antes de pasar al próximo servidor mientras se encuentra en el modo AutoScan. Puede establecer para el - Belkin F1DA116Z | User Manual - Page 228
ón, encontrará una lista completa de los comandos de teclado de acceso rápido que puede utilizar con el conmutador. KVM PRO3: Comando Barra de espaciado puerto [01,02.,,,16] BANK [00,01.,,,15] [01,02.,,,16] PgUP PgDown B S P A Borrar Función Activar OSD Host previo Host siguiente Conmutador - Belkin F1DA116Z | User Manual - Page 229
y Mac® 1 El teclado USB que está conectado al conmutador KVM PRO3 admite el teclado Sun en sus funciones especiales del entorno de sistema operativo Sun. Cuando 2 un conmutador KVM se conecta a un servidor Sun, el conmutador KVM emula las teclas de Sun utilizando una serie de combinaciones de - Belkin F1DA116Z | User Manual - Page 230
Belkin si requiere ayuda. Para actualizar el firmware, necesitará los siguientes elementos: 1. Un servidor individual que ejecute Windows 2000, XP o Vista. Este servidor NO debe conectarse a los puertos del servidor en el conmutador KVM PRO3. 2. Un puerto serie disponible en el servidor. 3. Un cable - Belkin F1DA116Z | User Manual - Page 231
. Vea la sección "Actualización del firmware" de este manual del usuario. P: ¿El conmutador KVM PRO3 es compatible con Microsoft® IntelliMouse®? R: El conmutador KVM PRO3 es compatible con ratones USB y PS/2 de Microsoft, Logitech®, Kensington®, etc., y Belkin. Póngase en contacto con el servicio - Belkin F1DA116Z | User Manual - Page 232
para funcionar. P: ¿Puedo utilizar el conmutador PRO3 KVM de mi servidor Sun que admite USB? R: Sí, el conmutador KVM PRO3 funcionará con cualquier servidor USB. P: ¿El conmutador KVM PRO3 es compatible con Linux? R: Sí, el conmutador KVM PRO3 funciona con Red Hat y otras distribuciones de - Belkin F1DA116Z | User Manual - Page 233
se obtiene un error de teclado durante el arranque. • Compruebe que el cable del teclado del conmutador KVM PRO3 está completamente conectado a su servidor. Apriete las conexiones flojas. • Compruebe si el legado del teclado USB es compatible con el sistema BIOS. • Si está haciendo uso del software - Belkin F1DA116Z | User Manual - Page 234
al puerto de la consola del conmutador KVM PRO3. • Apriete las conexiones flojas. no es detectado durante el arranque. • Compruebe los cables y asegúrese de que están insertados correctamente. para un ratón PS/2 o USB estándar o bien para un ratón PS/2 o USB compatible con Microsoft. • Asegúrese - Belkin F1DA116Z | User Manual - Page 235
cable USB a mi servidor USB y mi teclado y ratón no funcionan. 2 • Antes de conectar el conmutador KVM PRO3, asegúrese de que en cada servidor esté instalado el controlador HID USB. (Para instalar el controlador HID USB, conecte un ratón USB y un teclado USB Mac" de este manual de usuario. 6 - Belkin F1DA116Z | User Manual - Page 236
en serie unos con otros. Una cadena margarita de conmutadores KVM emplea ajustes comunes para permitir interacciones complejas y perfectas entre múltiples consolas para el control de varios servidores. HID:Human Interface Device (Dispositivo de interfaz humana), la clase de dispositivos USB que - Belkin F1DA116Z | User Manual - Page 237
normativas de la FCC. Su utilización está 5 6 Declaración de conformidad CE 7 Nosotros, Belkin International, Inc., declaramos bajo nuestra sola responsabilidad que los productos F1DA104Z, F1DA108Z, F1DA116Z, a los que 8 hace referencia la presente declaración, están en conformidad con el - Belkin F1DA116Z | User Manual - Page 238
no autorizadas de programas o sistemas. Cómo acceder a nuestros servicios. Para obtener asistencia sobre algún producto de Belkin, debe seguir los siguientes pasos: 1. Póngase en contacto con Belkin International, Inc en 501 W. Walnut St., Compton CA 90220, a la atención de: Servicio de atención al - Belkin F1DA116Z | User Manual - Page 239
O MÚLTIPLES, INCLUYENDO ENTRE OTROS LA PÉRDIDA DE NEGOCIO O BENEFICIOS QUE PUEDA SURGIR DE LA VENTA O EL EMPLEO DE 6 CUALQUIER PRODUCTO BELKIN, INCLUSO SI BELKIN HA SIDO INFORMADA DE LA POSIBILIDAD DE DICHOS DAÑOS. 7 Esta garantía le proporciona derechos legales específicos y también podr - Belkin F1DA116Z | User Manual - Page 240
Conmutador KVM PRO3OmniView® Belkin International Inc. 501 West Walnut Street, Compton, CA, 90220-5221 EE.UU. +1 310 898 1100 +1 310 898 1111 fax Belkin Ltd. Express Business Park Shipton Way, Rushden NN10 6GL, Reino Unido +44 (0) 1933 35 2000 +44 (0) 1933 31 2000 fax Belkin B.V. Boeing Avenue 333 - Belkin F1DA116Z | User Manual - Page 241
PRO3® OmniView Switch KVM UK FR DE NL ES IT Manuale duso F1DA104Zea F1DA108Zea F1DA116Zea - Belkin F1DA116Z | User Manual - Page 242
Switch KVM PRO3 11 Collegamento della console allo switch KVM PRO3 14 Collegamento dei server allo switch KVM PRO3 16 Collegamento di diversi switch KVM PRO3 (in configurazione daisy-chain 20 Avvio dei sistemi 25 4. Utilizzo dello Switch KVM PRO3 firmware 36 5. Domande frequenti 37 6. - Belkin F1DA116Z | User Manual - Page 243
di aggiornare il firmware. 6 Gli Switch KVM PRO3 si possono facilmente collegare tra loro in configurazione a cascata per arrivare a gestire fino a 256 server PS/2, USB da ununica console. 7 Inoltre gli Switch KVM PRO3 comprendono un garanzia di 3 anni Belkin. In questo Manuale Utente potete - Belkin F1DA116Z | User Manual - Page 244
consente di impostare lo Switch KVM PRO3 in modo tale che esso Switch KVM. • Porte dedicate per collegamenti in cascata È possibile collegare fino a 16 swich KVM in configurazione daisy-chain sfruttando le apposite porte dedicate e potendo quindi ampliare facilmente la propria configurazione KVM - Belkin F1DA116Z | User Manual - Page 245
KVM PRO3. In questo modo lo switch 7 KVM si manterrà sempre compatibile con i più recenti dispositivi e server. Gli aggiornamenti del firmware sono disponibili gratuitamente per tutta la durata dello Switch KVM PRO3 e si possono scaricare dal sito di assistenza Belkin 8 www.belkin.com/support - Belkin F1DA116Z | User Manual - Page 246
Descrizione generale Requisiti dellapparecchiatura Cavi: Per collegare lo Switch KVM PRO3 a un server è necessario un kit di microcavi a doppia porta Belkin Kit di microcavi a doppia porta Belkin: F1D9400-XX (PS/2) F1D9401-XX (USB) 4 - Belkin F1DA116Z | User Manual - Page 247
sezione Descrizione generale Belkin - Cavo per collegamento in cascata PRO3 Belkin F1D108-CBL 1 Nota: i codici prodotto e la disponibilità sono soggetti a variazioni. 2 3 4 5 ����F�1�D�1�0�8-�C�B�L� 6 7 8 5 - Belkin F1DA116Z | User Manual - Page 248
Switch KVM PRO3 è compatibile con le CPU collegate, tra le altre, alle seguenti piattaforme OS: • Windows® NT®, 95, 98, 2000, Me, XP, Server 2003, o VistaTM • Microsoft® DOS 5.x e successive • Red Hat® Linux® 8.x e successive • Novell® NetWare® 5.x • Mac OS® X e superiore (con supporto USB) • SunTM - Belkin F1DA116Z | User Manual - Page 249
Descrizione generale Diagrammi di visualizzazione dellunità 1 Vista anteriore dello switch KVM PRO3: LED per lidentificazione LED a 7 segmenti per 2 4 5 6 Sel�e�t�t�o�r��i�p�o��r�t�a�� ad �a�c�c�e��s�s��o diretto 7 Pulsanti di�s�c�o�r�r�i�m��e�n�t�o manuale BANCO 8 (F1DA108Zea) 7 - Belkin F1DA116Z | User Manual - Page 250
à Vista posteriore dello switch KVM PRO3: Co�n�f�i�g�u��r�a�z�i�o�n��e�daisy-chain in uscita S�e�l�e�z�i�o�n��e�d��i�B��A��N�C�O��S�witch Porte mouse/tastiera �co�n�s��o�l�e��P�S�/�2�e��V�G��A�P�o�r�t�e��m��o�u��s�e/ �ta�s�ti�e�r�a�c�o�n��s�o�l�e�U�S��B C�o�n�f�i�g��u�r�a�z�i�o��ne daisy-chain - Belkin F1DA116Z | User Manual - Page 251
a un massimo di 16 switch KVM OmniView 4 Nº di server supportati: 4, 8, 16 rispettivamente per i modelli a 4, 8 e 16 porte (max. 256 server tramite 438mm x 44.5mm x 190mm (F1DA116Zea) 438mm x 89mm x 190mm Peso: (F1DA104Zea) 2.4kg. (F1DA108Zea) 4.2kg. (F1DA116Zea) 5.5kg. Nota: le specifiche sono - Belkin F1DA116Z | User Manual - Page 252
una solida installazione su rack. Per lo switch KVM PRO3 a 4 porte è disponibile un kit opzionale di montaggio su rack per OmniView (F1D005). Per decidere dove posizionare lo switch, è necessario prendere in considerazione i seguenti aspetti: Switch KVM PRO3: • Se si intenda utilizzare o meno - Belkin F1DA116Z | User Manual - Page 253
and F1DA116Zea) 2 Gli switch KVM PRO3 a 16 porte comprendono staffe regolabili ideali per il montaggio su rack da 19 pollici. Le staffe di montaggio prevedono tre posizioni di regolazione per consentire una collocazione dello Switch KVM PRO3 da 3 portarlo a livello con le estremità delle guide - Belkin F1DA116Z | User Manual - Page 254
montaggio su rack OmniView (F1D005). Fase 1. Attaccare la staffa di montaggio su ogni lato dello switch KVM PRO3 a quattro porte servendosi delle viti Philips incluse. (vedere lo schema riportato di seguito). Fase 2. Montare lo Switch KVM PRO3 a quattro porte sul gruppo delle guide rack. (vedere lo - Belkin F1DA116Z | User Manual - Page 255
dal titolo "Collegamento di diversi Switch KVM PRO3 (in collegamento a cascata)" in questo Manuale Utente. 2 Lo Switch KVM PRO3 ora è montato correttamente sul rack e si può collegare alla console. 3 Nota per i possessori della serie Belkin PRO3 di prima generazione (F1DA104Tea, F1DA108Tea - Belkin F1DA116Z | User Manual - Page 256
VGA del monitor alla porta femmina HDDB15 sul retro dello Switch KVM PRO 2 nella sezione "Console". (vedere lo schema riportato di seguito). Fase 2 Collegare il cavo PS/2 o USB della tastiera alla porta per tastiera sul retro dello Switch KVM PRO3 per PMI nella sezione "Console". (vedere lo schema - Belkin F1DA116Z | User Manual - Page 257
Installazione Fase 3 1 Collegare il cavo PS/2 o USB della tastiera alla porta per tastiera sul retro dello Switch KVM PRO3 nella sezione "Console". (vedere lo schema riportato di seguito). 2 3 4 5 6 7 Nota:Utilizzare le periferiche di ingresso USB o PS/2 per collegarsi alla console. Se si - Belkin F1DA116Z | User Manual - Page 258
Installazione Collegamento dei server allo switch KVM PRO3 (Connessione PS/2): Fase 1 Assicurarsi che il server sia spento. Fase 2 Utilizzando il kit di microcavi a doppia porta di Belkin per PS/2 (F1D9400-XX), collegare il connettore VGA alla presa per il monitor prevista sul server. (vedere lo - Belkin F1DA116Z | User Manual - Page 259
sezione Installazione Fase 4 1 Collegare il kit di microcavi a doppia porta PS/2 Belkin alle porte host desiderate presenti nello Switch KVM PRO3. (vedere lo schema riportato di seguito). 2 3 4 5 6 Fase 5 7 Accendere il server. Fase 6 8 Ripetere le fasi da 1 a 5 per ogni altro server - Belkin F1DA116Z | User Manual - Page 260
Installazione Collegamento dei server allo switch KVM PRO3 (Connessione USB): Fase 1 Assicurarsi che il server sia acceso. Fase 2 Utilizzando il kit di microcavi a doppia porta di Belkin per PS/2 (F1D9400-XX), collegare il connettore VGA alla presa per il monitor prevista sul server. (vedere lo - Belkin F1DA116Z | User Manual - Page 261
di microcavi a doppia porta PS/2 Belkin alle porte host desiderate presenti nello Switch KVM PRO3. (vedere lo schema riportato di seguito). Il 2 server dovrebbe riconoscere automaticamente lo Switch KVM PRO3 ed installare eventuali driver HID USB necessari. 3 4 5 6 7 Fase 5 Ripetere le fasi - Belkin F1DA116Z | User Manual - Page 262
daisy-chain, lo Switch KVM PRO3 con tecnologia a micro-cavi (F1DA104Zea, F1DA108Zea, F1DA116Zea) deve essere designato come Switch KVM primario. (Vedere lo schema in basso). cable 1 Primary unit (BANK 00) cable 2 Secondary unit (BANK 01) cable 3 Secondary unit (BANK 02) Secondary unit (BANK - Belkin F1DA116Z | User Manual - Page 263
ON= posizione su; OFF = posizione giù Esempi: Quattro Switch KVM PRO3 a 8 porte (F1DA108Zea) vengono collegati in cascata per gestire fino a 32 server. Il DIP switch sullo switch KVM primario è impostato su "BANK 00" (impostazione predefinita) e ciascuna delle unità secondarie è impostata - Belkin F1DA116Z | User Manual - Page 264
configurazione in cascata cable 1 Primary unit (BANK 00) cable 2 Secondary unit (BANK 01) cable 3 Secondary unit (BANK 02) Secondary unit (BANK 03) Operazioni preliminari: Fase 1: Accertarsi che la console, tutti i server e gli Switch KVM PRO3 siano spenti e che ad ogni switch KVM sia stato - Belkin F1DA116Z | User Manual - Page 265
switch KVM PRO3 supplementari, se si vuole 7 creare un collegamento in cascata. Nota: Lo Switch KVM PRO3 è compatibile con le versioni precedenti degli 8 Switch KVM OmniView PRO3 Belkin con cablaggio standard (F1DA104T, F1DA108T, F1DA116T). Nella configurazione daisy-chain, lo Switch KVM PRO3 - Belkin F1DA116Z | User Manual - Page 266
: Se gli switch PRO3 PS/2 non vengono elencati correttamente, resettare lo switch master (BANCO 00) premendo contemporaneamente i pulsanti "BANK +" e "BANK -". Lo switch KVM primario si può resettare anche per rilevare eventuali nuovi switch KVM appena aggiunti. Se gli switch KVM continuano a non - Belkin F1DA116Z | User Manual - Page 267
Switch KVM PRO3 porte occupate per verificare che tutti i server siano collegati e rispondano correttamente. Se si riscontrasse un errore, controllare i cavi collegati al server in 5 questione e riavviare. Se il problema persiste, vedere la sezione "Risoluzione dei problemi" di questo manuale - Belkin F1DA116Z | User Manual - Page 268
ad essere utilizzati. Selezionare i server connessi mediante i selettori di porta ad accesso diretto previsti sul pannello anteriore dello switch KVM PRO3, utilizzando lOn-Screen Display oppure attraverso i tasti di scelta rapida della tastiera della console. Trascorreranno circa 1-2 secondi prima - Belkin F1DA116Z | User Manual - Page 269
sezione Utilizzo dello Switch KVM PRO3 Nel caso gli switch siano configurati in struttura daisy-chain, si può passare da un BANCO allaltro (switch KVM) premendo "Bloc Scorr", "Bloc Scorr", "Pag su" 1 per passare al BANCO precedente. Premere "Bloc Scorr", "Bloc Scorr", "Pag giù" per passare al - Belkin F1DA116Z | User Manual - Page 270
BANK +" e "BANK -" dello switch KVM primario sarà possibile alternare tra gli switch KVM collegati a catena. Premendo entrambi i pulsanti contemporaneamente si eseguirà il reset dello Switch KVM PRO3. Il pulsante "BANK 02. Il pulsante "BANK +" consente di passare questo pulsante "BANK -" si passa - Belkin F1DA116Z | User Manual - Page 271
per evitare errori di dati e sincronizzazione. Se lutente stesse utilizzando il mouse o la tastiera quando lo switch KVM PRO3 esegue la commutazione delle porte, il flusso di dati potrebbe interrompersi e causare un movimento confuso del mouse e/o linserimento di caratteri sbagliati dalla - Belkin F1DA116Z | User Manual - Page 272
visualizza il BANCO attualmente selezionato e i server collegati a tale BANCO. Se nella propria configurazione è stato previsto un unico switch KVM PRO3, il menu OSD visualizza "BANK 00". Un simbolo " "serve ad indicare che il server collegato è alimentato. Comandi della tastiera per il menu OSD - Belkin F1DA116Z | User Manual - Page 273
sezione Utilizzo dello Switch KVM PRO3 Per alternare da un server allaltro utilizzando il menu OSD, principale consente di: • 01 - Impostare la lingua per lOSD • 02 - Modificare i nomi delle singole porte. • 03 - Ricercare una porta attraverso il nome • 04 - Assegnare nomi utenti e password. • 05 - Belkin F1DA116Z | User Manual - Page 274
Utilizzo dello Switch KVM PRO3 Comandi su tastiera per la Pagina principale del menu. ( ):: Passaggio al campo successivo (Invio): Scegliere una delle caratteri consentito per i campi nome utente e password è otto. Il nome predefinito dellamministratore è: Nome utente: admin La password è: belkin 32 - Belkin F1DA116Z | User Manual - Page 275
sezione Utilizzo dello Switch KVM PRO3 Elenco di acesso 1 Questa funzione consente di specificare ogni singolo accesso da parte dellutente alla porta.**?** Laccesso allelenco è consentito solo allamministratore. La colonna di sinistra elenca i nomi delle porte. Gli utenti sono elencati in base - Belkin F1DA116Z | User Manual - Page 276
selezione rapida utilizzabili con lo Switch KVM PRO3: Comando Barra spaziatrice Funzione Attivazione OSD Host precedente Host successivo [01,02.,,,16] porte Switch KVM non abilitato per configurazione in daisy-chain [01,02.,,,15] BANCO [01,02.,,,16] porte Configurazione in cascata: La prima - Belkin F1DA116Z | User Manual - Page 277
Mappatura dei tasti combo Sun e Mac® 1 La tastiera USB collegata allo switch KVM PRO3 non supporta la tastiera Sun per lesecuzione di alcune funzioni specifiche previste nel sistema operativo 2 Sun. Quando il kit di microcavi a doppia porta Belkin è collegato ad un server Sun, il modulo di - Belkin F1DA116Z | User Manual - Page 278
per tutta la durata dello switch KVM PRO3. Per eseguire laggiornamento del firmware, scaricare il rispettivo file e la utility da www.belkin.com/support/ La utility vi guiderà attraverso il processo di aggiornamento del firmware sullo Switch KVM PRO3. Avvertenza: Si consiglia vivamente di - Belkin F1DA116Z | User Manual - Page 279
sul mercato. Vedere la sezione "Aggiornamento del firmware" di questo manuale utente. 8 Q: Lo switch KVM PRO3 supporta Microsoft IntelliMouse®? A: Lo Switch KVM PRO3 supporta i mouse Microsoft, Logitech PS/2 USB®, Kensington®, ecc., e Belkin. Qualora si presentino problemi di compatibilit - Belkin F1DA116Z | User Manual - Page 280
funzionare lo Switch KVM PRO3 rileva lalimentazione dalle porte PS/2 e USB presenti sul server. Q: Posso utilizzare lo Switch KVM PRO3 sul mio server Sun che supporta lo standard USB? A: Sì, lo Switch KVM PRO3 funziona con ogni server conforme allo standard USB. Q: Lo switch KVM PRO3 supporta Linux - Belkin F1DA116Z | User Manual - Page 281
errore tastiera. • Accertarsi che il cavo della tastiera sullo Switch KVM PRO3 sia completamente collegato al server. Serrare eventuali collegamenti lenti. • Accertarsi che il supporto legacy per la tastiera USB - Belkin F1DA116Z | User Manual - Page 282
delle porte, USB oppure ad un mouse compatibile con i server Microsoft PS/2 o USB. • Accertarsi che non siano installati altri driver del mouse nei file "CONFIG.SYS" oppure "AUTOEXEC.BAT". • Evitare di muovere il mouse o di premere il pulsante del mouse durante la commutazione dello switch KVM PRO3 - Belkin F1DA116Z | User Manual - Page 283
Switch KVM PRO3, accertarsi che il driver HID USB sia installato su ciascun server. (Per installare il driver HID USB, collegare un mouse USB ed una tastiera USB Vedere la sezione "mappatura dei 5 tasti Mac Combo per server Sun" nel manuale duso. I tasti di avvio Apple® come C (per riavvio dal CD - Belkin F1DA116Z | User Manual - Page 284
loro in serie. Una struttura composta da diversi switch KVM collegati in cascata utilizza delle impostazioni comuni per consentire lesecuzione di interazioni continue e complesse tra diverse console, per garantire il controllo su numerosi server. HID:Human Interface Device, un dispositivo USB che - Belkin F1DA116Z | User Manual - Page 285
porte per i server. 1 OSD: On-Screen Display, uninterfaccia grafica che può essere utilizzata dallutente per controllare e configurare lo switch KVM. 2 Porta: Una presa di interfaccia su un server attraverso la quale si può collegare un dispositivo o il cavo di un dispositivo. Switch KVM - Belkin F1DA116Z | User Manual - Page 286
possano causare un funzionamento anomalo. Dichiarazione di conformità CE Noi sottoscritti, Belkin International, Inc. dichiariamo sotto la nostra piena responsabilità che i prodotti F1DA104Z, F1DA108Z, F1DA116Z ai quali questa dichiarazione fa riferimento, sono realizzati in conformità allo Standard - Belkin F1DA116Z | User Manual - Page 287
del servizio di garanzia. 2 Per usufruire dellassistenza per il proprio prodotto Belkin, è necessario: 1. Contattare la Belkin International, Inc. allindirizzo 501 W. Walnut St., Compton 3 CA 90220, att.: Customer Service oppure chiamare il numero (800)-223-5546, entro 15 giorni dallevento - Belkin F1DA116Z | User Manual - Page 288
PRO3® OmniView Switch KVM Belkin International, Inc. 501 West Walnut Street, Compton, CA 90220-5221 USA +1 310 898 1100 +1 310 898 1111 fax Belkin Ltd. Express Business Park Shipton Way, Rushden NN10 6GL, Regno Unito +44 (0) 1933 35 2000 +44 (0) 1933 31 2000 fax Belkin B.V. Boeing Avenue 333 1119
-
 1
1 -
 2
2 -
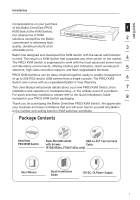 3
3 -
 4
4 -
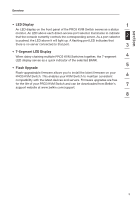 5
5 -
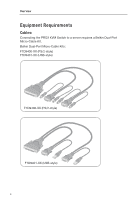 6
6 -
 7
7 -
8
-
9
-
10
-
11
-
12
-
13
-
14
-
15
-
16
-
17
-
18
-
19
-
20
-
21
-
22
-
23
-
24
-
25
-
26
-
27
-
28
-
29
-
30
-
31
-
32
-
33
-
34
-
35
-
36
-
37
-
38
-
39
-
40
-
41
-
42
-
43
-
44
-
45
-
46
-
47
-
48
-
49
-
50
-
51
-
52
-
53
-
54
-
55
-
56
-
57
-
58
-
59
-
60
-
61
-
62
-
63
-
64
-
65
-
66
-
67
-
68
-
69
-
70
-
71
-
72
-
73
-
74
-
75
-
76
-
77
-
78
-
79
-
80
-
81
-
82
-
83
-
84
-
85
-
86
-
87
-
88
-
89
-
90
-
91
-
92
-
93
-
94
-
95
-
96
-
97
-
98
-
99
-
100
-
101
-
102
-
103
-
104
-
105
-
106
-
107
-
108
-
109
-
110
-
111
-
112
-
113
-
114
-
115
-
116
-
117
-
118
-
119
-
120
-
121
-
122
-
123
-
124
-
125
-
126
-
127
-
128
-
129
-
130
-
131
-
132
-
133
-
134
-
135
-
136
-
137
-
138
-
139
-
140
-
141
-
142
-
143
-
144
-
145
-
146
-
147
-
148
-
149
-
150
-
151
-
152
-
153
-
154
-
155
-
156
-
157
-
158
-
159
-
160
-
161
-
162
-
163
-
164
-
165
-
166
-
167
-
168
-
169
-
170
-
171
-
172
-
173
-
174
-
175
-
176
-
177
-
178
-
179
-
180
-
181
-
182
-
183
-
184
-
185
-
186
-
187
-
188
-
189
-
190
-
191
-
192
-
193
-
194
-
195
-
196
-
197
-
198
-
199
-
200
-
201
-
202
-
203
-
204
-
205
-
206
-
207
-
208
-
209
-
210
-
211
-
212
-
213
-
214
-
215
-
216
-
217
-
218
-
219
-
220
-
221
-
222
-
223
-
224
-
225
-
226
-
227
-
228
-
229
-
230
-
231
-
232
-
233
-
234
-
235
-
236
-
237
-
238
-
239
-
240
-
241
-
242
-
243
-
244
-
245
-
246
-
247
-
248
-
249
-
250
-
251
-
252
-
253
-
254
-
255
-
256
-
257
-
258
-
259
-
260
-
261
-
262
-
263
-
264
-
265
-
266
-
267
-
268
-
269
-
270
-
271
-
272
-
273
-
274
-
275
-
276
-
277
-
278
-
279
-
280
-
281
-
282
-
283
-
284
-
285
-
286
-
287
-
288
 |
 |
OmniView
®
PRO3
KVM Switch
User Manual
F1DA104Zea
F1DA108Zea
F1DA116Zea
UK
FR
DE
NL
ES
IT