BenQ 9H.J1P77.Q4A User Manual - Page 24
Adjusting the projected image, Auto-adjusting the image
 |
UPC - 840046016791
View all BenQ 9H.J1P77.Q4A manuals
Add to My Manuals
Save this manual to your list of manuals |
Page 24 highlights
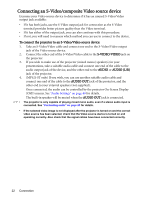
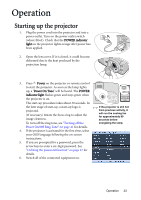
7. The projector will start to search for input signals. The current input signal being scanned displays in the upper left corner of the screen. If the projector doesn't detect a valid signal, the message "No Signal" will continue displaying until an input signal is found. You can also press SOURCE on the projector or remote control to select your desired input signal. See "Switching input signal" on page 30 for details. If the frequency/resolution of the input signal exceeds the projector's operating range, you will see the message "Out of Range" displayed on a blank screen. Please change to an input signal which is compatible with the projector's resolution or set the input signal to a lower setting. See "Timing chart" on page 61 for details. Adjusting the projected image Adjusting the projection angle The projector is equipped with 1 quick-release adjuster foot and 1 rear adjuster foot. These adjusters change the image height and projection angle. To adjust the projector: 1. Press the quick-release button and lift the front of the projector. Once the image is positioned where you want it, release the quick-release button to lock the foot in position. 2. Screw the rear adjuster foot to fine tune the horizontal angle. To retract the foot, hold up the projector while 2 1 pressing the quick-release button, then slowly lower the projector. Screw the rear adjuster foot in a reverse • Do not look into the lens direction. while the lamp is on. The strong light from the lamp If the projector is not placed on a flat surface or the may cause damage to screen and the projector are not perpendicular to your eyes. each other, the projected image becomes trapezoidal. To correct this situation, see "Correcting keystone" on • Be careful when you page 25 for details. press the quick-release button as it is close to the exhaust vent where hot air comes from. Auto-adjusting the image In some cases, you may need to optimize the picture quality. To do this, press AUTO on the projector or remote control. Within 3 seconds, the built-in Intelligent Auto Adjustment function will re-adjust the values of Frequency and Clock to provide the best picture quality. The current source information will be displayed in the corner of the screen for 3 seconds. • The screen will be blank while AUTO is functioning. • This function is only available when a PC signal (analog RGB) is selected. 24 Operation
-
 1
1 -
2
-
3
-
4
-
5
-
6
-
7
-
8
-
9
-
10
-
11
-
12
-
13
-
14
-
15
-
16
-
17
-
18
-
 19
19 -
 20
20 -
 21
21 -
 22
22 -
 23
23 -
 24
24 -
 25
25 -
 26
26 -
 27
27 -
 28
28 -
 29
29 -
30
-
31
-
32
-
33
-
34
-
35
-
36
-
37
-
38
-
39
-
40
-
41
-
42
-
43
-
44
-
45
-
46
-
47
-
48
-
49
-
50
-
51
-
52
-
53
-
54
-
55
-
56
-
57
-
58
-
59
-
60
-
61
-
62
-
63
-
64
-
65
-
66
 |
 |
