Bosch DB18C3100R2 Installation Guide - Page 30
Quick Installation, Switching
 |
View all Bosch DB18C3100R2 manuals
Add to My Manuals
Save this manual to your list of manuals |
Page 30 highlights
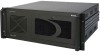
30 en | Quick Installation DiBos/DiBos Micro 4 Quick Installation This chapter describes how to put the device into operation quickly and easily. Main connections 1. Connect the cameras to the video inputs. 2. Make sure that the HW dongle is connected to the parallel interface (if you are handling a device that has been supplied with a HW dongle). 3. Connect the VGA monitor. 4. Connect the mouse and keyboard. Optional connections The optional connections can be added after the system is configured. 1. Connect monitor A and monitor B to connections A and B. 2. Connect up to 32 alarm inputs (for DiBos micro: 12). 3. Connect up to 16 relay outputs (for DiBos micro: 12). 4. Connect your network via the Ethernet port. 5. Connect customer-operated ATMs, foyer card reader, radio clock and alarm panel. Switching on 1. Switch on all connected devices. 2. Plug the power cable into the video system. 3. Switch on the video system (On/Off switch on the front). The computer boots up. First-time use Once the boot routine is complete, 1 image/second is stored for every camera connected. The user interface is automatically displayed. This shows images from all connected cameras in a multi-image view. If no images are displayed for a camera, check the camera connection. You are not yet logged on as a user. You can, however, start the Configuration wizard. Quick configuration with the help of the Configuration wizard 1. Start the Configuration wizard in the System menu > Configuration wizard. 2. Carry out a quick configuration in the Configuration wizard or load an existing configuration onto the system. F.01U.033.308 | V7 | 2009.09 Installation Guide Bosch Sicherheitssysteme GmbH
-
 1
1 -
2
-
3
-
4
-
5
-
6
-
7
-
8
-
9
-
10
-
11
-
12
-
13
-
14
-
15
-
16
-
17
-
18
-
19
-
20
-
21
-
22
-
23
-
24
-
 25
25 -
 26
26 -
 27
27 -
 28
28 -
 29
29 -
 30
30 -
 31
31 -
 32
32 -
 33
33 -
 34
34 -
 35
35 -
36
-
37
-
38
-
39
-
40
-
41
-
42
-
43
-
44
-
45
-
46
-
47
-
48
-
49
-
50
-
51
-
52
-
53
-
54
-
55
-
56
-
57
-
58
-
59
-
60
-
61
-
62
-
63
-
64
-
65
-
66
-
67
-
68
-
69
-
70
-
71
-
72
-
73
-
74
-
75
-
76
-
77
-
78
-
79
-
80
-
81
-
82
-
83
-
84
-
85
-
86
-
87
-
88
-
89
-
90
-
91
-
92
-
93
-
94
-
95
-
96
-
97
-
98
-
99
-
100
-
101
-
102
-
103
-
104
-
105
-
106
-
107
-
108
-
109
-
110
-
111
-
112
-
113
-
114
-
115
-
116
-
117
-
118
-
119
-
120
-
121
-
122
-
123
-
124
-
125
-
126
-
127
-
128
-
129
-
130
-
131
-
132
-
133
-
134
-
135
-
136
-
137
-
138
-
139
-
140
-
141
-
142
-
143
-
144
-
145
-
146
-
147
-
148
-
149
-
150
-
151
-
152
-
153
-
154
-
155
-
156
-
157
-
158
 |
 |
