Bosch SRV53C13UC Instructions for Use - Page 75
Securing The Dishwasher, Sliding The Dishwasher Into Place, Leveling The Dishwasher, Attaching
 |
View all Bosch SRV53C13UC manuals
Add to My Manuals
Save this manual to your list of manuals |
Page 75 highlights
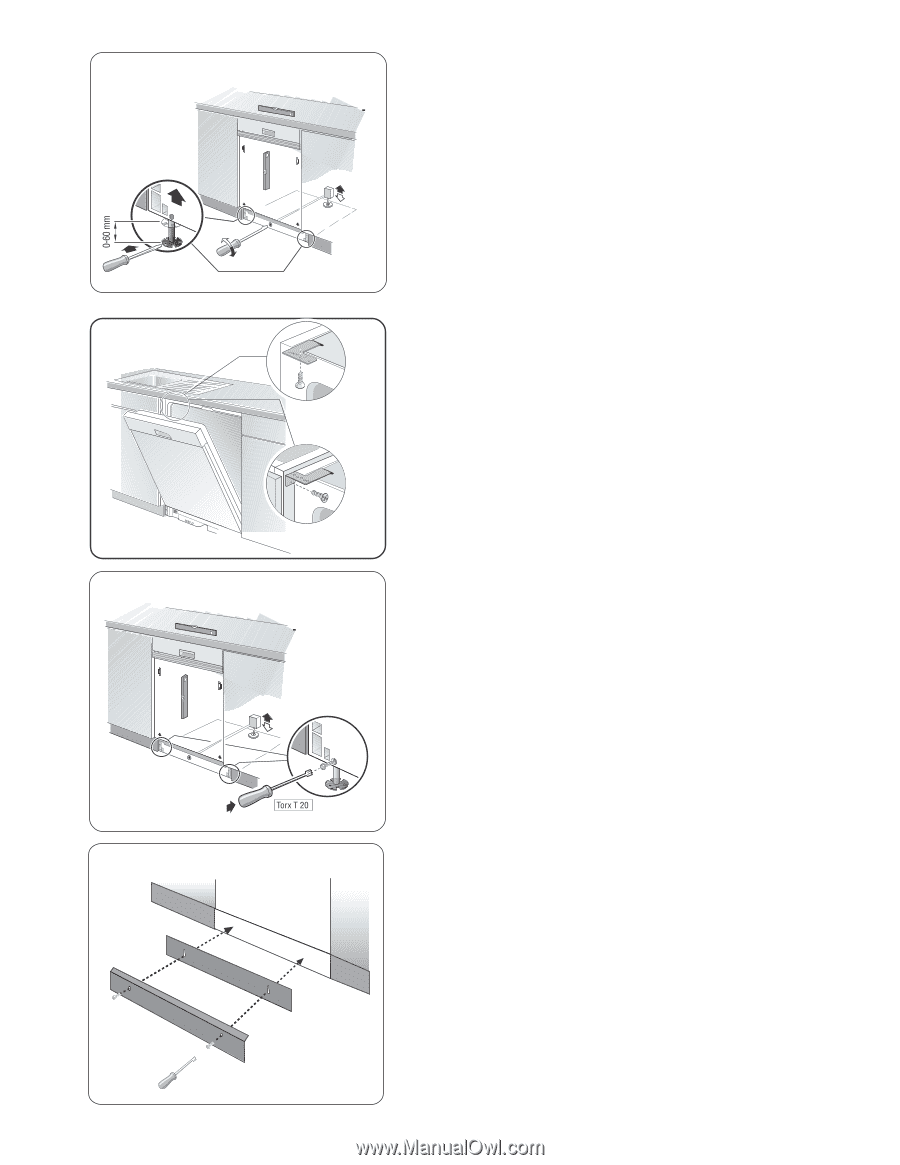
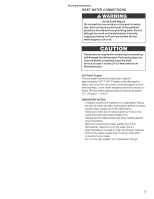
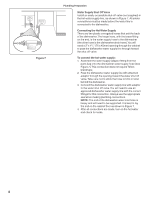
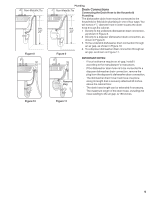
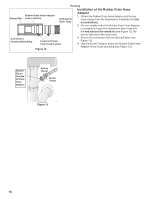
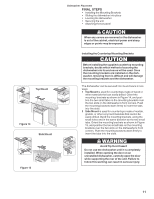
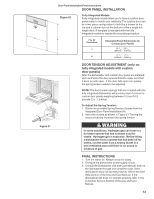
Figure 16 Top Mount Figure 17 Figure 18 Dishwasher Placement SLIDING THE DISHWASHER INTO PLACE The unit should now be ready to slide into the cabinet opening. To avoid scratching the floor, use floor protection and caution when sliding the dishwasher into the cabinet. Make sure that the hoses and cords do not bunch up behind the unit or kink as you slide the unit back. Make certain to slide the unit into place before raising the leg levelers. Side Mount LEVELING THE DISHWASHER Make sure the dishwasher is level. Adjust the rear leveler by turning the center screw at the front of the dishwasher, as shown in Figure 16. Turning the screw clockwise raises the rear of the dishwasher. Adjust the front levelers as shown in Figure 16. Turning the levelers to the right raises the dishwasher. SECURING THE DISHWASHER 1. Drive the mounting screws through the holes in the mounting brackets as shown in Figure 17 for Top or Side Mount. 2. After the unit is installed in the enclosure, leveled and secured, lock the two front leg levelers in place by driving the enclosed leg leveler locking screws into each screw boss located in front of the levelers. See Figure 18. 3. Tighten screws until they are flush with the surface of the bosses. ATTACHING THE TOE PANEL Your dishwasher comes with a two-piece toe panel to allow height adjustment. 1. Position the slotted rear toe panel on the dishwasher first. Allow it to rest on the floor. 2. Position the mating front toe panel on top of the rear toe panel allowing the angled edge to rest on the mating edge of the dishwasher. 3. Drive the two black screws (included) through the hole in the toe panel to secure. Use the supplied screws to avoid damaging the dishwasher. See Figure 19. Figure 19 12
-
 1
1 -
2
-
3
-
4
-
5
-
6
-
7
-
8
-
9
-
10
-
11
-
12
-
13
-
14
-
15
-
16
-
17
-
18
-
19
-
20
-
21
-
22
-
23
-
24
-
25
-
26
-
27
-
28
-
29
-
30
-
31
-
32
-
33
-
34
-
35
-
36
-
37
-
38
-
39
-
40
-
41
-
42
-
43
-
44
-
45
-
46
-
47
-
48
-
49
-
50
-
51
-
52
-
53
-
54
-
55
-
56
-
57
-
58
-
59
-
60
-
61
-
62
-
63
-
64
-
65
-
66
-
67
-
68
-
69
-
 70
70 -
 71
71 -
 72
72 -
 73
73 -
 74
74 -
 75
75 -
 76
76 -
 77
77 -
 78
78 -
 79
79 -
 80
80 -
81
-
82
-
83
-
84
-
85
-
86
-
87
-
88
-
89
-
90
-
91
-
92
-
93
-
94
-
95
-
96
-
97
-
98
-
99
-
100
-
101
-
102
-
103
-
104
-
105
-
106
 |
 |