Bose Acoustimass 16 Series II Owner's guide - Page 8
English, Français, Español - how to wire
 |
View all Bose Acoustimass 16 Series II manuals
Add to My Manuals
Save this manual to your list of manuals |
Page 8 highlights
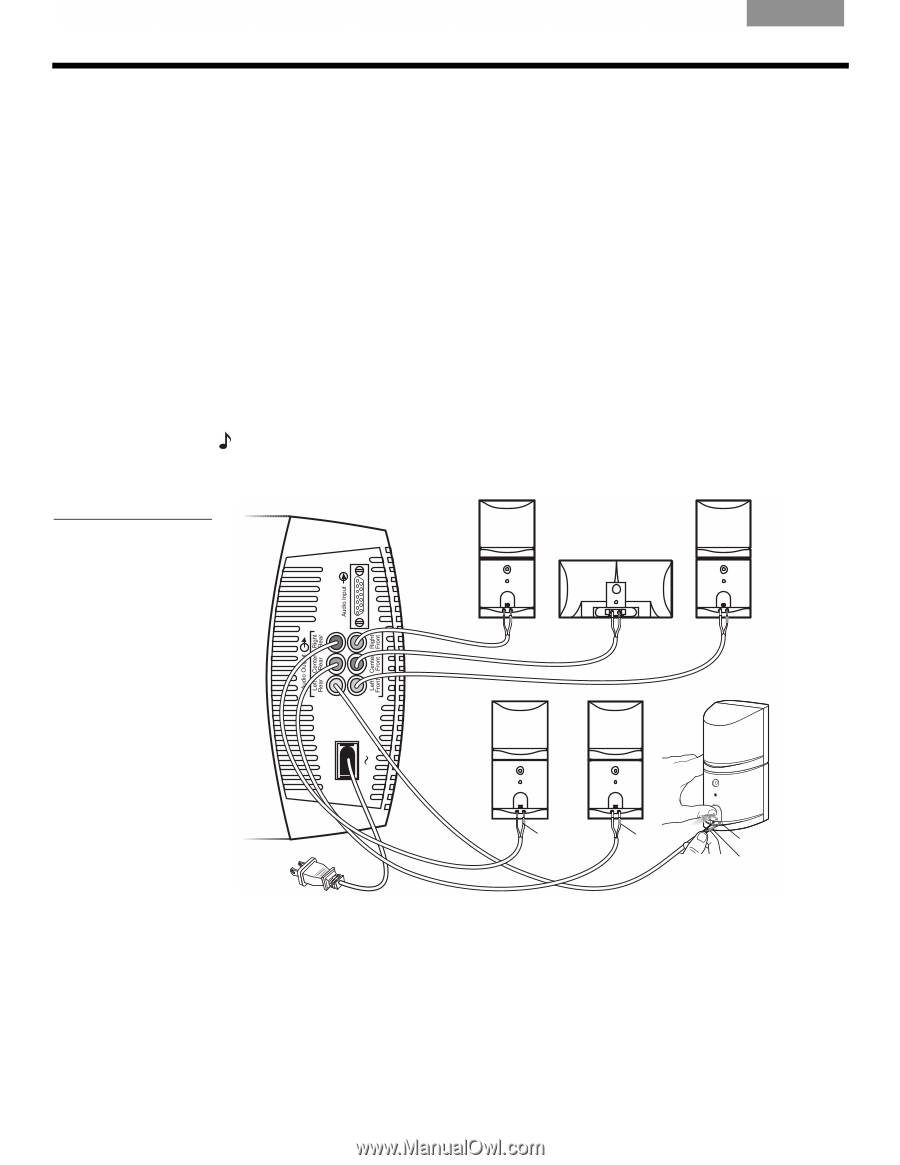
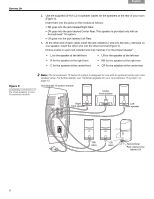
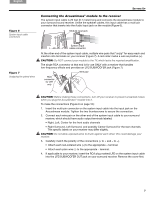
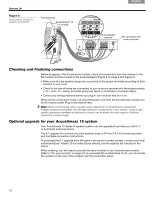
SETTING UP Français Español English 2. Use the supplied 50-ft (15.2 m) speaker cables for the speakers at the rear of your room (Figure 5). Insert them into the jacks on the module as follows: • RR goes into the jack labeled Right Rear. • CR goes into the jack labeled Center Rear. This speaker is provided only with an Acoustimass® 16 system. • LR goes into the jack labeled Left Rear. 3. At the other end of each cable, insert the red collared (+) wire into the red (+) terminal on one speaker. Insert the other wire into the other terminal (Figure 5). Notice a label on each red collared wire that matches it to the proper speaker: • L for the speaker at the left front • R for the speaker at the right front • C for the speaker at the center front • LR for the speaker at the left rear • RR for the speaker at the right rear • CR for the speaker at the center rear Figure 5 Completing connections of the small speakers to your Acoustimass module Note: The Acoustimass 15 Series III system is designed for use with an optional center rear cube speaker array. For further details, see "Optional upgrade for your Acoustimass 15 system" on page 10. Acoustimass 16 system module Center front speaker Right front speaker Left front speaker RR label CR label Red terminal Red collared wire labeled LR 8
-
 1
1 -
2
-
 3
3 -
 4
4 -
 5
5 -
 6
6 -
 7
7 -
 8
8 -
 9
9 -
 10
10 -
 11
11 -
 12
12 -
 13
13 -
14
-
15
-
16
-
17
-
18
-
19
-
20
-
21
-
22
-
23
-
24
-
25
-
26
-
27
-
28
-
29
-
30
-
31
-
32
-
33
-
34
-
35
-
36
-
37
-
38
-
39
-
40
-
41
-
42
-
43
-
44
 |
 |