Brother International AX325 Owner's Manual - English - Page 12
Replacing, cassette, daisy, wheel
 |
View all Brother International AX325 manuals
Add to My Manuals
Save this manual to your list of manuals |
Page 12 highlights
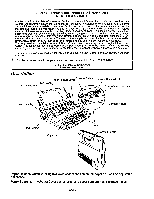
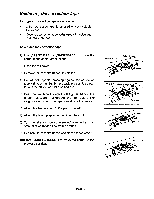
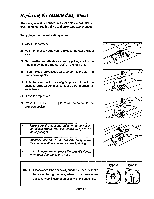
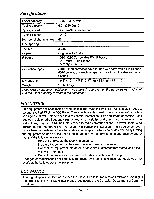
Replacing the cassette daisy wheel The daisy wheel is housed in a clear plastic cassette for easy, damage-free handling and quick typeface changes. To replace the cassette daisy wheel: 1) Open the top cover. Lev =r 2) Pull the lever towards you to release the daisy wheel lock. 3) Remove the cassette daisy wheel by pulling it out of the machine by the protruding "ear" on the top right. 4) Insert the desired cassette daisy wheel into the slot and $ press down gently. 5) Slide the lever back to its original position to lock the r(g cassette daisy wheel in place. Make sure to press the lever firmly. 6) Close the top cover. 7) Press [CODE] + [RESET] to move the carrier to the previous position. • Make sure the cassette daisy wheel is not insertedbackwards. The "ear"shouldalways be on the upper right. • Improper insertion of the cassette daisy wheel may cause malfunction and incorrect printing. • It is not necessary to remove the cassette ribbon when replacing the daisy wheel. NOTE Please check the shape of your daisy wheel cassette before replacing the daisy wheel. The daisy wheel cassette type B cannot be used with this machine. - Page 12 - fl) Type A Type B
-
 1
1 -
2
-
3
-
4
-
5
-
6
-
 7
7 -
 8
8 -
 9
9 -
 10
10 -
 11
11 -
 12
12 -
 13
13 -
 14
14 -
 15
15 -
 16
16
 |
 |
