Canon 6864A001AA Software Starter Guide DC SD Ver.4 - Page 36
Printing from PhotoRecord from Windows NT 4.0/Windows 2000
 |
UPC - 013803001983
View all Canon 6864A001AA manuals
Add to My Manuals
Save this manual to your list of manuals |
Page 36 highlights
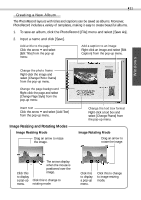
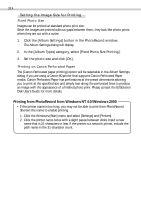
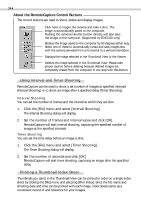
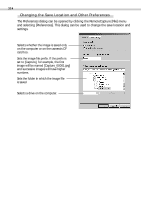
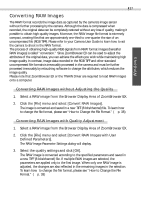
32 Setting the Image Size for Printing Fixed Photo Size Images can be printed at standard photo print size. Since the images are printed without gaps between them, they look like photo prints when they are cut with a cutter. 1. Click the [Album Settings] button in the PhotoRecord window. The Album Settings dialog will display. 2. In the [Album Types] category, select [Fixed Photo Size Printing]. 3. Set the photo size and click [OK]. Printing on Canon Perforated Paper The [Canon Perforated paper printing] option will be selectable in the Album Settings dialog if you are using a Canon BJ printer that supports Canon Perforated Paper media. Canon Perforated Paper has perforations at the preset dimensions allowing you to print at the specified size and simply tear along the perforated lines to produce an image with the appearance of a finished photo print. Please consult the BJ Solution Disk User's Guide for more details. Printing from PhotoRecord from Windows NT 4.0/Windows 2000 • If the printer name is too long, you may not be able to print from PhotoRecord. Shorten the name to enable printing. 1. Click the Windows [Start] menu and select [Settings] and [Printers]. 2. Click the printer name twice with a slight pause between clicks. Input a new name that is 31 characters or less. If the printer is a network printer, include the path name in the 31-character count.
-
 1
1 -
2
-
3
-
4
-
5
-
6
-
7
-
8
-
9
-
10
-
11
-
12
-
13
-
14
-
15
-
16
-
17
-
18
-
19
-
20
-
21
-
22
-
23
-
24
-
25
-
26
-
27
-
28
-
29
-
30
-
 31
31 -
 32
32 -
 33
33 -
 34
34 -
 35
35 -
 36
36 -
 37
37 -
 38
38 -
 39
39 -
 40
40 -
 41
41 -
42
-
43
-
44
-
45
-
46
-
47
-
48
-
49
-
50
-
51
-
52
-
53
-
54
-
55
-
56
-
57
-
58
-
59
-
60
-
61
-
62
-
63
-
64
-
65
-
66
-
67
-
68
-
69
-
70
-
71
-
72
-
73
-
74
-
75
-
76
-
77
-
78
-
79
-
80
-
81
-
82
-
83
-
84
-
85
-
86
-
87
-
88
-
89
-
90
-
91
-
92
-
93
-
94
-
95
-
96
-
97
-
98
-
99
-
100
-
101
-
102
-
103
-
104
-
105
-
106
-
107
-
108
 |
 |
