Canon imageCLASS MF3240 imageCLASS MF3200 Series Software Guide - Page 81
Click [OK]., Follow the instructions on the screen - wireless
 |
View all Canon imageCLASS MF3240 manuals
Add to My Manuals
Save this manual to your list of manuals |
Page 81 highlights
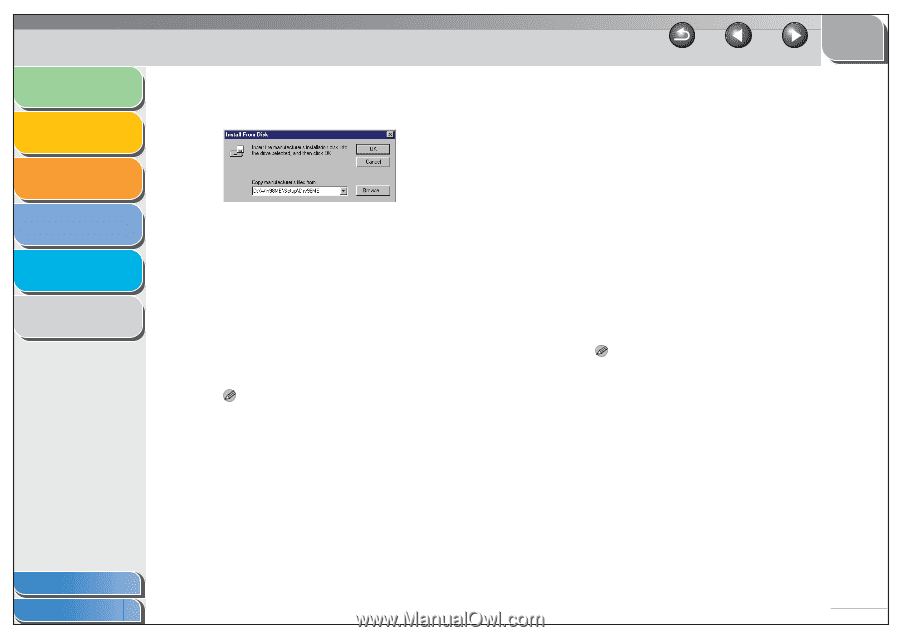
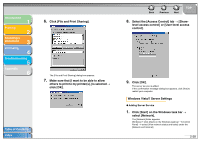
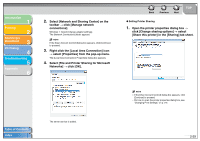
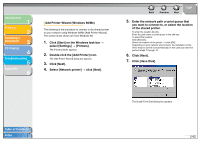
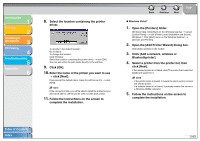
Introduction 1 Printing 2 Scanning a Document 3 PC Faxing 4 Troubleshooting 5 Appendix 6 8. Select the location containing the printer driver. To specify in the default location: Go to step 9. To change the location: Click [Browse]. Select the location containing the printer driver → click [OK]. You can also enter the path name directly in the edit box. 9. Click [OK]. 10. Enter the name of the printer you want to use → click [Next]. If you accept the default name, leave the edit box as it is → click [Next]. NOTE If the connection fails, you will be able to install the printer but you will not be able to use the printer until it comes back online. 11. Follow the instructions on the screen to complete the installation. Back Previous Next TOP ● Windows Vista/7 1. Open the [Printers] folder. Windows Vista: Click [Start] on the Windows task bar → select [Control Panel] → click [Printer] under [Hardware and Sound]. Windows 7: Click [Start] menu on the Windows task bar → [Devices and Printers] 2. Open the [Add Printer Wizard] dialog box. Click [Add a printer] on the toolbar. 3. Click [Add a network, wireless or Bluetoothprinter]. 4. Select a printer from the printer list, then click [Next]. If the desired printer is not listed, click [The printer that I want isn't listed] and search for it. NOTE - If the printer name is invalid, it means the client cannot connect the shared printer. - If a suitable driver is not found, it probably means the server is a Windows 98/Me computer. 5. Follow the instructions on the screen to complete the installation. Table of Contents Index 2-63
-
 1
1 -
2
-
3
-
4
-
5
-
6
-
7
-
8
-
9
-
10
-
11
-
12
-
13
-
14
-
15
-
16
-
17
-
18
-
19
-
20
-
21
-
22
-
23
-
24
-
25
-
26
-
27
-
28
-
29
-
30
-
31
-
32
-
33
-
34
-
35
-
36
-
37
-
38
-
39
-
40
-
41
-
42
-
43
-
44
-
45
-
46
-
47
-
48
-
49
-
50
-
51
-
52
-
53
-
54
-
55
-
56
-
57
-
58
-
59
-
60
-
61
-
62
-
63
-
64
-
65
-
66
-
67
-
68
-
69
-
70
-
71
-
72
-
73
-
74
-
75
-
 76
76 -
 77
77 -
 78
78 -
 79
79 -
 80
80 -
 81
81 -
 82
82 -
 83
83 -
 84
84 -
 85
85 -
 86
86 -
87
-
88
-
89
-
90
-
91
-
92
-
93
-
94
-
95
-
96
-
97
-
98
-
99
-
100
-
101
-
102
-
103
-
104
-
105
-
106
-
107
-
108
-
109
-
110
-
111
-
112
-
113
-
114
-
115
-
116
-
117
-
118
-
119
-
120
-
121
-
122
-
123
-
124
-
125
-
126
-
127
-
128
-
129
-
130
-
131
-
132
-
133
-
134
-
135
-
136
-
137
-
138
-
139
-
140
-
141
-
142
-
143
-
144
-
145
-
146
-
147
-
148
-
149
-
150
-
151
-
152
-
153
-
154
-
155
-
156
-
157
-
158
-
159
-
160
-
161
-
162
-
163
-
164
-
165
-
166
-
167
-
168
-
169
-
170
-
171
-
172
-
173
-
174
-
175
-
176
-
177
-
178
-
179
-
180
-
181
-
182
-
183
-
184
-
185
-
186
-
187
-
188
-
189
-
190
-
191
-
192
-
193
-
194
-
195
-
196
-
197
-
198
-
199
-
200
-
201
-
202
-
203
-
204
-
205
-
206
-
207
-
208
-
209
-
210
-
211
-
212
-
213
-
214
-
215
-
216
-
217
-
218
-
219
-
220
-
221
-
222
-
223
-
224
-
225
-
226
 |
 |