Casio CW-75 User Guide - Page 10
Part 1 - Getting Acquainted - software
 |
UPC - 079767163815
View all Casio CW-75 manuals
Add to My Manuals
Save this manual to your list of manuals |
Page 10 highlights
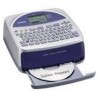
Part 1 - Getting Acquainted This part of the manual provides you with important general information about your printer. About the Bundled CD-ROM and CD-R Note the following precautions whenever handling or storing the bundled CDROM and CD-R. About This Manual This manual covers operation of the CW-75 DISC TITLE PRINTER only. For details about using the label layout software that comes bundled with the printer, see the User's Guide on the DISC TITLE PRINTER Application CDROM. Important! • In this manual, the term "printer" refers to the CASIO CW-75 DISC TITLE PRINTER. • In this manual, the term "label layout software" refers to the DISC TITLE PRINTER application. Handling Precautions • When handling the disc, avoid getting finger smudges, dirt, scratches, etc. on either of its surfaces. • Should the disc become dirty, use an eyeglass cleaning cloth or some other soft cloth to wipe it lightly from the center of the disc outwards towards its edge. Never use phonograph record cleaner or any other cleaning agent. • Never write on either of the disc's surfaces with a pen or pencil, or affix a sticker to the disc surfaces. • Use of a disc that is cracked or deformed, or a disc that has adhesive on it is dangerous. Never use such a disc. Storage Precautions • Avoid storing discs in areas subjected to high temperature, high humidity, or direct sunlight. • When you are not using a disc, store it in its original case or in a commercially available CD case. • Avoid storing a disc so its label comes in direct contact with the surface of a vinyl case, bag, etc. Warning! Never play a CD-ROM disc on any device that is not specifically designed to play back CD-ROM discs. Audio output at a high volume setting creates the risk of damaged hearing and damage to audio speakers. Key Operations • Required key operations are indicated in text by bold characters or the graphic image of the applicable key. Example: Press 1 and then SET. • The symbols x, z, c, and v indicate cursor key operations. Important! Note that the key markings and display images shown in this manual may differ somewhat from those on the actual product. E 8
-
 1
1 -
2
-
3
-
4
-
 5
5 -
 6
6 -
 7
7 -
 8
8 -
 9
9 -
 10
10 -
 11
11 -
 12
12 -
 13
13 -
 14
14 -
 15
15 -
16
-
17
-
18
-
19
-
20
-
21
-
22
-
23
-
24
-
25
-
26
-
27
-
28
-
29
-
30
-
31
-
32
-
33
-
34
-
35
-
36
-
37
-
38
-
39
-
40
-
41
-
42
-
43
-
44
-
45
-
46
-
47
-
48
-
49
-
50
-
51
-
52
-
53
-
54
-
55
-
56
-
57
-
58
-
59
-
60
-
61
-
62
-
63
-
64
-
65
-
66
-
67
-
68
-
69
-
70
 |
 |
