Casio CW-75 User Guide - Page 58
Performing a Demo Print
 |
UPC - 079767163815
View all Casio CW-75 manuals
Add to My Manuals
Save this manual to your list of manuals |
Page 58 highlights
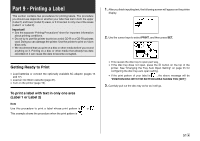
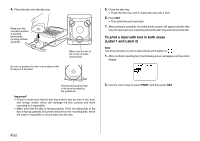
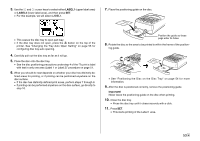
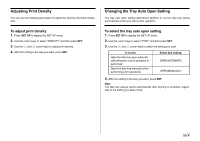
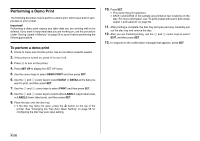
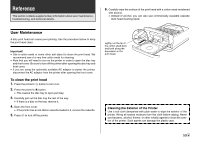
Performing a Demo Print The following describes how to perform a demo print, which uses built-in sample data to print a label. Important! Performing a demo print causes any label data you are working with to be deleted. If you want to keep label data you are working on, use the procedure under "Saving Labels in Memory" on page 50 to save it before performing the following procedure. To perform a demo print 1. Check to make sure that the printer has an ink ribbon cassette loaded. 2. If the printer is turned on, press ] to turn it off. 3. Press [ to turn on the printer. 4. Press SET UP to display the SET UP menu. 5. Use the cursor keys to select DEMO PRINT and then press SET. 6. Use the x and z cursor keys to select DATA1 or DATA2 as the data you want to print, and then press SET. 7. Use the x and z cursor keys to select PRINT and then press SET. 8. Use the c and v cursor keys to select either LABEL1 (upper label area) or LABEL2 (lower label area), and then press SET. 9. Place the disc onto the disc tray. • If the disc tray does not open, press the button on the top of the printer. See "Changing the Tray Auto Open Setting" on page 55 for configuring the disc tray auto open setting. 10. Press SET. • This starts the print operation. • DATA1 and DATA2 of the sample are printed at two locations on the disc. For more information, see "To print a label with text in both areas (Label 1 and Label 2)" on page 52. 11. After printing is complete, the disc tray will open part way. Carefully pull out the disc tray and remove the disc. 12. After you are finished printing, use the x and z cursor keys to select EXIT, and then press SET. 13. In response to the confirmation message that appears, press SET. E 56
-
 1
1 -
2
-
3
-
4
-
5
-
6
-
7
-
8
-
9
-
10
-
11
-
12
-
13
-
14
-
15
-
16
-
17
-
18
-
19
-
20
-
21
-
22
-
23
-
24
-
25
-
26
-
27
-
28
-
29
-
30
-
31
-
32
-
33
-
34
-
35
-
36
-
37
-
38
-
39
-
40
-
41
-
42
-
43
-
44
-
45
-
46
-
47
-
48
-
49
-
50
-
51
-
52
-
 53
53 -
 54
54 -
 55
55 -
 56
56 -
 57
57 -
 58
58 -
 59
59 -
 60
60 -
 61
61 -
 62
62 -
 63
63 -
64
-
65
-
66
-
67
-
68
-
69
-
70
 |
 |
