Coby CT-P8700 Operation Guide - Page 6
Tone/Pulse
 |
View all Coby CT-P8700 manuals
Add to My Manuals
Save this manual to your list of manuals |
Page 6 highlights
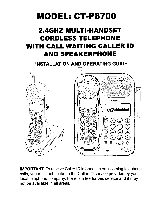
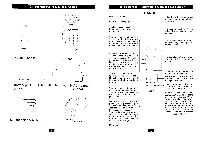
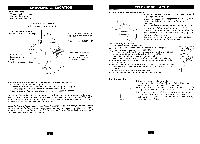
CHOOSING A LOCATION Do the following: • Choose the best location • Connect the phone • Choose the dialing mode Away from VCRs and TV sets and other electronic equipment Away from heat sources, such as radiators, air ducts, and sunlight 0 Away from noicse sources such as a window by a street with heavy traffic Away from a personal computer Near a central location and on a level surface Away from a microwave oven 0 Away from excessive moisture, extremely low temperatures, dust, mechanical vibration, or shock Where you place the phone affects the reception quality of the handset: • Away from another cordless telephone • Place the base near an AC electrical outlet and near telephone line jack • Place the base away from metal walls and metal file cabinets • Raise the base unit's antenna making sure it points towards the ceiling CAUTION: The cordless telephone operates at a frequency that may cause interference to nearby TVs and VCRs; the base phone should not be placed near, or on top of a TV or VCR. If interference is experienced, moving the cordless telephone farther away from the TV or VCR will often reduce or eliminate the interference. Note: While the 2.4GHz frequency is inherently clearer, we suggest that you do not use this phone withing 20 feet of a working microwave. The microwave produces frequencies in this range which may cause interference. This interference is normal for all 2.4GHz phones and should not be considered a product defect. TELEPHONE SETUP Connecting the base and charge unit 1.Connect the telephone line cord the ••LINE•' jack and to a telephone outlet. 2.Connect the AC power adapters to the 9V DC jack in the base and charge unit and to an AC outlet respectively. Note: Use only the supplied AC power adapter. Do not use any other AC power adapter. Connect the AC power adapter to a continuous power supply. Place the phone close to the AC outlet so that you can plug in the AC power adapter easily. Tip: If your telephone outlet is not modular, contact your telephone company for assistance. Wall Mounting Instruction: 1. Remove the handset from the base. 2. Turn the base over so the under-side of the base faces you. 3. Adjust the base to the wall mount position, 4. Plug the supplied 7-foot telephone cord into the LINE jack on the e telephone cord into the LINE jack on the telephone. 5. Connect the telephone line cord to the wall jack. 6. Insert the AC adapter into the 9V DC jack on the top of the base. 7. Run the cables down through the cable channel to allow for flush wall mounting. 8. Slip the telephone base onto the wall, lining up the wall mounting holes over the screws. Slide the telephone base down so it is firmly in place. 9. Return the handset to the telephone base. 10. Plug the other end of the AC adapter into the AC outlet. Tone/Pulse Switch I Tone / Pulse Switch 1. Choose the correct dialing mode. 2. Select the dialing mode Tone (Tone) or Pulse (Pulse) by setting the switch at the back of the base unit. Note: Changes to the switch position during a call do not take effect until the call has ended. Tip: If you are unsure of the proper dialing mode, make a trial call with the dial mode setting to Tone. If the call connects, Leave the switch as is (Tone mode), otherwise ,set to Pulse.
-
 1
1 -
 2
2 -
 3
3 -
 4
4 -
 5
5 -
 6
6 -
 7
7 -
 8
8 -
 9
9 -
 10
10 -
 11
11 -
 12
12 -
13
-
14
-
15
-
16
 |
 |
