Coby CT-P8700 Operation Guide - Page 7
Telephone, Setup, Basic, Operation
 |
View all Coby CT-P8700 manuals
Add to My Manuals
Save this manual to your list of manuals |
Page 7 highlights
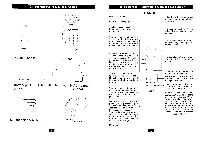
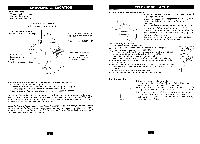
TELEPHONE SETUP To Install the Battery To install the 3.6V 600mAh cordless handset battery pack(see the sketch map on page 4): 1.Slide open the battery compartment door on the back of the handset. 2.Plug the battery connector into the 2-pin connector in the battery compartment, and then insert the battery. 3.Close the battery compartment door. 4.Place the handset on the base unit cradle. 5.Onece you have installed the battery pack and place the handset on the base you will hear a tone indicating the handset has connected with the base and will successfully charge. 6.IMPORTANT: Charge the battery pack for at least 12 hours before using the handset the first time. 7.The CHARGE LED on the base illuminates when the handset is properly making contact with the charge terminals. Battery Duration A fully charged battery lasts for approximately: • 5 hours when you use the handset continuously (talk time). • 5 days when the handset is not in use (standby). When the Battery Needs Charging LOW BATTERY 02" 12/25 .-39 • The display will show "LOW BATTERY". When to Purchase a New Battery Pack If the battery lasts only a few minutes even after a full charge, the usable life of the battery has expired and needs to be replaced. Replacement batteries can be purchased through most local electronic outlets. The Headset Jack The headset jack is located on the side of the handset and is a standard 2.5mm plug. Simply plug a headset into the jack and the headset will be active. Note: When the headset is plugged into the telephone ,the microphone and earpiece on the handset are not active Headset(Included) Headset Jack BASIC OPERATION Making Calls With the handset: 1.Pick up the handset from the base and press O. TALK 2.Wait until you hear a dial tone, and then dial the number you wish to dial. 3.When you are finished talking, press the CD key or place the unit back into the base to end the call. Note: The IN USE light on the base will illuminate when the line is active. With the speakerphone: 1.Press -.CD.The speaker LED will light. :0 02" ID:, -LI 2.Wait until you hear a dial tone, and then dial the number you wish to dial. 3.When you are finished talking, press the key to end the call. Receiving Calls With the handset: When you hear the phone ring: 1.If the handset is in the base, lift the handset from the base. The handset will turn on . There is no need to push the al key if the unit is on the base when the call comes in. This auto-answer feature can be programmed off (see handset settings page 16). 2.11the handset is off the base the display, you will need to press to answer the call . RING TALK Note: If you are subscribed to caller ID service, The Caller ID information will display after the first ring. 3.When you are finished, push CD or place the handset back on the base. With the speakerphone: When you hear the phone ring: 1.Press ,.„.O • 2.When you are finished talking, press the Okey. Redialing With the handset: 1.Press ®17 x . TALK 2.Wait until you hea a dial tone, and then press RE'PA) to redial the last number dialed using the handset (up to 32 digits . Note: You can also press REPA) first to display the number and then press CTAIl)( to dial the number displayed. With the speakerphone: 1.Press . 2.Press REPA) to redial the last number dialed from either the handset or the speakerphone (up to 32 digits).
-
 1
1 -
 2
2 -
 3
3 -
 4
4 -
 5
5 -
 6
6 -
 7
7 -
 8
8 -
 9
9 -
 10
10 -
 11
11 -
 12
12 -
13
-
14
-
15
-
16
 |
 |
