Compaq 470007-802 Deskpro EN Series of Personal Computers Maintenance and Serv
Compaq 470007-802 - Deskpro EN - 256 MB RAM Manual
 |
View all Compaq 470007-802 manuals
Add to My Manuals
Save this manual to your list of manuals |
Compaq 470007-802 manual content summary:
- Compaq 470007-802 | Deskpro EN Series of Personal Computers Maintenance and Serv - Page 1
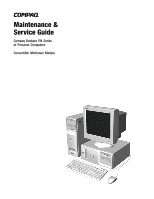
Maintenance & Service Guide Compaq Deskpro EN Series of Personal Computers Convertible Minitower Models - Compaq 470007-802 | Deskpro EN Series of Personal Computers Maintenance and Serv - Page 2
& Service Guide Compaq Deskpro EN Series of Personal Computers Convertible Minitower Part number 200803-002 Spare part number 201843-001 The complete MSG follows this addendum. This addendum contains changes to the original document. 2000 Compaq Computer Corporation. COMPAQ and the Compaq logo - Compaq 470007-802 | Deskpro EN Series of Personal Computers Maintenance and Serv - Page 3
Audio cover Spare Part Number 203967-001 179997-001 217055-001 203139-001 219817-001 Warranty Tier B B B B D ✎ System board 217055-001 does not support front-mounted audio. Computers with this board installed will not have a speaker mounted in the chassis but will have a piezo speaker mounted on - Compaq 470007-802 | Deskpro EN Series of Personal Computers Maintenance and Serv - Page 4
Specifications - Graphics Controller nVIDIA TNT2 Pro Graphics Controller Resolution Real-Time 3D Shading 640 x 480 800 x 600 1024 x 768 1152 x 864 1280 x 1024 1600 x 1200 1800 x 1440 1920 x 1080 1920 x 1200 256, 65K, 16.7M 256, 65K, 16.7M 256, 65K, 16.7M 256, 65K 256, 65K 256 65K 256 256/65K - Compaq 470007-802 | Deskpro EN Series of Personal Computers Maintenance and Serv - Page 5
Service Notes ! WARNING: Removing the heatsink from the processor destroys the integrity of the thermal interface pad between the two parts. Whenever the heatsink is removed - Compaq 470007-802 | Deskpro EN Series of Personal Computers Maintenance and Serv - Page 6
Maintenance & Service Guide Compaq Deskpro EN Series of Personal Computers Convertible Minitower Models - Compaq 470007-802 | Deskpro EN Series of Personal Computers Maintenance and Serv - Page 7
or nondisclosure agreement. The software may be used or copied only in accordance with the terms of the agreement. Maintenance & Service Guide Compaq Deskpro EN Series of Personal Computers Convertible Minitower Models Second Edition (September 2000) First Edition (June 2000) Part Number 200803 - Compaq 470007-802 | Deskpro EN Series of Personal Computers Maintenance and Serv - Page 8
CONTENTS preface About This Guide Symbols and Conventions ...vii Technician Notes ...vii Locating Additional Information viii chapter 1 Product Description 1.1 Model Overview ...1-2 1.2 System Design...1-2 1.3 Preinstalled Software ...1-3 1.3.1 Ordering Additional Software 1-3 1.4 Computer - Compaq 470007-802 | Deskpro EN Series of Personal Computers Maintenance and Serv - Page 9
Cleaning the Monitor 3-5 3.2.5 Cleaning the Mouse 3-5 3.3 Service Considerations...3-6 3.3.1 Power Supply Fan 3-6 3.3.2 Tools and Expansion Board 4-22 4.13.3 Installing a PCI Expansion Board 4-23 4.14 Board Guide ...4-25 4.15 Internal Speaker ...4-26 4.16 System Memory ...4-27 4.16.1 DIMMs - Compaq 470007-802 | Deskpro EN Series of Personal Computers Maintenance and Serv - Page 10
6.1.5 System Memory Map 6-5 6.2 Drives...6-6 6.2.1 1.44-MB Diskette Drive 6-6 6.2.2 Ultra ATA Hard Drives 6-7 6.2.3 CD-ROM Drives 6-8 6.3 Compaq Keyboards...6-9 6.4 2-Button Mouse...6-9 6.5 Supported Graphics Resolutions 6-10 6.5.1 Intel 3D Graphics 6-10 6.5.2 nVIDIA TNT 3D AGP 6-10 chapter - Compaq 470007-802 | Deskpro EN Series of Personal Computers Maintenance and Serv - Page 11
ABOUT THIS GUIDE This Maintenance & Service Guide is a troubleshooting and repair guide that can be used for reference when servicing the Compaq Deskpro EN Series of Personal Computers. Only authorized technicians trained by Compaq should attempt to repair this equipment. Compaq Computer Corporation - Compaq 470007-802 | Deskpro EN Series of Personal Computers Maintenance and Serv - Page 12
is available to support these products: ! User Documentation ! Technical Training Guides ! Compaq Service Advisories and Bulletins ! Compaq QuickFind ! Technical Reference Guide ! Compaq Quick Reference Guide ! Compaq Service Reference Guide ! Compaq Quick Troubleshooting Guide viii About This - Compaq 470007-802 | Deskpro EN Series of Personal Computers Maintenance and Serv - Page 13
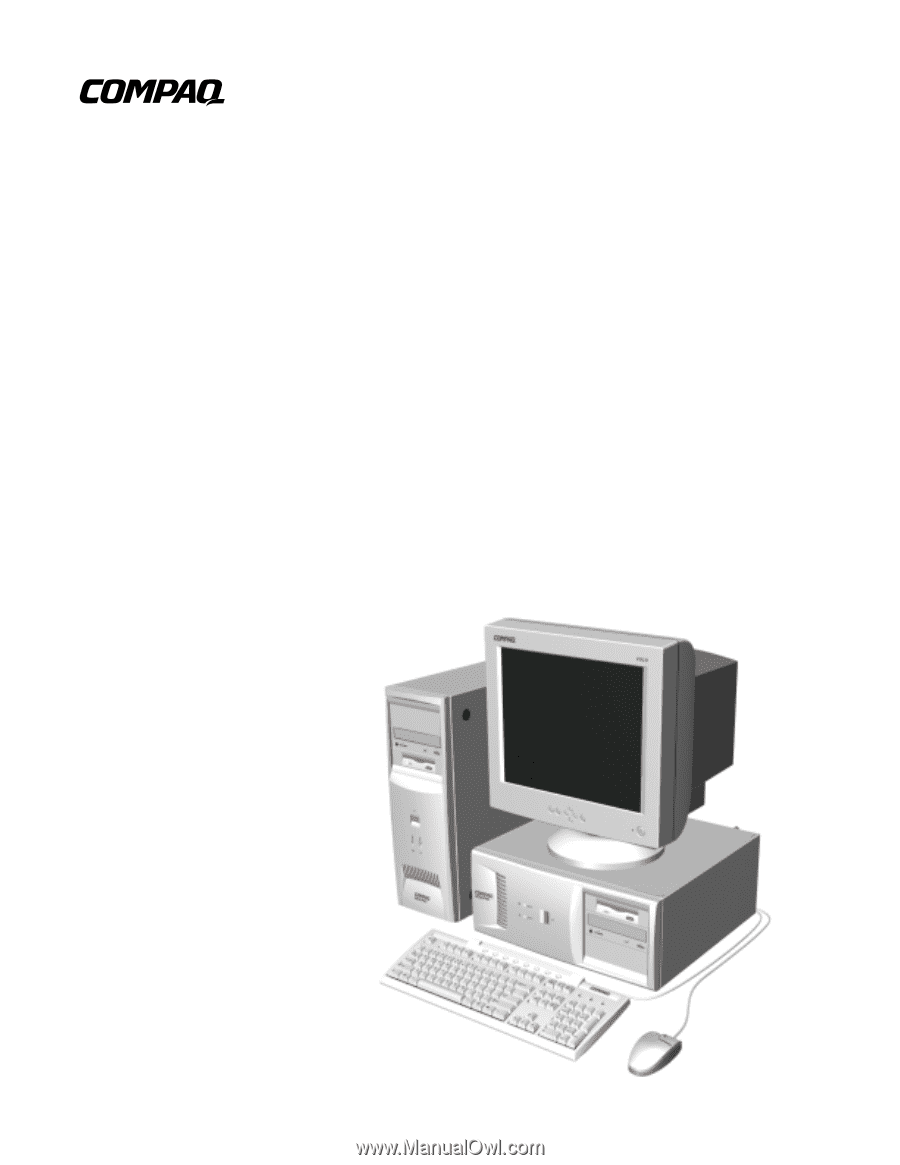
1 chapter PRODUCT DESCRIPTION This chapter describes the model features of the Compaq Deskpro EN Series Convertible Minitower model of Personal Computers. Compaq Deskpro EN Series of Personal Computers 1-1 - Compaq 470007-802 | Deskpro EN Series of Personal Computers Maintenance and Serv - Page 14
. ✎ The Compaq Deskpro EN Series guide screws are provided in the front of the chassis. ! The minitower model of this computer may be converted to a desktop configuration, or the desktop to a minitower. See Chapter 4, "Removal and Replacement Procedures," for additional information and instructions - Compaq 470007-802 | Deskpro EN Series of Personal Computers Maintenance and Serv - Page 15
system, and also contains the following preloaded software: ! ROM-based Setup utilities ! Compaq Diagnostics for Windows ! Compaq support software and device drivers ! Online Safety & Comfort Guide (English only) ! Intelligent Manageability ! Power Management with Energy Saver features ! Security - Compaq 470007-802 | Deskpro EN Series of Personal Computers Maintenance and Serv - Page 16
Deskpro EN Series of Personal Computers ship with a mouse and keyboard. Some models are also equipped with a CD-ROM drive. A Compaq color monitor or other compatible monitor does not ship with the computer. Front Panel Controls and LEDs Ref. Component/Function Ref. Component/Function 1 Power - Compaq 470007-802 | Deskpro EN Series of Personal Computers Maintenance and Serv - Page 17
and mouse ports are interchangeable Component Serial Connectors RJ-45 Connector Microphone Connector Headphone/Line-Out Audio Connector Line-In Audio Connector Parallel Port Connector Compaq Deskpro EN Series of Personal Computers 1-5 - Compaq 470007-802 | Deskpro EN Series of Personal Computers Maintenance and Serv - Page 18
drive ✎ Drive bay numbers are stamped on the chassis. To verify the type and size of the mass storage devices installed in the computer, run Compaq Computer Setup. 1-6 Product Description - Compaq 470007-802 | Deskpro EN Series of Personal Computers Maintenance and Serv - Page 19
Windows. ✎ If the system board is replaced with a spare part from Compaq, the invalid serial number condition will be recognized during POST. The original be reentered through Computer Setup. Refer to the Software Reference Guide for more information. CAUTION: A system board borrowed from another - Compaq 470007-802 | Deskpro EN Series of Personal Computers Maintenance and Serv - Page 20
is available to support these products: ! User Documentation ! Technical Training Guides ! Compaq Service Advisories and Bulletins ! Compaq QuickFind ! Technical Reference Guide ! Compaq Quick Reference Guide ! Compaq Service Reference Guide ! Compaq Quick Troubleshooting Guide 1-8 Product - Compaq 470007-802 | Deskpro EN Series of Personal Computers Maintenance and Serv - Page 21
2 chapter SPARE PARTS ✎ The Compaq Deskpro EN Series, Intel 815e chipset models will be referred to in this MSG as 815e. Compaq Deskpro EN Series of Personal Computers 2-1 - Compaq 470007-802 | Deskpro EN Series of Personal Computers Maintenance and Serv - Page 22
2.1 System Unit System Unit Spare Parts Description 1 Access panel 2 Front bezel 3 Chassis/basepan 4 Logo Kit, Deskpro EN (1 ea., DT and MT) 5 Power switch with cable, LED and switch holder 6 Feet 7 Power supply, 200 Watt Spare Part Number Not spared 166868-001 Not spared 210004-001 Not spared - Compaq 470007-802 | Deskpro EN Series of Personal Computers Maintenance and Serv - Page 23
Warranty Tier B B B B B ✎ Ultra ATA/100 hard drives are backwards compatible with Ultra ATA/66 devices; however, the data transfer rate is reduced to 66MB/sec. Compaq Deskpro EN Series of Personal Computers 2-3 - Compaq 470007-802 | Deskpro EN Series of Personal Computers Maintenance and Serv - Page 24
2.3 Cables Cables Description Cable Kit includes: Spare Part Number 166879-002 1 Diskette drive cable MEJD twist, 11”, with pull tab, center polarization (143218-001) 2 40-position IDE data cable, 12.5” (105876-001) 4 IDE Ultra ATA dual device, hard drive/CD-ROM cable, 18”, with pull tab, - Compaq 470007-802 | Deskpro EN Series of Personal Computers Maintenance and Serv - Page 25
-001 170081-001 192014-001 192011-001 192007-001 192008-001 192009-001 192006-001 192010-001 192012-001 187498-001 *Not shown. Warranty Tier B B B B B B B B B B B B Compaq Deskpro EN Series of Personal Computers 2-5 - Compaq 470007-802 | Deskpro EN Series of Personal Computers Maintenance and Serv - Page 26
2.5 Keyboards Keyboards (not illustrated) Description Easy Access Keyboard-US Spare Part Number 123130-xxx USB Easy Access Keyboard-US 173304-xxx Enhanced, Smart Card-US 125761-xxx Basic, Smart Card-US Spacesaver, Opal Arabic Belgian Brazilian BHCSY (Bosnia-Herzegovina, Croatia, Slovenia, - Compaq 470007-802 | Deskpro EN Series of Personal Computers Maintenance and Serv - Page 27
-069) * 6-32 x 3/16 hi-top, thread-forming screw with serrations (5 ea.) (192308-003) * M3 x 5mm, hi-top, taptite screw with serrations (3 ea.) (247348-001) * cap (179333-002) *Not shown Spare Part Number 179180-001 Warranty Tier D Compaq Deskpro EN Series of Personal Computers 2-7 - Compaq 470007-802 | Deskpro EN Series of Personal Computers Maintenance and Serv - Page 28
Plastics Kit Description Miscellaneous Plastics Kit, includes: 1 Panel, sub (166835-001) 2 Bezel, blank (166775-001) 3 Diskette bezel (166776-001) 4 Card guide (166778-001) 5 Foot, rubber (4 ea.) (166939-002) 6 Button, power (166774-001) 7 Drivelock, DT (166779-001) 8 Spring, power button (166837 - Compaq 470007-802 | Deskpro EN Series of Personal Computers Maintenance and Serv - Page 29
and above) 207609-001 Logo Kit EN/EX, includes: 210004-001 * Logo plate, DT (166806-005) * Logo plate, MT (166806-006) *Not shown Warranty Tier D B D D D D Compaq Deskpro EN Series of Personal Computers 2-9 - Compaq 470007-802 | Deskpro EN Series of Personal Computers Maintenance and Serv - Page 30
-002 2.10 Documentation and Software Documentation and Software (not illustrated) Description Maintenance & Service Guide (desktop & minitower) Illustrated Parts Map Service Reference Guide Quick Troubleshooting Guide Spare Part Number 201843-001 203722-001 152611-001 153837-001 2-10 Spare - Compaq 470007-802 | Deskpro EN Series of Personal Computers Maintenance and Serv - Page 31
Adherence to the procedures and precautions described in this chapter is essential for proper service. CAUTION: When the computer is plugged into an AC power source there is plastic tubes, trays, or Styrofoam. ✎ 700 volts can degrade a product. Compaq Deskpro EN Series of Personal Computers 3-1 - Compaq 470007-802 | Deskpro EN Series of Personal Computers Maintenance and Serv - Page 32
3.1.2 3.1.3 Preventing Electrostatic Damage to Equipment Many electronic components are sensitive to ESD. Circuitry design and structure determine the degree of sensitivity. The following proper packaging and grounding precautions are necessary to prevent damage to electric components and - Compaq 470007-802 | Deskpro EN Series of Personal Computers Maintenance and Serv - Page 33
Static-dissipative table or floor mats with hard tie to ground ! Field service kits ! Static awareness labels ! Wrist straps and footwear straps providing one- shielding bags ! Transparent metallized shielding bags ! Transparent shielding tubes Compaq Deskpro EN Series of Personal Computers 3-3 - Compaq 470007-802 | Deskpro EN Series of Personal Computers Maintenance and Serv - Page 34
3.2 3.2.1 3.2.2 Routine Care General Cleaning Safety Precautions 1. Never use solvents or flammable solutions to clean the computer. 2. Never immerse any parts in water or cleaning solutions; apply any liquids to a clean cloth and then use the cloth on the component. 3. Always turn off the computer - Compaq 470007-802 | Deskpro EN Series of Personal Computers Maintenance and Serv - Page 35
any debris from the ball socket and wipe the ball with a clean dry cloth before reassembly. ! To clean the mouse body, follow the procedures in 3.2.2. Compaq Deskpro EN Series of Personal Computers 3-5 - Compaq 470007-802 | Deskpro EN Series of Personal Computers Maintenance and Serv - Page 36
power source before opening the computer to prevent system board or component damage. Tools and Software Requirements To service the computer, you need the following: ! Torx T-15 screwdriver (Compaq screwdriver with bits PN 161946-001) ! Flat-bladed screwdriver (may sometimes be used in place of the - Compaq 470007-802 | Deskpro EN Series of Personal Computers Maintenance and Serv - Page 37
by parts being removed or replaced. CAUTION: When servicing this computer, ensure that cables are placed in years. See Chapter 4, "Removal and Replacement Procedures," for instructions on the replacement procedures. ! WARNING: This computer contains Compaq Deskpro EN Series of Personal Computers 3-7 - Compaq 470007-802 | Deskpro EN Series of Personal Computers Maintenance and Serv - Page 38
this chapter is essential for proper service. After completing all necessary removal the Drivelocks ♦ 4.13.2 Removing an Expansion Board 4.14 Board Guide 4.15 Internal Speaker 4.16 System Memory 4.17 Graphics Cards 4.18 removing drivelock. Compaq Deskpro EN Series of Personal Computers 4-1 - Compaq 470007-802 | Deskpro EN Series of Personal Computers Maintenance and Serv - Page 39
discharged of static electricity by briefly touching a grounded metal object. For more information, refer to Chapter 3, "Removal and Replacement Preliminaries." ✎ The Compaq Deskpro EN Series, Intel 815e chipset models will be referred to in this MSG as 815e. 4-2 Removal and Replacement Procedures - Compaq 470007-802 | Deskpro EN Series of Personal Computers Maintenance and Serv - Page 40
Grasp the open side of the logo plate (left side if a desktop, bottom if a minitower) and pull outward 2. To install a new logo plate, align the guide pins in the slots 1, then press into place. ✎ When replacing the logo plate, ensure that the alignment pins are properly placed in the front bezel - Compaq 470007-802 | Deskpro EN Series of Personal Computers Maintenance and Serv - Page 41
4.5 Cable Lock WARNING: To avoid injury, use care in handling the separated pieces of the cable lock bracket; metal edges may be sharp. Be sure to install the bracket so that sharp edges do not extend from the edges of the computer chassis. Depending on the model, the computer includes a cable lock - Compaq 470007-802 | Deskpro EN Series of Personal Computers Maintenance and Serv - Page 42
. 4. Slide the access panel backward approximately 1-inch (2.5-cm); then lift it up and off the unit. To replace the access panel, reverse the previous steps. Compaq Deskpro EN Series of Personal Computers 4-5 - Compaq 470007-802 | Deskpro EN Series of Personal Computers Maintenance and Serv - Page 43
4.7 Front Bezel 1. Prepare the computer for disassembly (Section 4.2). WARNING: Power is continuous to the system board and power supply even when the power switch is turned off. To prevent damage to the unit, disconnect the power cord from the power source or the unit before beginning disassembly - Compaq 470007-802 | Deskpro EN Series of Personal Computers Maintenance and Serv - Page 44
button out of the front bezel. The spring will follow the button out of the housing. To replace the power button, reverse the above procedure. Compaq Deskpro EN Series of Personal Computers 4-7 - Compaq 470007-802 | Deskpro EN Series of Personal Computers Maintenance and Serv - Page 45
4.9 Subpanel and Bezel Blanks The subpanel and bezel blanks must be removed from the front bezel if you are installing a mass storage device for the first time, or if you are converting the unit from a desktop to a minitower configuration or from a minitower to a desktop configuration. WARNING: - Compaq 470007-802 | Deskpro EN Series of Personal Computers Maintenance and Serv - Page 46
power switch, reverse the above procedure, pushing the switch assembly until it snaps into place. The power/LED connector is keyed to ensure proper installation. Compaq Deskpro EN Series of Personal Computers 4-9 - Compaq 470007-802 | Deskpro EN Series of Personal Computers Maintenance and Serv - Page 47
4.11 Mass Storage Devices The Compaq Deskpro EN Series of Personal Computers support up to five drives in various configurations. Reference Drive Bay 12 1, 2 3 3 45 4, 5 Drive Positions Configuration Two standard 5.25-inch, half-height bays for optional drives. - Compaq 470007-802 | Deskpro EN Series of Personal Computers Maintenance and Serv - Page 48
install either a third-height or a half-height drive into a half-height bay. ! You must install guide screws to ensure that the drive lines up correctly in the drive cage. Compaq has provided extra guide screws, which are installed in the front of the computer chassis, behind the front bezel. Some - Compaq 470007-802 | Deskpro EN Series of Personal Computers Maintenance and Serv - Page 49
4.11.1 Removing an Internal 3.5-Inch Hard Drive 1. Prepare the computer for disassembly (Section 4.2). WARNING: Power is continuous to the system board and power supply even when the power switch is turned off. To prevent damage to the unit, disconnect the power cord from the power source or the - Compaq 470007-802 | Deskpro EN Series of Personal Computers Maintenance and Serv - Page 50
screws from the drive. 9. Install two guide screws on each side of the replacement drive. ✎ Metric screws (M3) have a black finish while U.S. screws have a silver finish. Replace the 3.5-inch drive by reversing the above procedure. CAUTION: When servicing the computer, ensure that cables are placed - Compaq 470007-802 | Deskpro EN Series of Personal Computers Maintenance and Serv - Page 51
4.11.2 Removing an External 5.25-Inch Drive 1. Prepare the computer for disassembly (Section 4.2). WARNING: Power is continuous to the system board and power supply even when the power switch is turned off. To prevent damage to the unit, disconnect the power cord from the power source or the unit - Compaq 470007-802 | Deskpro EN Series of Personal Computers Maintenance and Serv - Page 52
guide screws from the drive 1. To install a new drive: 1. Install two guide screws on each side of the replacement drive 1. 2. Ensure that the guide screws line up with the guide front bezel. The system automatically recognizes hard drives sold by Compaq (or any other plug and play hard drive) and - Compaq 470007-802 | Deskpro EN Series of Personal Computers Maintenance and Serv - Page 53
4.11.3 Removing an External 3.5-Inch Drive If you are installing a second 3.5-inch diskette drive into 5.25-inch bays #1 or 2 for the first time, you must use a special adapter bracket. If you are installing a 3.5-inch diskette drive into 5.25-inch bay #3, you must use a special adapter bracket. If - Compaq 470007-802 | Deskpro EN Series of Personal Computers Maintenance and Serv - Page 54
adapter until the diskette drive eject button is free of the button protector, then lift the drive out of the drive adapter. 11. Remove the guide screw from the right side of the drive. Compaq Deskpro EN Series of Personal Computers 4-17 - Compaq 470007-802 | Deskpro EN Series of Personal Computers Maintenance and Serv - Page 55
a black finish while U.S. screws (#6) have a silver finish. CAUTION: When servicing the computer, ensure that cables are placed in their proper locations during the . CAUTION: Use only 3/16-inch or 5-mm long screws as guide screws. Longer screws can damage the internal components of the drive. - Compaq 470007-802 | Deskpro EN Series of Personal Computers Maintenance and Serv - Page 56
spring contained under the drivelock mechanism may pop out unexpectedly. 8. Remove the drivelock from the drive cage. 9. Remove the spring from the drivelock (see inset). Compaq Deskpro EN Series of Personal Computers 4-19 - Compaq 470007-802 | Deskpro EN Series of Personal Computers Maintenance and Serv - Page 57
10. Press in on the tabs to release the vertical drivelock from the chassis, then lift it up and out of the system while at the same time rotating the drivelock slightly to clear the travel slots at the bottom of the drivelock. 11. Remove the spring from the post (see inset). To reinstall the - Compaq 470007-802 | Deskpro EN Series of Personal Computers Maintenance and Serv - Page 58
4.13 Expansion Boards 4.13.1 Expansion Board Slots 1 AGP graphics slot 2 PCI expansion slots Compaq Deskpro EN Series of Personal Computers 4-21 - Compaq 470007-802 | Deskpro EN Series of Personal Computers Maintenance and Serv - Page 59
4.13.2 Removing a PCI Expansion Board 1. Prepare the computer for disassembly (Section 4.2). WARNING: Power is continuous to the system board and power supply even when the power switch is turned off. To prevent damage to the unit, disconnect the power cord from the power source or the unit before - Compaq 470007-802 | Deskpro EN Series of Personal Computers Maintenance and Serv - Page 60
feet) for greater stability. 3. Remove the access panel (Section 4.6). 4. If you are installing an expansion board for the first time, remove the expansion slot cover. Compaq Deskpro EN Series of Personal Computers 4-23 - Compaq 470007-802 | Deskpro EN Series of Personal Computers Maintenance and Serv - Page 61
5. Hold the board at each end and carefully rock it back and forth while pushing downward, until the connectors fit completely and firmly into the expansion slot. 6. Secure the board to the chassis with the retaining screw. 7. Attach any cables that came with the board. ✎ If installing a NIC board, - Compaq 470007-802 | Deskpro EN Series of Personal Computers Maintenance and Serv - Page 62
Remove any full-length expansion boards (Section 4.13.2). 5. Push down on the two tabs on the side of the board guide. 6. While holding the tabs down, remove the guide from the chassis. To replace the board guide, reverse the above procedures. Compaq Deskpro EN Series of Personal Computers 4-25 - Compaq 470007-802 | Deskpro EN Series of Personal Computers Maintenance and Serv - Page 63
. 2. Lay the computer down on its large base (side with feet) for greater stability. 3. Remove the access panel (Section 4.6). 4. Remove the board guide (Section 4.14). 5. Disconnect the speaker cable from the system board 1. 6. Remove the four screws 2 that secure the speaker to the front of the - Compaq 470007-802 | Deskpro EN Series of Personal Computers Maintenance and Serv - Page 64
pin, unbuffered PC100- or PC133- compliant SDRAM DIMMs, depending on the model. The SDRAM DIMMs must support CAS Latency 2 or 3 (CL = 2 or CL = 3). They must also contain the , allow the internal system components to cool before touching. Compaq Deskpro EN Series of Personal Computers 4-27 - Compaq 470007-802 | Deskpro EN Series of Personal Computers Maintenance and Serv - Page 65
4. Open both latches of the memory module socket 1, and insert the memory module into the socket 2. Begin by installing a module into the socket nearest the preinstalled module, and install the modules following the numerical order of the sockets. A memory module can be installed in only one way. - Compaq 470007-802 | Deskpro EN Series of Personal Computers Maintenance and Serv - Page 66
same time, rotate the front of the GPA/AIMM card up until it is at a 45 degree angle 2. 6. Remove the card from the expansion slot 3. Compaq Deskpro EN Series of Personal Computers 4-29 - Compaq 470007-802 | Deskpro EN Series of Personal Computers Maintenance and Serv - Page 67
Installing a GPA/AIMM Card WARNING: Power is continuous to the system board and power supply even when the power switch is turned off. To prevent damage to the unit, disconnect the power cord from the power source or the unit before beginning disassembly procedures. 1. Prepare the computer for - Compaq 470007-802 | Deskpro EN Series of Personal Computers Maintenance and Serv - Page 68
the AGP connector. 7. While pulling the arm on the right side of the retention mechanism 5, rotate the card down into the expansion slot until seated 6. Compaq Deskpro EN Series of Personal Computers 4-31 - Compaq 470007-802 | Deskpro EN Series of Personal Computers Maintenance and Serv - Page 69
4.17.2 AGP Card with a Type I Retention Mechanism Removing an AGP Card 1. Prepare the computer for disassembly (Section 4.2). 2. Lay the computer down on its large base (side with feet) for greater stability. 3. Remove the access panel (Section 4.6). 4. Remove the screw at the top of the expansion - Compaq 470007-802 | Deskpro EN Series of Personal Computers Maintenance and Serv - Page 70
of the retention mechanism. 5. Pull the card straight up to remove it from the expansion slot. To install the graphics card, reverse the above procedures. Compaq Deskpro EN Series of Personal Computers 4-33 - Compaq 470007-802 | Deskpro EN Series of Personal Computers Maintenance and Serv - Page 71
4.17.4 AGP Card with a Type 2 Retention Mechanism Removing an AGP Card 1. Prepare the computer for disassembly (Section 4.2). 2. Lay the computer down on its large base (side with feet) for greater stability. 3. Remove the access panel (Section 4.6). 4. Remove the screw at the top of the expansion - Compaq 470007-802 | Deskpro EN Series of Personal Computers Maintenance and Serv - Page 72
(Section 4.6). 4. Remove the screw at the top of the expansion slot. 5. Remove the AGP graphics board as you would any PCI expansion board (Section 4.13.2). Compaq Deskpro EN Series of Personal Computers 4-35 - Compaq 470007-802 | Deskpro EN Series of Personal Computers Maintenance and Serv - Page 73
4.18 Processor Before installing a processor, make sure the release latches are in the locked position. This will cause the processor to make an audible sound when it is properly seated in the retaining clip. 1. Prepare the computer for disassembly (Section 4.2). 2. Lay the computer down on its - Compaq 470007-802 | Deskpro EN Series of Personal Computers Maintenance and Serv - Page 74
4.19 System Board ✎ More information on the system board, including troubleshooting criteria, can be found in the Compaq Quick Troubleshooting Guide (part number 153837-001) and the Compaq Service Reference Guide (part number 152611-001). 1. Prepare the computer for disassembly (Section 4.2). - Compaq 470007-802 | Deskpro EN Series of Personal Computers Maintenance and Serv - Page 75
for your location in the Contacting Customer Support guide for more information. In Europe, do not dispose of batteries with general household waste. Dispose of or recycle them by using the public collection system or returning them to Compaq, your authorized Compaq partners, or their agents. 4-38 - Compaq 470007-802 | Deskpro EN Series of Personal Computers Maintenance and Serv - Page 76
it from the fan. To install the fan assembly, reverse the above procedure. ✎ This fan is used on units with 933 MHz and faster processors. Compaq Deskpro EN Series of Personal Computers 4-39 - Compaq 470007-802 | Deskpro EN Series of Personal Computers Maintenance and Serv - Page 77
4.22 Power Supply 1. Prepare the computer for disassembly (Section 4.2). WARNING: Power is continuous to the system board and power supply even when the power switch is turned off. To prevent damage to the unit, disconnect the power cord from the power source or the unit before beginning - Compaq 470007-802 | Deskpro EN Series of Personal Computers Maintenance and Serv - Page 78
the access panel (Section 4.6). 4. Remove the front bezel (Section 4.7). 5. Remove the drives from the 5.25-inch drive bays by pressing drivelock 1 (Sections 4.11.2 and 4.11.3). Compaq Deskpro EN Series of Personal Computers 4-41 - Compaq 470007-802 | Deskpro EN Series of Personal Computers Maintenance and Serv - Page 79
6. Rotate the drives 90 degrees, then reinstall them into the drive bays. ✎ The diskette drive should always be placed in bay number 3, the bay nearest the internal 3.5-inch drives, for proper placement within the chassis. CAUTION: The use of unnecessary force may result in damage to the drives. 7. - Compaq 470007-802 | Deskpro EN Series of Personal Computers Maintenance and Serv - Page 80
from the drives in the 5.25-inch drive bays. 6. Remove the drives from the 5.25-inch drive bays by pressing drivelock 2 (Sections 4.11.2 and 4.11.3). Compaq Deskpro EN Series of Personal Computers 4-43 - Compaq 470007-802 | Deskpro EN Series of Personal Computers Maintenance and Serv - Page 81
7. Rotate the drives 90 degrees, then reinstall them into the drive bays. ✎ The diskette drive should always be placed in the bay nearest the top of the chassis in the desktop configuration for proper drive clearance and access. CAUTION: The use of unnecessary force may result in damage to the - Compaq 470007-802 | Deskpro EN Series of Personal Computers Maintenance and Serv - Page 82
could damage the pins that align it within the front bezel. 10. Replace the subpanel, front bezel, and the computer access panel. Reassemble the computer. Compaq Deskpro EN Series of Personal Computers 4-45 - Compaq 470007-802 | Deskpro EN Series of Personal Computers Maintenance and Serv - Page 83
Drive Connector Primary IDE Connector Secondary IDE Connector CPU Fan ITP Connector PCI Slots AGP/AIMM Connector External Battery DIMM Memory Slots Primary Processor Socket Compaq Deskpro EN Series of Personal Computers 5-1 - Compaq 470007-802 | Deskpro EN Series of Personal Computers Maintenance and Serv - Page 84
5.1.2 Clearing CMOS The computer's configuration (CMOS) may occasionally be corrupted. If it does, it is necessary to clear the CMOS memory using jumper SW50. To clear and reset the configuration, perform the following procedure: 1. Prepare the computer for disassembly (Section 4.2). CAUTION: The - Compaq 470007-802 | Deskpro EN Series of Personal Computers Maintenance and Serv - Page 85
10. Repeat steps 6-8, then establish new passwords. Refer to the Computer Setup (F10 Setup) instructions to establish new passwords. CMOS Archive and Restore (Power Switch Override) Each time the system the computer will continue to function. Compaq Deskpro EN Series of Personal Computers 5-3 - Compaq 470007-802 | Deskpro EN Series of Personal Computers Maintenance and Serv - Page 86
5.2 5.2.1 Hard Drive Jumper Settings Seagate, Quantum, and Western Digital The drawings and tables below apply to a number of different size drives in the following paragraphs. Seagate, Quantum, and Western Digital Ultra ATA Hard Drive Jumper Settings Definition Seagate Single 7 - 8 Primary 5 - Compaq 470007-802 | Deskpro EN Series of Personal Computers Maintenance and Serv - Page 87
system) Secondary Cable Select Disabled* Enabled 4092 Cylinder Limitation Disabled* Enabled Factory Reserved Factory Reserved J50 J48 J46 J44 J42 J J O O J O J O O * = Default setting J = Jumper O = No jumper Compaq Deskpro EN Series of Personal Computers 5-5 - Compaq 470007-802 | Deskpro EN Series of Personal Computers Maintenance and Serv - Page 88
44.83 cm 16.76 cm 42.67 cm 11.8 kg 10 to 35°C -20° to 60°C 20% to 80% 10% to 90% 3048 m 9144 m Compaq Deskpro EN Series of Personal Computers 6-1 - Compaq 470007-802 | Deskpro EN Series of Personal Computers Maintenance and Serv - Page 89
6.1.2 System Interrupts 6.1.3 Hardware IRQ 0 1 2 3 4 5 6 7 8 9 10 11 12 13 14 15 System Function Timer Interrupt Keyboard Interrupt Controller Cascade Serial Port (COM B) Serial Port (COM A) Audio Diskette Drive Parallel Port (LPT 1) Real-Time Clock Available for PCI Available for PCI Available - Compaq 470007-802 | Deskpro EN Series of Personal Computers Maintenance and Serv - Page 90
Page Registers Channel 6, 7, 5 DMA Memory Low Page Register Reserved Page Registers Refresh Low Page Register Aliased at 81h-8Fh Fast A20 and INIT Register continued Compaq Deskpro EN Series of Personal Computers 6-3 - Compaq 470007-802 | Deskpro EN Series of Personal Computers Maintenance and Serv - Page 91
ICH Fixed I/O Registers cont Port Register Name CF9h Reset Control Register A0h Slave PIC ICW1 Init. Cmd Word 1 Register Slave PIC OCW2 Op Ctrl Word 2 Register Slave PIC OCW3 Op Ctrl Word 3 Register A1 Slave PIC ICW2 Init. Cmd Word 2 Register Slave PIC ICW3 Init. Cmd Word 3 Register - Compaq 470007-802 | Deskpro EN Series of Personal Computers Maintenance and Serv - Page 92
to 00000000h System Function System ROM PCI Memory Expansion HOST or PCI Memory Expansion System ROM PCI Option ROMs Video ROM Video RAM Base Memory Compaq Deskpro EN Series of Personal Computers 6-5 - Compaq 470007-802 | Deskpro EN Series of Personal Computers Maintenance and Serv - Page 93
6.2 Drives 6.2.1 1.44-MB Diskette Drive Size and Capacity Size (in) High Density (MB) Low Density (KB) Compaq Spare Part Number Light Drive Rotation (rpm) Height Bytes per Sector Sectors per Track (high/low density) Tracks per Side (high/low density) Read/Write - Compaq 470007-802 | Deskpro EN Series of Personal Computers Maintenance and Serv - Page 94
6.2.2 Ultra ATA Hard Drives Formatted Capacity Physical (MB) Logical (MB) Compaq Spare Part Number Total Logical Sectors Logical Geometry Cylinders Heads Sectors Physical Geometry Cylinders Heads Sectors Data Bytes/Sector Sector Interleave ECC Bytes Recording Method– - Compaq 470007-802 | Deskpro EN Series of Personal Computers Maintenance and Serv - Page 95
6.2.3 CD-ROM Drives 48X Max Compaq Spare Part Number 187263-001 Data Buffer (ms) 16.6 Data Transfer Rate 150 KB/s Min (audio) CD: 3000- C 10-80% relative humidity Dimensions (mm) (HxWxD) 42.9x150.1x208 Weight (grams) 1200 MPEG Playback Graphics None Solution Support 6-8 Specifications - Compaq 470007-802 | Deskpro EN Series of Personal Computers Maintenance and Serv - Page 96
Enhanced 1.4 in 18.3 in 6.3 in 1.4 in 18.3 in 6.3 in Compaq Smart Card 1.4 in 18.3 in 6.3 in 6.4 2-Button Mouse Dimensions Height Length Width 1.34 in 4. to 80%, noncondensing 20% to 80%, noncondensing ESD CE level 4, 15kV air discharge Compaq Deskpro EN Series of Personal Computers 6-9 - Compaq 470007-802 | Deskpro EN Series of Personal Computers Maintenance and Serv - Page 97
6.5 6.5.1 6.5.2 Supported Graphics Resolutions Intel 3D Graphics Colors 640 x 480 800 x 600 1024 x 768 1152 x 864 1280 x 1024 1600 x 1200 256 85 Hz 85 Hz 85 Hz - Compaq 470007-802 | Deskpro EN Series of Personal Computers Maintenance and Serv - Page 98
SERVICE NOTES CAUTION: Use safety glasses equipped with side shields before attempting to clean debris from under the keys. 1. The new Intel 815e chipset in these models is a high-performance, flexible technology that also provides stability for future models. This chipset supports . If Compaq's DMI - Compaq 470007-802 | Deskpro EN Series of Personal Computers Maintenance and Serv - Page 99
! detailed F10 Setup help text via the F1 key ! enhanced storage support from F10 Setup, including: " detailed device viewing information " choice of none means "diskette" device type. ! new F10 Setup device information ! service password that allows for back-door, power-on capability in the event a - Compaq 470007-802 | Deskpro EN Series of Personal Computers Maintenance and Serv - Page 100
, 4-29 B battery proper disposal, 4-38 removal and replacement, 4-38 spare part number, 2-9 bezel blank. See miscellaneous plastics kit board guide. See miscellaneous plastics kit removal and replacement, 4-25 boxes, shipping, 2-10 C cable lock removal and replacement, 4-4 cable select feature - Compaq 470007-802 | Deskpro EN Series of Personal Computers Maintenance and Serv - Page 101
Panel Connectors, 1-5 removal and replacement access panel, 4-5 battery, 4-38 board guide, 4-25 cable lock, 4-4 drivelocks, 4-18 expansion boards, 4-21 external 3-6 serial number need for service call, 1-3 serial number location, 1-7 service considerations, 3-6 service notes, 7-1 setup password, - Compaq 470007-802 | Deskpro EN Series of Personal Computers Maintenance and Serv - Page 102
sub-panel. See miscellaneous plastics kit subpanel and bezel blanks removal and replacement, 4-8 system design, 1-2 specifications, 6-1 system board connector locations, 5-1 connectors and jumpers, 5-1 spare part number, 2-5 system specifications DMA, 6-2 I/O, 6-3 memory map, 6-5 T tools required, - Compaq 470007-802 | Deskpro EN Series of Personal Computers Maintenance and Serv - Page 103
201843-001 200803-002
-
 1
1 -
 2
2 -
 3
3 -
 4
4 -
 5
5 -
 6
6 -
 7
7 -
8
-
9
-
10
-
11
-
12
-
13
-
14
-
15
-
16
-
17
-
18
-
19
-
20
-
21
-
22
-
23
-
24
-
25
-
26
-
27
-
28
-
29
-
30
-
31
-
32
-
33
-
34
-
35
-
36
-
37
-
38
-
39
-
40
-
41
-
42
-
43
-
44
-
45
-
46
-
47
-
48
-
49
-
50
-
51
-
52
-
53
-
54
-
55
-
56
-
57
-
58
-
59
-
60
-
61
-
62
-
63
-
64
-
65
-
66
-
67
-
68
-
69
-
70
-
71
-
72
-
73
-
74
-
75
-
76
-
77
-
78
-
79
-
80
-
81
-
82
-
83
-
84
-
85
-
86
-
87
-
88
-
89
-
90
-
91
-
92
-
93
-
94
-
95
-
96
-
97
-
98
-
99
-
100
-
101
-
102
-
103
 |
 |
Compaq Deskpro EN Series
of Personal Computers
Convertible Minitower Models
Maintenance &
Service Guide