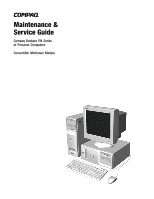
Compaq 470007-802 Deskpro EN Series of Personal Computers Maintenance and Serv - Page 5
Service Notes, WARNING, CAUTION
 |
View all Compaq 470007-802 manuals
Add to My Manuals
Save this manual to your list of manuals |
Page 5 highlights
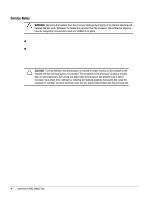
Service Notes ! WARNING: Removing the heatsink from the processor destroys the integrity of the thermal interface pad between the two parts. Whenever the heatsink is removed from the processor, the old thermal interface must be completely removed and a new one installed in its place. Before installing a heatsink, prepare for its installation by doing one of the following: ! New heatsink: if the heatsink has a thermal interface attached to its bottom, peel off the protective paper before installing the heatsink. ! Reinstalled heatsink: Note where the thermal interface is located on the heatsink. Carefully remove the thermal interface pad and all residue from the heatsink surface. If any thermal interface remains on the die of the processor, scrape it off with your fingernail. A Q-Tip dipped in alcohol can be used to clean both surfaces. Add thermal interface pad to the bottom of the heatsink before reinstalling the original heatsink to insure an efficient thermal interface. CAUTION: Thermal interface heat transmission is reduced if residue remains on the heatsink or the heatsink thermal interface surface is scratched. This could lead to the processor running at a higher than normal temperature, fan turning at a higher than normal speed, and possible loss of data if processor shuts down from overheating. Installing the heatsink assembly backwards will cause the processor to overheat, since the aluminum core will only make partial contact with the processor die. 4 Addendum to MSG 200803-002
-
 1
1 -
 2
2 -
 3
3 -
 4
4 -
 5
5 -
 6
6 -
 7
7 -
 8
8 -
 9
9 -
 10
10 -
 11
11 -
12
-
13
-
14
-
15
-
16
-
17
-
18
-
19
-
20
-
21
-
22
-
23
-
24
-
25
-
26
-
27
-
28
-
29
-
30
-
31
-
32
-
33
-
34
-
35
-
36
-
37
-
38
-
39
-
40
-
41
-
42
-
43
-
44
-
45
-
46
-
47
-
48
-
49
-
50
-
51
-
52
-
53
-
54
-
55
-
56
-
57
-
58
-
59
-
60
-
61
-
62
-
63
-
64
-
65
-
66
-
67
-
68
-
69
-
70
-
71
-
72
-
73
-
74
-
75
-
76
-
77
-
78
-
79
-
80
-
81
-
82
-
83
-
84
-
85
-
86
-
87
-
88
-
89
-
90
-
91
-
92
-
93
-
94
-
95
-
96
-
97
-
98
-
99
-
100
-
101
-
102
-
103
 |
 |
