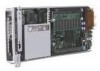
Compaq BL10e HP ProLiant BL e-Class System Setup and Installation Guide - Page 45
rack template for the next enclosure 2., Identify the back side of the rack template.
 |
UPC - 613326445501
View all Compaq BL10e manuals
Add to My Manuals
Save this manual to your list of manuals |
Page 45 highlights
Installing and Cabling the System 3. Align the rack template so that its sides are square with the sides of the rack. IMPORTANT: Tick marks on the rack supports help you to maintain proper alignment of the rack template. 4. Use a pencil to mark an "M" at the locations on the rack where the rack rails are to be inserted (1). 5. On the rack, mark the top and bottom edges of the rack template to help align the rack template for the next enclosure (2). Figure 3-6: Marking the rack for ProLiant BL e-Class system installation 6. Remove the rack template from the front of the rack and move to the back of the rack. 7. Identify the back side of the rack template. 8. Repeat steps 2 through 5 for the back of the rack. NOTE: Store the rack template for future use. HP ProLiant BL e-Class System Setup and Installation Guide 3-7
-
 1
1 -
2
-
3
-
4
-
5
-
6
-
7
-
8
-
9
-
10
-
11
-
12
-
13
-
14
-
15
-
16
-
17
-
18
-
19
-
20
-
21
-
22
-
23
-
24
-
25
-
26
-
27
-
28
-
29
-
30
-
31
-
32
-
33
-
34
-
35
-
36
-
37
-
38
-
39
-
 40
40 -
 41
41 -
 42
42 -
 43
43 -
 44
44 -
 45
45 -
 46
46 -
 47
47 -
 48
48 -
 49
49 -
 50
50 -
51
-
52
-
53
-
54
-
55
-
56
-
57
-
58
-
59
-
60
-
61
-
62
-
63
-
64
-
65
-
66
-
67
-
68
-
69
-
70
-
71
-
72
-
73
-
74
-
75
-
76
-
77
-
78
-
79
-
80
-
81
-
82
-
83
-
84
-
85
-
86
-
87
-
88
-
89
-
90
-
91
-
92
-
93
-
94
-
95
-
96
-
97
-
98
-
99
-
100
-
101
-
102
-
103
-
104
-
105
-
106
-
107
-
108
-
109
-
110
-
111
-
112
-
113
-
114
-
115
-
116
-
117
-
118
-
119
-
120
-
121
-
122
-
123
-
124
-
125
-
126
-
127
-
128
-
129
-
130
-
131
-
132
-
133
-
134
-
135
-
136
-
137
-
138
-
139
-
140
-
141
-
142
-
143
-
144
-
145
-
146
-
147
-
148
-
149
-
150
-
151
-
152
-
153
-
154
-
155
-
156
 |
 |
