Compaq ProLiant 8500 Compaq ProLiant 8500 I/O Module Upgrade Guide - Page 3

Contents, Compaq ProLiant 8500 Server I/O Module Upgrade Guide

Page 3 highlights

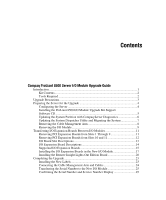
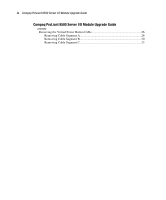
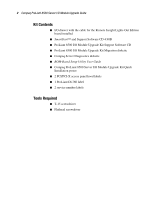
Contents Compaq ProLiant 8500 Server I/O Module Upgrade Guide Introduction ...1 Kit Contents...2 Tools Required ...2 Upgrade Precautions...3 Preparing the Server for the Upgrade 4 Configuring the Server 4 Installing the ProLiant 8500 I/O Module Upgrade Kit Support Software CD ...5 Updating the System Partition with Compaq Server Diagnostics 6 Updating the System Dispatcher Utility and Migrating the System 7 Removing the Cable Management Arm 8 Removing the I/O Module 9 Transferring I/O Expansion Boards Between I/O Modules 11 Removing PCI Expansion Boards from Slots 1 Through 9 11 Removing PCI Expansion Boards from Slots 10 and 11 12 I/O Board Slot Descriptions 13 I/O Expansion Board Descriptions 14 Supported I/O Expansion Boards 15 Installing the I/O Expansion Boards in the New I/O Module 17 Installing the Remote Insight Lights-Out Edition Board 20 Completing the Upgrade 23 Installing the New Labels 23 Connecting the Cable Management Arm and Cables 24 Transferring the Serial Number to the New I/O Module 25 Confirming the Serial Number and Service Number Display 25

  • 1
  • 2
  • 3
  • 4
  • 5
  • 6
  • 7
  • 8
  • 9
  • 10
  • 11
  • 12
  • 13
  • 14
  • 15
  • 16
  • 17
  • 18
  • 19
  • 20
  • 21
  • 22
  • 23
  • 24
  • 25
  • 26
  • 27
  • 28
  • 29
  • 30
  • 31
  • 32
  • 33
  • 34
  • 35
  • 36
  • 37
  • 38
  • 39
  • 40
  • 41
  • 42

Contents
Compaq ProLiant 8500 Server I/O Module Upgrade Guide
Introduction
.................................................................................................................
1
Kit Contents
..........................................................................................................
2
Tools Required
.....................................................................................................
2
Upgrade Precautions
....................................................................................................
3
Preparing the Server for the Upgrade
..........................................................................
4
Configuring the Server
.........................................................................................
4
Installing the ProLiant 8500 I/O Module Upgrade Kit Support
Software CD
.........................................................................................................
5
Updating the System Partition with Compaq Server Diagnostics
........................
6
Updating the System Dispatcher Utility and Migrating the System
.....................
7
Removing the Cable Management Arm
...............................................................
8
Removing the I/O Module
....................................................................................
9
Transferring I/O Expansion Boards Between I/O Modules
.......................................
11
Removing PCI Expansion Boards from Slots 1 Through 9
................................
11
Removing PCI Expansion Boards from Slots 10 and 11
....................................
12
I/O Board Slot Descriptions
................................................................................
13
I/O Expansion Board Descriptions
.....................................................................
14
Supported I/O Expansion Boards
.......................................................................
15
Installing the I/O Expansion Boards in the New I/O Module
.............................
17
Installing the Remote Insight Lights-Out Edition Board
....................................
20
Completing the Upgrade
............................................................................................
23
Installing the New Labels
...................................................................................
23
Connecting the Cable Management Arm and Cables
.........................................
24
Transferring the Serial Number to the New I/O Module
....................................
25
Confirming the Serial Number and Service Number Display
............................
25