Craftsman 21217 Operation Manual
Craftsman 21217 - 12 in. Miter Saw Manual
 |
View all Craftsman 21217 manuals
Add to My Manuals
Save this manual to your list of manuals |
Craftsman 21217 manual content summary:
- Craftsman 21217 | Operation Manual - Page 1
TRAC ® Model No. 137.212170 CAUTION: Before using this Miter Saw, read this manual and follow all its Safety Rules and Operating Instructions Customer Help Line For Techr|ical Support 1-800-843-1682 • Safety Instructions • Installation • Operation • Maintenance • Parts List Sears Parts & Repair - Craftsman 21217 | Operation Manual - Page 2
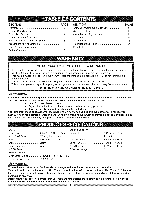
Miter Saw Glossary of Terms Assembly and Adjustments Operation Maintenance Troubleshooting Guide Parts List PAGE 9 10 11 17 23 24 25 CRAFTSMAN ONE YEAR FULL WARRANTY If this Craftsman from state to state. Sears, Roebuck and Co., Hoffman MOTOR Power Source Arbor Shaft Size Speed Brake - Craftsman 21217 | Operation Manual - Page 3
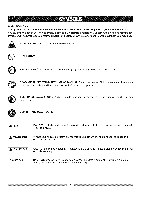
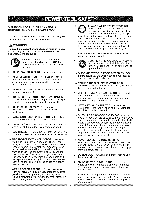
risk of injury, user and all bystanders must read and understand instruction manual before using this product. KEEP HANDS AWAY FROM BLADE: Failure to keep your hands away from the blade will result in serious personal injury. SUPPORT AND CLAMP WORK i_,, DANGER i DANGER: indicates an imminently - Craftsman 21217 | Operation Manual - Page 4
available at Sears. NOTE: FACE MASK OR DUST MASK. Sawing operation produces dust. 14. FROM POWER SOURCE before servicing, and when changing this Operator's Manual for recommended 5 shows the correct size to use depending on caught in moving parts. Nonslip footwear is Follow instructions for - Craftsman 21217 | Operation Manual - Page 5
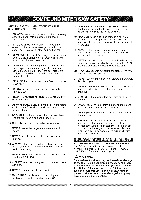
adequate support to the sides of the saw table for long work pieces, 23. NEVER use the miter saw in an area with flammable liquids or gases. 24. NEVER use solvents to clean plastic parts. Solvents could possibly dissolve or otherwise damage the material. 25. SHUT OFF the power before servicing or - Craftsman 21217 | Operation Manual - Page 6
dull saw blades are used. 5. Most motor troubles may . The table below shows the correct size to use depending on cord length and parts when servicing a tool with double insulation. Servicing to start the saw again. If the motor still does not start, refer to the TROUBLESHOOTING GUIDE. (When using - Craftsman 21217 | Operation Manual - Page 7
miter saw. Follow instructions that accompany accessories. Use of improper accessories may cause hazards. o The use of any cutting tool except 12 in. saw to possible serious injury. ACCESSORIES Visit your Sears Hardware Department or see the Sears Power and Hand Tool Catalog to purchase recommended - Craftsman 21217 | Operation Manual - Page 8
in the power cord until the missing or damaged part is correctly replaced. To avoid electric shock, use only identical replacement parts when servicing double insulated tools. Call 1-800-4-MY-HOME ® for replacement parts. f Miter Saw Extension Wings Extension Wing Hardware Bag Dust Bag Hold - Craftsman 21217 | Operation Manual - Page 9
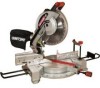
Dust Bag Hold Down Latch Sliding Fence Left Extension Wing Arbor Lock Blade Bevel Scale Lower Blade Guard Stop Block Right Extension Wing Stop Locking Lever Lock Handle Switch Handle -- ON/OFF Trigger Switch Carrying Handle Laser Guide Hold-Down Clamp Positive Mite Detents 9 Mounting Holes - Craftsman 21217 | Operation Manual - Page 10
arbor bolt during blade replacement or removal. BASE - Supports the table, holds accessories and allows for workbench or leg set mounting. BEVEL LOCKING HANDLE - Locks the miter saw the blade or the part of the workpiece which will be cut. SET - The distance between two saw blade tips, bent outward - Craftsman 21217 | Operation Manual - Page 11
position. [_ WARNING] To avoid injury and damage to the saw, transport or store the miter saw with the cutting head locked in the down position. Never use damage to the tool, support long workpieces by installing the extension wings to extend the work support surface. When using extension and - Craftsman 21217 | Operation Manual - Page 12
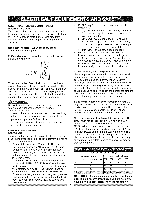
2. Place the hold-down clamp assembly (3) in one of two mounting holes (4). 2 3. Tighten the lock knob. 4 Fig. F 2 4 . Locate the arbor lock (5) on the motor, below the miter saw switch handle. (Fig. H) 7. Press the arbor lock, holding it in firmly while turning the blade wrench clockwise. The - Craftsman 21217 | Operation Manual - Page 13
the arbor bolt from failing out if it accidentally loosens, and helps prevent the spinning blade from coming off the saw. o Make sure the collars are clean and properly arranged. Lower the blade into the table and check for any contact with the metal base or the turn table. ADJUSTMENT iNSTRUCTiONS - Craftsman 21217 | Operation Manual - Page 14
in (clockwise) to increase the cutting depth. 4. Rotate the blade manually to check for contact to any metal surface. 5. Repeat until adjusted table and the heel of the square against the saw blade. 3. If the blade is not 900(0 °) square with the miter table, loosen the bevel lock handle, tilt the - Craftsman 21217 | Operation Manual - Page 15
. O 10 12 Mounting instructions (if stand is not used) 1. For stationary use, place the saw in the desired location, directly on a workbench where there is room for handling and proper support of the workpiece. The base of the saw has four mounting holes. Bolt the base of the miter saw (1) to the - Craftsman 21217 | Operation Manual - Page 16
to preview the saw blade path on the stock to be cut before starting the miter saw. This laser guide is powered by the transformed alternating current supply directly through the power lead. The saw must be connected on this laser product should be performed by authorized service center personnel. 16 - Craftsman 21217 | Operation Manual - Page 17
latch, bevel lock handle and cover plate screws. o Review and understand all safety instructions and operating procedures in this Operator's Manual. (SAFETY & OPERATIONS) o Review the MAINTENANCE and TROUBLESHOOTING GUIDE for your miter saw. o To avoid injury or possible death from electrical shock - Craftsman 21217 | Operation Manual - Page 18
or jewelry (rings, watches). They can get caught and draw you into moving parts. o Wear non-slip footwear. o Tie back long hair. o Roll long support for a workpiece that is longer or wider than the basic miter saw table, or to help feed, support, or pull the workpiece. o Do not use this saw - Craftsman 21217 | Operation Manual - Page 19
If the blade doesn't stop within 6 seconds, unplug the saw and follow the instructions in TROUBLESHOOTING GUIDE section. Before freeing jammed material: o Release trigger switch. o Wait for all moving parts to stop. o Unplug the miter saw. Fig. S TURNING SAW ON (FIG. T) To reduce the likelihood of - Craftsman 21217 | Operation Manual - Page 20
for the blade to pass through which could result in serious injury. At extreme miter or bevel angles the saw blade may also contact the fence. 1. When a bevel cut is required, or try to cut the workpiece without the support of the fence, This will cause the blade to bind and could result in personal - Craftsman 21217 | Operation Manual - Page 21
holding the workpiece positioned 8-3/4 inches or more away from the blade. The support must let the workpiece lay flat on the work table during the cutting operation. NOTE: When mounted on a flat surface, the miter saw table is 3-1/8 inches high. AUXiLiARY WOOD FENCE (FIG. BB) When making multiple - Craftsman 21217 | Operation Manual - Page 22
. Fig.CC F e n c Fig. DD FI el nl cl el 1 Miter saw table Bevel/Miter Settings Fig. EE Settings for standard crown molding lying flat on compound miter saw table Inside Corner \ OR MiterSawTable Miter Saw Table I miterat45°,beveal t0° miter at 0°, bevel at 45o NOTE: Always perform a dry run cut - Craftsman 21217 | Operation Manual - Page 23
naphtha acetone, lacquer thinner or similar highly volatile solvents to clean the miter saw. _,A WARNING I To avoid injury from unexpected starting or electrical on the metal end of the assembly go in the same hole the carbon part fits into. Tighten the cap snugly, but do not overtighten. NOTE: To - Craftsman 21217 | Operation Manual - Page 24
at the outlet, Brush spark when switch released. 1. Brush worn. 2. Other. 1. Replace Brushes. See MAINTENANCE section. 2. Contact Sears Service Center. TROUBLESHOOTING GUIDE = SAW OPERATION PROBLEM PROBLEM CAUSE SUGGESTED CORRECTIVE ACTION Blade hits table. Angle of cut not accurate. Can not - Craftsman 21217 | Operation Manual - Page 25
12 in. COMPOUND MITER SAW MODEL NO. 137.212170 [_ WARNING] When servicing use only CRAFTSMAN replacement parts, Use of any other parts many create a HAZARD or cause product damage, Any attempt to repair or replace electrical parts on this Miter Saw may create a HAZARD unless repair is done by a - Craftsman 21217 | Operation Manual - Page 26
12 in. COMPOUND MITER SAW MODEL NO. 137.212170 2MGR OKB9 0KTS _0KD6, 2M6Q D I 0DT7 0DT4 0JFB .._ \ 2LSZ )CHI OKR1 OJ4N 23TD 23LN_ 0KR4 _ _' 0CHG l \ \ 7 28JF 0KE2 "23V1 2M6I 0KR_ OJR03 - Craftsman 21217 | Operation Manual - Page 27
12 in. COMPOUND MITER SAW PARTS LiST AND SCHEMATIC FOR MOTOR I.D. 0JCF 0JX2 'Y CUTTERSHAFT ASS'Y CR. RE. PAN HD. SCREW & WASHER FIELD ASS'Y BALL BEARING BALL BEARING Size (p4-30 M5"0.8-6 M5"0.8-12 M5* 12-60 M5"0.8-6 #AW M5"0.8-35 6200ZZ 6201ZLU MODEL NO. 137.212170 QTY 1 2 3 2 2 1 1 1 1 2 2 2 1 1 - Craftsman 21217 | Operation Manual - Page 28
the replacement parts, accessories and owner's manuals that you need to do-it-yourself. For Sears professional Sears Parts & Repair Service Center 1-800-488-1222 (U.S.A.) 1-800-469-4663 (Canada) www.sears.com www.sears.ca To purchase a protection agreement on a product serviced by Sears
-
 1
1 -
 2
2 -
 3
3 -
 4
4 -
 5
5 -
 6
6 -
 7
7 -
8
-
9
-
10
-
11
-
12
-
13
-
14
-
15
-
16
-
17
-
18
-
19
-
20
-
21
-
22
-
23
-
24
-
25
-
26
-
27
-
28
 |
 |
Operator's
Manual
6)
12
in. COMPOUND
MITER SAW
WiTH LASER TRAC
®
Model
No.
137.212170
CAUTION:
Before
using this Miter Saw,
read this manual
and follow
all
its
Safety
Rules and
Operating
Instructions
Customer
Help
Line
For Techr|ical
Support
1-800-843-1682
•
Safety
Instructions
•
Installation
•
Operation
•
Maintenance
•
Parts
List
Sears
Parts
&
Repair
Center
1-800-488=1222
Sears,
Roebuck
and
Co., Hoffman
Estates,
IL
60179
USA
Visit
our
Craftsman
website:
www.sears.com/craftsman
Part
No.
137212170001
Printed
in China