D-Link DBS-2000-10 Nuclias Manual
D-Link DBS-2000-10 Manual
 |
View all D-Link DBS-2000-10 manuals
Add to My Manuals
Save this manual to your list of manuals |
D-Link DBS-2000-10 manual content summary:
- D-Link DBS-2000-10 | Nuclias Manual - Page 1
D-Link Nuclias - Cloud Networking Solution Portal User Manual DBA Series Access Points i - D-Link DBS-2000-10 | Nuclias Manual - Page 2
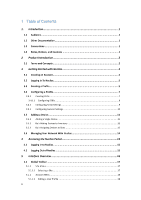
1 Table of Contents 1. Introduction 1 1.1 Audience ...1 1.2 Other Documentation 1 1.3 Conventions ...1 1.4 Notes, Notices, and Cautions 1 2 Product Introduction 2 2.1 Terms and Concepts 2 3 Getting Started with Nuclias 4 3.1 Creating an Account 4 3.2 Logging In To Nuclias 5 3.3 Creating a - D-Link DBS-2000-10 | Nuclias Manual - Page 3
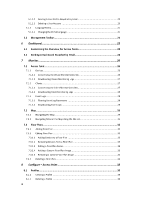
Clients ...27 7.1.2.1 Customizing the Client Monitor Overview 27 7.1.2.2 Downloading Client Monitoring Logs 28 7.1.3 Event Logs ...28 7.1.3.1 Filtering Event Log Parameters 28 7.1.3.2 Downloading Event Logs 28 7.2 Map ...29 7.2.1 Navigating the Map ...29 7.2.2 Navigating Sites on the Map Using - D-Link DBS-2000-10 | Nuclias Manual - Page 4
8.1.3 Deleting Multiple Profiles 39 8.1.4 Creating an SSID...40 8.1.5 Configuring Basic SSID Settings 40 8.1.5.1 Configuring Basic SSID Settings Using No Security 40 8.1.5.2 Configuring Basic SSID Settings Using WPA, WPA+WPA2 With Preshared Key Authentication ...42 8.1.5.3 Configuring Basic SSID - D-Link DBS-2000-10 | Nuclias Manual - Page 5
Radio Settings 67 8.2.5.7 Performing a Device Ping Test 67 8.2.5.8 Performing a Device Traceroute Test 67 8.2.5.9 Performing a Blink LED Test 68 8.2.5.10 Manually Rebooting a Device 68 8.2.5.11 Adding a License Key to a Device 68 8.2.5.12 Deleting a License Key From a Device 68 8.2.6 Deleting - D-Link DBS-2000-10 | Nuclias Manual - Page 6
8.5.3 Editing Existing Local Authentication Databases 77 8.5.3.1 Adding a New Local User to an Existing Local Authentication Database 77 8.5.3.2 Editing an Existing Local User in an Existing Local Authentication Database 78 8.5.3.3 Deleting an Existing Local User From an Existing Local - D-Link DBS-2000-10 | Nuclias Manual - Page 7
List 101 10.5 Firmware ...101 10.5.1 Setting an Automatic Upgrade Window 102 10.5.2 Setting a Custom Device Upgrade Time 103 10.5.3 Performing a Manual Firmware Upgrade 104 10.6 Alert Settings 105 10.6.1 Configuring Alert Notifications 105 10.7 Add Device 106 11 Help ...107 11.1 Contact Us - D-Link DBS-2000-10 | Nuclias Manual - Page 8
information with regards to configuring and troubleshooting Nuclias Portal. All the documents are available either from the D-Link website or the Nuclias website. Other documents related to Nuclias Portal are: • Nuclias Switch User Manual 1.3 Conventions - D-Link DBS-2000-10 | Nuclias Manual - Page 9
Cautions Below are examples of the three types of indicators used in this manual. When making changes to Nuclias Portal using the information in this document, of data and tells you how to avoid the problem. CAUTION: A caution indicates a potential for property damage, personal injury, or death. 1 - D-Link DBS-2000-10 | Nuclias Manual - Page 10
the management of your wireless and wired network, reducing the need for dedicated support staff, and allowing large numbers of devices to be managed from a single used in this product. Service Provider (SP): A Service Provider is an instance that sells the D-Link Nuclias service to customers and is - D-Link DBS-2000-10 | Nuclias Manual - Page 11
organization cannot manage other organizations on the same level. Within the Nuclias structure, organizations are considered clients. Examples of organizations include, branch offices, restaurants, medium-sized offices. Site Tag: A Site Tag is a label for structurally organizing and visualizing an - D-Link DBS-2000-10 | Nuclias Manual - Page 12
is designed to provide new users with instructions on how to get started with the D-Link Nuclias Cloud. This covers the basic requirements and customer service country and click Next. Server Region Country Select which server region to store your data on. Select a country for local support. If - D-Link DBS-2000-10 | Nuclias Manual - Page 13
3. Click Create Account. 4. You will receive an email containing a verification link. Once verified, you can now log into the Nuclias Portal interface using your create a set of default Profiles with recommended settings. The instructions below will explain how to create a custom Profile. 1. - D-Link DBS-2000-10 | Nuclias Manual - Page 14
3. On the Site overview page, hover the cursor over the Site name and click the Pencil icon in the top-right to edit the site. 4. In the Edit Site window, click the Profile Information tab and click Create Profile. 5. Enter a name for the Profile and choose the device model. Note: The Profile can - D-Link DBS-2000-10 | Nuclias Manual - Page 15
5. Click Create Profile. 3.4 Configuring a Profile Once the Profile is created, you can start configuring a variety of settings for the Profile including setting up and customizing SSIDs, configure wireless band settings, and advanced settings. 3.4.1 Creating SSIDs Multiple SSIDs can be created per - D-Link DBS-2000-10 | Nuclias Manual - Page 16
, Scheduled Availability, and Advanced tabs to configure the respective settings. Refer to the relevant SSID configuration sections in the User Manual for more detailed information about these settings. Basic Captive Portal 8 Configure basic SSID settings including SSID name, security method - D-Link DBS-2000-10 | Nuclias Manual - Page 17
settings. Refer to the relevant SSID configuration sections in the User Manual for more detailed information about these settings. Basic Channel 9 Configure radio settings including enabling or disabling wireless bands, supported wireless standards, and radio transmitting power. Configure - D-Link DBS-2000-10 | Nuclias Manual - Page 18
Configuring General Settings 1. Navigate to the Configure > Access Point > Profiles page and click Settings. 2. Refer to the respective SSID configuration sections in the User Manual for more detailed information about these settings. Settings Configure a proxy server and enable or disable IPv6 - D-Link DBS-2000-10 | Nuclias Manual - Page 19
in the format XXXX-XXX-XXX or XXXXXXXXXX. When entering the UID, do not include dashes. Enter a name for the device. Select a Site to link this device to. Select a Profile for this device. The device will use the settings configured in that profile. [Optional] Enter the device license key. Note - D-Link DBS-2000-10 | Nuclias Manual - Page 20
3.5.2 Bulk Adding Devices to Inventory Devices can be bulk imported and added to Inventory to be assigned to a Site later. 1. Navigate to the Configure > Access Point > Profiles page. 2. Click Bulk import. 3. [Optional] Download the reference sample template. 4. Click Browse. 5. Locate the CSV- - D-Link DBS-2000-10 | Nuclias Manual - Page 21
2. Click Bulk import. 3. [Optional] Download the reference sample template. 4. Click Browse. 5. Locate the CSV-formatted file containing the UIDs of the devices. Note: To directly register devices to a Site, use the following format: [UID][Device Name][Profile Name][Site][License Key] 6. Click - D-Link DBS-2000-10 | Nuclias Manual - Page 22
3.6 Managing Your Network With Nuclias With the everything now set up, you can now start expanding and managing your network using Nuclias. There are several ways you can manage your network, refer to the following overview for more information. • To view the real-time status of the network and at - D-Link DBS-2000-10 | Nuclias Manual - Page 23
4 Accessing the Nuclias Portal 4.1 Logging in to Nuclias 1. In a web browser, go to login.nuclias.com. 2. Enter your registration email address and password. 3. Click Log In. 4.2 Logging Out of Nuclias 1. Click the user name in the top-right corner. 2. Click Logout. Note: Clicking Logout will - D-Link DBS-2000-10 | Nuclias Manual - Page 24
5 Interface Overview Section A Item Global Toolbar B Management Toolbar C Workspace Description Provides access to the organization and site selection menu as well as alerts, user account, and language menus. Provides access to the various device management, report, and inventory sections. - D-Link DBS-2000-10 | Nuclias Manual - Page 25
5.1 Global Toolbar 5.1.1 Site Menu The Site menu is used to select a Site or Site Tag within the selected organization, and may only contain selected sites, depending on the privilege of the account that you have logged in with. Site Tags and Sites are an easy way of grouping devices within an - D-Link DBS-2000-10 | Nuclias Manual - Page 26
5.1.2 Account Menu The account menu contains the User Profile and Logout options and can be reached by clicking the user name you have logged in with. Figure 5-1 5.1.2.1 Editing a User Profile The User Profile page is used to view the current user's profile and access privilege information. It can - D-Link DBS-2000-10 | Nuclias Manual - Page 27
c. Edit profile image i. Click on the green pencil icon in the bottom-right corner of the profile image. ii. In the Upload Image window click Browse and navigate to the image you want to use. iii. Click Save. d. Email user information i. Click the Email this page button to send your user information - D-Link DBS-2000-10 | Nuclias Manual - Page 28
5.1.2.2 Sending A User Profile Snapshot by Email 1. From the Global Toolbar, click the Account menu. 2. Select User Profile. 3. Click Email this page. Note: This will immediately send a snapshot of the user profile page to the email address registered to this user account. 5.1.2.3 Deleting a User - D-Link DBS-2000-10 | Nuclias Manual - Page 29
menu. Note: Selecting another language will immediately change the portal display language into the selected language. Currently only English is supported. 5.2 Management Toolbar From the Management toolbar, users can access the various management features of the Nuclias Cloud platform, including - D-Link DBS-2000-10 | Nuclias Manual - Page 30
, and firmware management. Refer to the Settings section on page 87 for more information. The Help section offers users a platform to submit support tickets and provide feedback. Refer to the Help section on page 107 for more information. 6 Dashboard The Dashboard page is the default window - D-Link DBS-2000-10 | Nuclias Manual - Page 31
SSID(s), and the time frame from the drop-down menus. 4. In the Connected Clients section, select a time frame from the drop-down menu. 5. In the Top Information section, click the filter selection in the top-right. 6. Check the information parameters to display the corresponding top information in - D-Link DBS-2000-10 | Nuclias Manual - Page 32
6.2 Sending A Dashboard Snapshot by Email Users can create and send a snapshot of the dashboard window by email. 1. Navigate to the Dashboard page. 2. In the Usage Overview section, select Access Point or SSID, the access point(s) or SSID(s), and the time frame from the corresponding drop-down menus - D-Link DBS-2000-10 | Nuclias Manual - Page 33
5. Check the information parameters to display the corresponding top information in the overview window. 6. In the Top Information section, select a time frame from the drop-down menu for each enabled section. 7. Click Email this page in the top-right. 8. In the Email report window, enter the email - D-Link DBS-2000-10 | Nuclias Manual - Page 34
7 Monitor From the Monitor tab, users can view detailed device monitoring reports and access the map and floor plan windows. Access Point Map Floor Plans The Access Point section provides detailed logs for access point devices, connected clients, and events. Refer to the Access Point section on - D-Link DBS-2000-10 | Nuclias Manual - Page 35
4. Click the checkbox next to the parameters to display them in the overview. Note: All checked parameters will automatically appear. 7.1.1.2 Downloading Device Monitoring Logs 1. Navigate to the Monitor > Access Point > Device page. 2. From the device list, click the Download icon in the top-right. - D-Link DBS-2000-10 | Nuclias Manual - Page 36
set parameters. 7.1.3.2 Downloading Event Logs 1. Navigate to the Monitor > Access Point > Event Logs page. 2. From the event log list, click Download icon in the center. 28 - D-Link DBS-2000-10 | Nuclias Manual - Page 37
the Map window, users can consult a geographical overview of the organization's Sites in the form of an interactive world map. Note: Sites must be linked to a valid address in order to show up on the map. 7.2.1 Navigating the Map From the interactive map, users can view a geographical representation - D-Link DBS-2000-10 | Nuclias Manual - Page 38
4. Click and drag the left-mouse button on the map surface to move around on the map. 5. Click the + and - buttons in the bottom-right corner of the map to zoom in and out on the map. Alternatively, hold Ctrl and scroll the mouse wheel up and down to zoom in and out. 6. Drag and drop the Pegman icon - D-Link DBS-2000-10 | Nuclias Manual - Page 39
7.2.2 Navigating Sites on the Map Using the Site List From the interactive map, users can view a geographical representation of the Site's physical location as well as view basic information and the current status of the Site. 1. Navigate to the Monitor > Map page. 2. Click Site List on the left- - D-Link DBS-2000-10 | Nuclias Manual - Page 40
6. Click the Site icon on the map to view basic information. 7. [Optional] Click the Site name in the Site window to open the Dashboard view for that Site. 7.3 Floor Plans Floor plans offer organizations an easy way to visually represent the location of each device within the organization. Floor - D-Link DBS-2000-10 | Nuclias Manual - Page 41
4. Select the Site to associate this floor plan with. 5. Click OK. 7.3.1 Editing Floor Plan Users can add and remove device icons onto floor plans for a visual overview of the device placement, edit the floor plan name, and upload a custom floor plan image. 7.3.1.1 Adding Devices to a Floor Plan - D-Link DBS-2000-10 | Nuclias Manual - Page 42
Note: Selecting a Site will only show floor plans created for the selected Site. Select All to show all floor plans for all Sites. 3. From the floor plan list, click on the floor plan name. 4. Click the X icon next to the device in the AP list that you wish to remove. Note: Devices removed from the - D-Link DBS-2000-10 | Nuclias Manual - Page 43
3. From the floor plan list, click on the floor plan name. 4. Click the floor plan name in the Floor Plan Name field. 5. Enter a new name and press Enter or click outside of the field. 6. Click Save. 7.3.1.4 Adding a Custom Floor Plan Image 1. Navigate to the Monitor > Floor plans page. 2. Select a - D-Link DBS-2000-10 | Nuclias Manual - Page 44
Image 1. Navigate to the Monitor > Floor plans page. 2. Select a Site from the Site menu. Note: Selecting a Site will only show floor plans created for the selected Site. Select All to show all floor plans for all Sites. 3. From the floor plan list, click on the floor plan name. 4. On the floor plan - D-Link DBS-2000-10 | Nuclias Manual - Page 45
4. When prompted to confirm, click Yes. 37 - D-Link DBS-2000-10 | Nuclias Manual - Page 46
8 Configure - Access Point From the Configure section, users can manage Profiles and devices for the organization. The following sections provide more detailed information about Profile and device management respectively. Profiles Devices IP ACLs MAC ACLs Local Authentication From the Profiles - D-Link DBS-2000-10 | Nuclias Manual - Page 47
8.1 Profiles 8.1.1 Creating a Profile Profiles are a set of general configuration settings that can be swiftly and easily applied to all devices associated with the Profile so all devices are configured identically as a group. Within each profile, users can configure SSID and wireless settings, set - D-Link DBS-2000-10 | Nuclias Manual - Page 48
8.1.4 Creating an SSID Users can create multiple SSIDs under a single Profile and configure each SSID with unique settings to accommodate different wireless usage scenarios. 1. Navigate to the Configure > Access Point > Profiles page. 2. From the Profile list, click SSID under the Actions column of - D-Link DBS-2000-10 | Nuclias Manual - Page 49
From the basic SSID configuration section, users can configure general wireless and SSID settings, including SSID name, security mode, DHCP settings, broadcasting mode, and VLAN functionality. 1. Navigate to the Configure > Access Point > Profiles page. 2. From the Profile list, click SSID under - D-Link DBS-2000-10 | Nuclias Manual - Page 50
Subnet mask Gateway Primary Secondary clients. Enter a valid subnet mask. Enter a valid gateway address. Enter a primary DNS server address. Enter a secondary DNS server address. 12. Choose to enable or disable VLAN. 13. If VLAN is enabled, specify the following information: Note: If VLAN and NAT - D-Link DBS-2000-10 | Nuclias Manual - Page 51
1. Navigate to the Configure > Access Point > Profiles page. 2. From the Profile list, click SSID under the Actions column of the Profile of the SSID you wish to edit. 3. From the SSID list, click the SSID name of the SSID you wish to edit. 4. In the SSID configuration window, click the Basic tab. - D-Link DBS-2000-10 | Nuclias Manual - Page 52
End IP Subnet mask Gateway Primary Secondary clients. Enter the starting IP address of the pool. Only IP address within the start/end range will be assigned to clients. Enter a valid subnet mask. Enter a valid gateway address. Enter a primary DNS server address. Enter a secondary DNS server address - D-Link DBS-2000-10 | Nuclias Manual - Page 53
Using WPA, WPA+WPA2 With 802.1X Enterprise (RADIUS) Authentication 1. Navigate to the Configure > Access Point > Profiles page. 2. From the Profile list, click SSID under the Actions column of the Profile of the SSID you wish to edit. 3. From the SSID list, click the SSID name of the SSID you wish - D-Link DBS-2000-10 | Nuclias Manual - Page 54
15. If NAT Mode is enabled, select Auto to use an automatic IP pool or select a customized 2.4 GHz and 5 GHz DHCP pool from the drop-down menu. 16. [Optional] To create a customized DHCP pool, click Add a DHCP Pool and specify the following information: DHCP name Lease time Start IP End IP Subnet - D-Link DBS-2000-10 | Nuclias Manual - Page 55
URL for redirection Redirection interval Enter the URL clients connecting to the SSID will be redirected to. Enter the time (in minutes) clients will be periodically redirected to the URL. 22. Click Save. 23. Click Push Configuration. 8.1.6 Configuring SSID Captive Portal Settings 8.1.6.1 - D-Link DBS-2000-10 | Nuclias Manual - Page 56
8.1.6.2 Configuring an SSID Captive Portal With Basic Login Page Using Local Authentication A basic login captive portal page requires users to log in using a user account configured in local authentication databases. To create and manage local authentication databases, refer to the Local - D-Link DBS-2000-10 | Nuclias Manual - Page 57
With Basic Login Page Using a RADIUS Server 1. Navigate to the Configure > Access Point > Profiles page. 2. From the Profile list, click SSID under the Actions column of the Profile of the SSID you wish to edit. 3. From the SSID list, click the SSID name of the SSID you wish to edit. 4. In the SSID - D-Link DBS-2000-10 | Nuclias Manual - Page 58
2. From the Profile list, click SSID under the Actions column of the Profile of the SSID you wish to edit. 3. From the SSID list, click the SSID name of the SSID you wish to edit. 4. In the SSID configuration window, click the Captive Portal tab. 5. Select Sign-on with third party credentials as the - D-Link DBS-2000-10 | Nuclias Manual - Page 59
Note: Local authentication databases can be configured separately. Refer to the Local Authentication section on page 76 for more information. 11. [Optional] Click Add authentication users to create a new local authentication database. 12. Specify the following information: 3rd party credentials - D-Link DBS-2000-10 | Nuclias Manual - Page 60
Secret between 1 and 65535. Enter a shared secret. 10. Select a primary RADIUS server database from the drop-down menu. 11. [Optional] Select a secondary RADIUS server database from the drop-down menu. 12. Specify the following information: 3rd party credentials Session Timeout Idle timeout - D-Link DBS-2000-10 | Nuclias Manual - Page 61
Allow Deny Allow devices that correspond with a MAC address in the MAC ACL to connect to the SSID. Prevent devices that correspond with a MAC address in the MAC ACL to connect to the SSID. 7. Select a MAC ACL from the drop-down menu. Note: To create a MAC ACL, refer to the MAC ACL section on page - D-Link DBS-2000-10 | Nuclias Manual - Page 62
Settings Using IP ACL Using IP Access Control Lists (ACL), users manage access to the network based on the IP. Clients with IP addresses corresponding to IP addresses in the ACL can be allowed or denied access to the network. 1. Navigate to the Configure > Access Point > Profiles page. 2. From the - D-Link DBS-2000-10 | Nuclias Manual - Page 63
6. In the Availability column, select the schedule behavior for each day of the week: On The SSID will be live and broadcasting during the defined time period. Off The SSID will be disabled during the defined time period. 7. In the From and To column, select a schedule starting and ending - D-Link DBS-2000-10 | Nuclias Manual - Page 64
5. Specify the following information: Max Clients Enter the maximum number of concurrent clients that can connect to the SSID. The maximum is 64. Max Allowed Client Enter the maximum amount of times a client can Retries attempt to reconnect to the SSID once the maximum client limit has been - D-Link DBS-2000-10 | Nuclias Manual - Page 65
window, users can configure the 2.4 GHz and 5 GHz wireless bands settings including basic radio functionality, channel selection, and advanced settings and troubleshooting features. 8.1.11.1 Configuring Basic Profile Radio Settings 1. Navigate to the Configure > Access Point > Profiles page. 57 - D-Link DBS-2000-10 | Nuclias Manual - Page 66
Isolation Choose to enable or disable the 2.4 GHz and 5 GHz wireless band. Select a radio mode from the drop-down menu. Only devices that support the selected wireless standards will be able to connect to this wireless band. Select the channel transmission bandwidth for the 2.4 and 5 GHz wireless - D-Link DBS-2000-10 | Nuclias Manual - Page 67
Specify the interval (in hours) at which the auto- interval channel scan is performed. 5. [Optional] Click Run Auto Channel now to manually perform an auto-channel scan. 6. Click Save. 7. Click Push Configuration. 8.1.11.3 Configuring Advanced Profile Radio Settings 1. Navigate to the Configure - D-Link DBS-2000-10 | Nuclias Manual - Page 68
. 8.1.12 Configuring General Profile Settings From the General Profile settings, users can configure a proxy server to route traffic and enable IPv6 support. 1. Navigate to the Configure > Access Point > Profiles page. 2. From the Profile list, click Settings under the Actions column of the Profile - D-Link DBS-2000-10 | Nuclias Manual - Page 69
address. If proxy server is enabled, enter the proxy server port. The range is between 1 and 65535. Choose to enable or disable IPv6 support. This allows the Profile to work in an IPv6 network environment. 4. Click Save. 5. Click Push Configuration. 8.1.13 Pushing Configuration Changes The Push - D-Link DBS-2000-10 | Nuclias Manual - Page 70
in the format XXXX-XXX-XXX or XXXXXXXXXX. When entering the UID, do not include dashes. Enter a name for the device. Select a Site to link this device to. Select a Profile for this device. The device will use the settings configured in that profile. [Optional] Enter the device license key. Note - D-Link DBS-2000-10 | Nuclias Manual - Page 71
to the Inventory Bulk adding new devices to the Inventory stores the devices in a warehouse where they are kept inactive until they are manually assigned to a Site and Profile by the user at a later point. 1. Navigate to the Configure > Access Point > Devices page. 2. Click Bulk import. 3. [Optional - D-Link DBS-2000-10 | Nuclias Manual - Page 72
1. Navigate to the Configure > Access Point > Devices page. 2. Click Bulk import. 3. [Optional] Download the reference sample template. 4. Click Browse. 5. Locate the CSV-formatted file containing the UIDs of the devices. Note: To directly register devices to a Site, use the following format: [UID][ - D-Link DBS-2000-10 | Nuclias Manual - Page 73
1. Navigate to the Configure > Access Point > Devices page. 2. From the device list, click the device name. 3. In the Site and Profile section, select a Site from the drop-down menu. 4. In the Site and Profile section, select a Profile from the drop-down menu. 5. Click Apply. 8.2.5.3 Changing the - D-Link DBS-2000-10 | Nuclias Manual - Page 74
Note: By default, the connection type is set to Local Setting, which refers to the local connection type configured on the physical device. All unmodified devices are configured to use DHCP. 1. Navigate to the Configure > Access Point > Devices page. 2. From the device list, click the device name. - D-Link DBS-2000-10 | Nuclias Manual - Page 75
4. In the Use profile configuration field, select disable. Note: Local settings are configured identically to Profile settings. Refer to the Profiles section on page 39 for more information on how to configure each section. 8.2.5.6 Configuring the Local Device Radio Settings Under normal - D-Link DBS-2000-10 | Nuclias Manual - Page 76
Start to start the test. Note: The Start button will change to Stop once the test begins. 5. Click Stop to stop the test. 8.2.5.10 Manually Rebooting a Device 1. Navigate to the Configure > Access Point > Devices page. 2. From the device list, click the device name. 3. Click the Tools tab in the - D-Link DBS-2000-10 | Nuclias Manual - Page 77
2. From the device list, click the device name. 3. Click the License tab in the top-right of the screen. 4. In the License Table section, from the license key list, click Delete under the Actions column of the license key you wish to delete. 5. When prompted to confirm, click Yes. Note: Deleting a - D-Link DBS-2000-10 | Nuclias Manual - Page 78
8.3 IP ACLs 8.3.1 Creating an IP ACL Single Entries 1. Navigate to the Configure > Access Point > IP ACLs page. 2. Click Add IP ACL. 3. In the Add IP address window, enter a name for the IP ACL. 4. Select Add IP address. 5. Specify the following information: Using IP address [#] Subnet mask [#] - D-Link DBS-2000-10 | Nuclias Manual - Page 79
6. Click Browse. 7. Locate the CSV-formatted file containing the IP addresses and subnet masks using the following format: [IP address][subnet mask] 8. Click Save. 8.3.3 Editing Existing IP ACLs 8.3.3.1 Adding IP Addresses to an Existing IP ACL 1. Navigate to the Configure > Access Point > IP ACLs - D-Link DBS-2000-10 | Nuclias Manual - Page 80
5. [Optional] Click Add to add additional IP entries. Repeat step 4 for each new entry. 6. Click Save. 8.3.3.2 Editing an IP Address in an IP ACL 1. Navigate to the Configure > Access Point > IP ACLs page. 2. From the IP ACL list, click the pencil icon under the Actions column of the IP ACL you - D-Link DBS-2000-10 | Nuclias Manual - Page 81
8.3.5 Deleting an IP ACL 1. Navigate to the Configure > Access Point > IP ACLs page. 2. From the IP ACL list, click the trash can icon under the Actions column of the IP ACL you wish to delete. 3. When prompted to confirm, click Yes. 8.4 MAC ACLs 8.4.1 Creating a MAC ACL Single Entries 1. - D-Link DBS-2000-10 | Nuclias Manual - Page 82
2. Click Add MAC ACL. 3. In the Add MAC ACL window, enter a name for the MAC ACL. 4. Select Bulk import. 5. [Optional] Download the reference sample template. 6. Click Browse. 7. Locate the CSV-formatted file containing the MAC addresses of the devices using the following format: [MAC address] 8. - D-Link DBS-2000-10 | Nuclias Manual - Page 83
4. Specify the following information: MAC Address [#] Enter a valid MAC address. 5. [Optional] Click Add to add additional MAC entries. 6. Click Save. 8.4.3.2 Editing a MAC Address in an Existing MAC ACL 1. Navigate to the Configure > Access Point > MAC ACLs page. 2. From the MAC ACL list, click - D-Link DBS-2000-10 | Nuclias Manual - Page 84
1. Navigate to the Configure > Access Point > MAC ACLs page. 2. From the MAC ACL list, click the pencil icon under the Actions column of the MAC ACL you wish to edit. 3. In the Update MAC ACL window, click Export to CSV. 8.4.5 Deleting a MAC ACL 1. Navigate to the Configure > Access Point > MAC ACLs - D-Link DBS-2000-10 | Nuclias Manual - Page 85
8.5.2 Creating a Local Authentication Database Using Bulk Import 1. Navigate to the Configure > Access Point > Local authentication list page. 2. Click Add MAC ACL. 3. In the Add local authentication window, enter a name for the local authentication list. 4. Select Bulk import. 5. [Optional] - D-Link DBS-2000-10 | Nuclias Manual - Page 86
3. In the Update local authentication window, click Add local authentication. 4. Specify the following information: User name Password Enter a local user name. Enter a password. 5. [Optional] Click Add to add additional local user accounts. 6. Click Save. 8.5.3.2 Editing an Existing Local User - D-Link DBS-2000-10 | Nuclias Manual - Page 87
2. From the local authentication database, click the pencil icon under the Actions column of the database you wish to edit. 3. In the Update local authentication window, click the trash can icon under the Actions column of the local user you wish to delete. 4. Click Save. 5. When prompted to confirm - D-Link DBS-2000-10 | Nuclias Manual - Page 88
8.6 Splash Page Editor From the Splash Page Editor window, users can configure and customize splash pages to use with the SSID. This can be configured to have users click through or enter credentials to access the network. Users can either customize any of the default splash pages or create their - D-Link DBS-2000-10 | Nuclias Manual - Page 89
3. Click the respective splash page section tab and edit the following information: Header Footer Click-through [login] Progress Landing Error Managed Files Terms of Use Edit the header section of the splash page. Edit the footer section of the splash page. Edit the click-through content. This - D-Link DBS-2000-10 | Nuclias Manual - Page 90
9 Reports From the Reports section, users can view and generate detailed reports for changes on the platform, access point and client activity, network alerts, and license reports. The following sections provide more detailed information about the different types of reports. Change Log Access Point - D-Link DBS-2000-10 | Nuclias Manual - Page 91
Profile SSID Device Enter the account name the event is linked to. Enter the name of the Site the event is linked to. Enter the name of the Profile the event is linked to. Enter the name of the SSID the event is linked to. Enter the name of the Device the event is - D-Link DBS-2000-10 | Nuclias Manual - Page 92
Email 1. Navigate to the Reports > Access Point page. 2. [Optional] Select a time frame from the drop-down menu. 3. Check the profiles to filter access point logs for from the Device report drop-down menu. 4. Check the devices to filter access point logs for from the Device drop-down menu. Note: - D-Link DBS-2000-10 | Nuclias Manual - Page 93
7. Check the type of access point logs to show from the Customize report drop-down menu. Select All to show all report types. 8. [Optional] Click Preview to see a preview version of the access point log with the selected parameters. 9. Click Download. 9.3 Alerts From the Alerts window, users can - D-Link DBS-2000-10 | Nuclias Manual - Page 94
Note: Alerts are managed per user. Multiple users with the required editing rights within the same organizations will see the same alerts. If one user acknowledges or deletes alerts, they will no longer appear for this user, but will still be visible for the other users until they acknowledge or - D-Link DBS-2000-10 | Nuclias Manual - Page 95
AP Severity Enter the name of the access point that triggered the alert. Select an alert severity level from the drop-down menu. 9.4 Licenses 9.4.1 Filtering the License Logs 1. Navigate to the Reports > Licenses page. 2. Click the filter selection in the top-right. 3. Check the information - D-Link DBS-2000-10 | Nuclias Manual - Page 96
window. Refer to the Inventory section on page 97 for more information. From the Firmware section, users can set device upgrade schedules, or manually upgrade a device's firmware. Refer to the Firmware section on page 101 for more information. From the Alert Settings section, users can choose the - D-Link DBS-2000-10 | Nuclias Manual - Page 97
10.1.1 Inviting a New User 1. Navigate to the Settings > Account Management page. 2. Click Invite User. 3. Specify the following information: User name Access Level Email address Site Tag Site Role Enter the user's name. Select the access level of the user. This determines what information the - D-Link DBS-2000-10 | Nuclias Manual - Page 98
10.1.2 Editing an Existing User 10.1.2.1 Editing a User Name 1. Navigate to the Settings > Account Management page. 2. From the user account list, click he user you wish to edit. 3. In the Edit User window, edit the following information: Name Enter a user name 4. Click Save change. 10.1.2.2 - D-Link DBS-2000-10 | Nuclias Manual - Page 99
2. From the user list, click the Search field. 3. Enter the user name. Note: All user names matching the value entered in the search field will automatically appear. 4. [Optional] Click the filter drop-down menu and enter the following information: Note: Multiple filters can be populated to narrow - D-Link DBS-2000-10 | Nuclias Manual - Page 100
window, users can view more information about all organizations linked to the user account including organization type, device status Creating a New Organization Organization creation is only available for Managed Services Providers (MSP)-level users. Normal user accounts cannot create additional - D-Link DBS-2000-10 | Nuclias Manual - Page 101
4. Click Save. 10.2.3 Adding A Site Tag to Organization 1. Navigate to the Settings > Organization Management page. 2. From the organization list, click Create Site Tag under the Actions column. 3. Specify the following information: an Site Name Parent Tag Enter a name for the Site Select a - D-Link DBS-2000-10 | Nuclias Manual - Page 102
Organization Organization deletion is only available for Managed Services Providers (MSP)-level users. Normal user accounts License Key A single licenses key can be added to the organization so they can be manually assigned to a device at a later point. 1. Navigate to the Settings > License - D-Link DBS-2000-10 | Nuclias Manual - Page 103
4. Click Save. 10.3.2 Bulk Adding Multiple Licenses Multiple licenses keys can be bulk added to the organization so they can be manually assigned to a device at a later point. 1. Navigate to the Settings > License Management. 2. Click Bulk Import. 3. [Optional] Download the reference sample template - D-Link DBS-2000-10 | Nuclias Manual - Page 104
the name of the organization the license key is linked to. Enter the UID of the device the license is linked to. Enter the model name of the device the license is linked to. Enter the MAC address of the device the license is linked to. Enter the license start date in the format - D-Link DBS-2000-10 | Nuclias Manual - Page 105
name for the device. 4. Under the Register Device option, select Enable. 5. Specify the following information: Site Profile License Key Select a Site to link this device to. Select a Profile for this device. The device will use the settings configured in that profile. [Optional] Enter the device - D-Link DBS-2000-10 | Nuclias Manual - Page 106
Device to the Inventory Adding a new device to the Inventory stores the device in a warehouse where it is kept inactive until it is manually assigned to a Site and Profile by the user at a later point. 1. Navigate to the Settings > Inventory page. 2. Click Add device. 3. Specify the following - D-Link DBS-2000-10 | Nuclias Manual - Page 107
3. [Optional] Download the reference sample template. 4. Click Browse. 5. Locate the CSV-formatted file containing the UIDs of the devices. Note: To add devices to the inventory, use the following format: [UID] 6. Click Upload. 10.4.4 Bulk Adding and Registering Multiple Devices to a Site When bulk - D-Link DBS-2000-10 | Nuclias Manual - Page 108
Upload. 10.4.5 Deleting a Device From the Inventory Deleting a device from the inventory completely removes the device from the organization it was linked to, allowing it to be reassigned to a different organization. 1. Navigate to the Settings > Inventory page. 2. Click the tab of the inventory - D-Link DBS-2000-10 | Nuclias Manual - Page 109
3. From the device list, click the checkbox next to the device(s) you wish to delete. 4. Click Delete. 5. When prompted to confirm, click Yes. 10.4.6 Searching for a Device 1. Navigate to the Settings > Inventory page. 2. Click the tab of the inventory list to filter shown devices. 3. From the - D-Link DBS-2000-10 | Nuclias Manual - Page 110
. Firmware upgrades are managed at the Site level and configured per device type, which means that all devices of the same type that are linked to that Site will use the same firmware upgrading policy. 10.5.1 Setting an Automatic Upgrade Window Automatic upgrade windows provide an easy way of - D-Link DBS-2000-10 | Nuclias Manual - Page 111
6. Click Save. 10.5.2 Setting a Custom Device Upgrade Time Users can define a specific time and date to scan for firmware updates which overrides the automatic upgrade schedule. 1. Navigate to the Settings > Firmware page. 2. Select a Site from the Site menu in the top of the screen. 3. Select a day - D-Link DBS-2000-10 | Nuclias Manual - Page 112
6. Click the date field to choose a date and select a time from the drop-down menu. 7. Click Save. 10.5.3 Performing a Manual Firmware Upgrade Devices can be manually upgraded by performing an on-the-spot firmware upgrade check. 1. Navigate to the Settings > Firmware page. 2. Select a Site from the - D-Link DBS-2000-10 | Nuclias Manual - Page 113
4. Click the tab of the device you wish to configure firmware upgrades for. Note: Upgrade windows need to be configured separately for each device type. 5. Select Perform the upgrade now. 6. Click Upgrade now. 7. When prompted to confirm, click Yes. 10.6 Alert Settings 10.6.1 Configuring Alert - D-Link DBS-2000-10 | Nuclias Manual - Page 114
in the format XXXX-XXX-XXX or XXXXXXXXXX. When entering the UID, do not include dashes. Enter a name for the device. Select a Site to link this device to. Select a Profile for this device. The device will use the settings configured in that profile. [Optional] Enter the device license key. Note - D-Link DBS-2000-10 | Nuclias Manual - Page 115
so we may continue to improve the quality of our platform. 11.1.1 Contacting Nuclias Support 1. Navigate to the Help > Contact Us page. 2. Specify the following information: Name E-mail Phone Issue category Problem device Description Click to enter a sender name. The recipient will see this name
-
 1
1 -
 2
2 -
 3
3 -
 4
4 -
 5
5 -
 6
6 -
 7
7 -
8
-
9
-
10
-
11
-
12
-
13
-
14
-
15
-
16
-
17
-
18
-
19
-
20
-
21
-
22
-
23
-
24
-
25
-
26
-
27
-
28
-
29
-
30
-
31
-
32
-
33
-
34
-
35
-
36
-
37
-
38
-
39
-
40
-
41
-
42
-
43
-
44
-
45
-
46
-
47
-
48
-
49
-
50
-
51
-
52
-
53
-
54
-
55
-
56
-
57
-
58
-
59
-
60
-
61
-
62
-
63
-
64
-
65
-
66
-
67
-
68
-
69
-
70
-
71
-
72
-
73
-
74
-
75
-
76
-
77
-
78
-
79
-
80
-
81
-
82
-
83
-
84
-
85
-
86
-
87
-
88
-
89
-
90
-
91
-
92
-
93
-
94
-
95
-
96
-
97
-
98
-
99
-
100
-
101
-
102
-
103
-
104
-
105
-
106
-
107
-
108
-
109
-
110
-
111
-
112
-
113
-
114
-
115
 |
 |

i
D-Link Nuclias – Cloud Networking Solution
Portal User Manual
DBA Series Access Points