Dell Latitude D630 Service Manual - Page 40
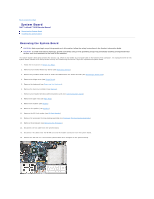
Installing the System Board - wireless switch
 |
UPC - 683728230456
View all Dell Latitude D630 manuals
Add to My Manuals
Save this manual to your list of manuals |
Page 40 highlights
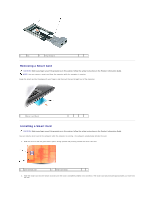
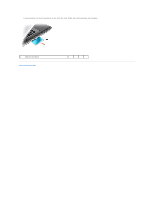
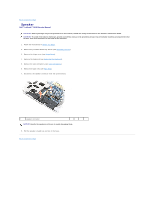
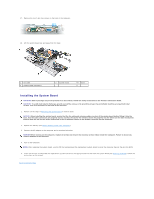
17. Remove the four 5-mm hex screws on the back of the computer. 18. Lift the system board out and away from the base. 1 fan cable 4 modem cable connectors 2 system board 3 base Installing the System Board CAUTION: Before you begin any of the procedures in this section, follow the safety instructions in the Product Information Guide. CAUTION: To avoid electrostatic discharge, ground yourself by using a wrist grounding strap or by periodically touching an unpainted metal surface, such as a connector on the back of the computer. 1. Perform all the steps in Removing the System Board in reverse order. NOTICE: When installing the system board, ensure that the fan cable and antenna cables are clear of the system board before fitting it into the base, that the audio connectors are properly seated, and that the tab for the wireless switch fits properly into the detent on the slider mechanism. Position both the tab and the slider mechanism in the off position (closest to the display) to ensure correct alignment. 2. Replace the battery (see Before Working Inside Your Computer). 3. Connect the AC adapter to the computer and to an electrical outlet. NOTICE: Before turning on the computer, replace all screws and ensure that no stray screws remain inside the computer. Failure to do so may result in damage to the computer. 4. Turn on the computer. NOTE: After replacing the system board, use the CD that accompanied the replacement system board to enter the computer Service Tag into the BIOS. 5. Insert the CD that accompanied the replacement system board into the appropriate drive and flash the system BIOS (see Flashing the BIOS). Follow the instructions on the screen. Back to Contents Page
-
 1
1 -
2
-
3
-
4
-
5
-
6
-
7
-
8
-
9
-
10
-
11
-
12
-
13
-
14
-
15
-
16
-
17
-
18
-
19
-
20
-
21
-
22
-
23
-
24
-
25
-
26
-
27
-
28
-
29
-
30
-
31
-
32
-
33
-
34
-
 35
35 -
 36
36 -
 37
37 -
 38
38 -
 39
39 -
 40
40 -
 41
41 -
 42
42 -
 43
43
 |
 |
