Dell PowerEdge 2650 2-Post Rack Installation
Dell PowerEdge 2650 Manual
 |
View all Dell PowerEdge 2650 manuals
Add to My Manuals
Save this manual to your list of manuals |
Dell PowerEdge 2650 manual content summary:
- Dell PowerEdge 2650 | 2-Post
Rack Installation - Page 1
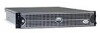
Dell™ Systems 2-Post Rack Installation www.dell.com | support.dell.com - Dell PowerEdge 2650 | 2-Post
Rack Installation - Page 2
to hardware or loss of data and tells you how to avoid the problem. CAUTION: A CAUTION indicates a potential for property damage, personal injury the entities claiming the marks and names or their products. Dell Computer Corporation disclaims any proprietary interest in trademarks and trade names other - Dell PowerEdge 2650 | 2-Post
Rack Installation - Page 3
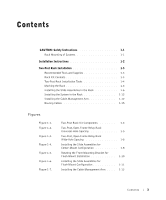
1-1 Rack Mounting of Systems 1-1 Installation Instructions 1-2 Two-Post Rack Installation 1-3 Recommended Tools and Supplies 1-3 Rack Kit Contents 1-3 Two-Post Rack Installation Tasks 1-4 Marking the Rack 1-4 Installing the Slide Assemblies in the Rack 1-6 Installing the System in - Dell PowerEdge 2650 | 2-Post
Rack Installation - Page 4
Figure 1-8. Figure 1-9. Figure 1-10. Installing the System Status Indicator Cable Routing the Power Cords Routing Cables 1-14 1-15 1-16 4 Contents - Dell PowerEdge 2650 | 2-Post
Rack Installation - Page 5
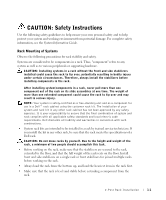
Instructions Use the following safety guidelines to help ensure your own personal safety and to help protect your system and working environment from potential damage. For complete safety information, see the System Information Guide local electric code requirements. Dell disclaims all liability and - Dell PowerEdge 2650 | 2-Post
Rack Installation - Page 6
www.dell.com | support.dell.com CAUTION: Safety Instructions (continued) • Use caution when pressing the component rail release latches and sliding a component into or out of a rack; the slide rails can pinch your fingers. • After a component is inserted into - Dell PowerEdge 2650 | 2-Post
Rack Installation - Page 7
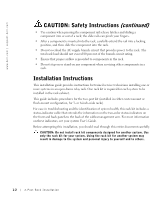
Instructions" at the front of this document for additional safety information regarding rack installation. Recommended Tools and Supplies You need the following tools and supplies to install the system in a two-post open-frame relay rack: • #2 Phillips screwdriver • 11/32-inch wrench or nut driver - Dell PowerEdge 2650 | 2-Post
Rack Installation - Page 8
www.dell.com | support.dell.com • +Twelve 12-24 x 0.5-inch pan-head Phillips screws • Tie-wraps (not shown in Figure 1-1) Figure 1-1. Two-Post Rack Kit Components slide assemblies (2) stiffening bracket - Dell PowerEdge 2650 | 2-Post
Rack Installation - Page 9
Universal-Hole Spacing Racks Industry-standard two-post racks with universal-hole spacing have an alternating pattern of three holes per U with center-to-center hole spacing (beginning at the top hole of a 1-U space) of 15.9 mm, 15.9 mm, and 12.7 mm (0.625 inch, 0.625 inch, and 0.5 inch) for the - Dell PowerEdge 2650 | 2-Post
Rack Installation - Page 10
www.dell.com | support.dell.com To mark the rack, perform the following steps: 1 Place a mark on the rack's front vertical rails where you want to locate the bottom of the system you are installing in the two-post rack. The bottom of each 1-U space is at the middle of the narrowest - Dell PowerEdge 2650 | 2-Post
Rack Installation - Page 11
Figure 1-4). 2 Position the right slide assembly in the two-post rack at the location you marked, push the back bracket forward against the vertical two-post rack, secure inches wide, use the holes at the back end of the slide assemblies (shown in Figure 1-4). If the vertical rack is 6 inches wide, - Dell PowerEdge 2650 | 2-Post
Rack Installation - Page 12
www.dell.com | support.dell.com Figure 1-4. Installing the Slide Assemblies for Center-Mount Configuration two-post open-frame rack front bracket back bracket nuts (2 per bracket) 12-24 x 0.5-inch - Dell PowerEdge 2650 | 2-Post
Rack Installation - Page 13
following steps: 1 Locate the two slide assemblies and place them, side by side, on a smooth work surface, with the front ends of the slide opposite slide assembly. 2 Using a #2 Phillips screwdriver and an 11/32-inch wrench or nut driver, remove two 12-24 x 0.5-inch pan-head Phillips screws, two - Dell PowerEdge 2650 | 2-Post
Rack Installation - Page 14
www.dell.com | support.dell.com Figure 1-5. the right slide assembly in the rack. 10 Use an 11/32-inch wrench or nut driver to fully tighten the nuts on the mounting brackets on both slide use the holes at the back end of the slide assemblies (shown in Figure 1-6). If the vertical rack is 6 - Dell PowerEdge 2650 | 2-Post
Rack Installation - Page 15
Figure 1-6. Installing the Slide Assemblies for Flush-Mount Configuration two-post open-frame rack 12-24 x 0.5-inch pan-head Phillips screws (5 each slide) slide assembly system release latch (yellow) stiffening bracket holes for stiffening bracket with 3-inch racks holes for stiffening bracket - Dell PowerEdge 2650 | 2-Post
Rack Installation - Page 16
dell.com | support.dell the system into the slide assembly. 7 Press up on the green slide release latch side of the front chassis panel to secure the system to the locate the latch on the end of the slide assembly. 2 Push the tab on the back end of the cable-management arm into the latch on the end - Dell PowerEdge 2650 | 2-Post
Rack Installation - Page 17
front end tab on back end cable-management arm 4 Install the system status indicator cable plug into its connector (see Figure 1-8). 5 Open the wire covers on the cable-management arm by lifting the center of the wire over the top of the embossed round button on the front of the forward part of - Dell PowerEdge 2650 | 2-Post
Rack Installation - Page 18
www.dell.com | support.dell.com 6 Route the system status indicator end of the cable through the cable-management arm, and install the indicator in its slot at the back end of the cable-management arm (see Figure 1-8). Figure 1-8. Installing the System Status Indicator Cable system status indicator - Dell PowerEdge 2650 | 2-Post
Rack Installation - Page 19
system back panel. For details on cable connections, see your system's Installation and Troubleshooting Guide and the User's Guide. 2 Route the power and I/O cables through the cable-management arm, using four loosely secured tie-wraps (two in the middle and one on each end of the cablemanagement - Dell PowerEdge 2650 | 2-Post
Rack Installation - Page 20
www.dell.com | support.dell.com NOTE: As you pull the system out to its furthest extension, the slide assemblies will lock in the extended position. To push the system back into the rack, press the slide release latch on the side of the slide, and then slide the system completely into the rack. 4
-
 1
1 -
 2
2 -
 3
3 -
 4
4 -
 5
5 -
 6
6 -
 7
7 -
8
-
9
-
10
-
11
-
12
-
13
-
14
-
15
-
16
-
17
-
18
-
19
-
20
 |
 |

www.dell.com | support.dell.com
Dell™ Systems
2-Post Rack Installation