Dell PowerEdge 2650 2-Post Rack Installation - Page 10
Installing the Slide Assemblies in the Rack - rail install
 |
View all Dell PowerEdge 2650 manuals
Add to My Manuals
Save this manual to your list of manuals |
Page 10 highlights
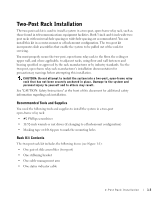
www.dell.com | support.dell.com To mark the rack, perform the following steps: 1 Place a mark on the rack's front vertical rails where you want to locate the bottom of the system you are installing in the two-post rack. The bottom of each 1-U space is at the middle of the narrowest metal area between holes. NOTE: If your rack has wide-hole spacing, go to step 3. 2 Place a mark 88 mm (3.5 inches) above the original mark you made (or count up six holes in a rack with universal-hole spacing (see Figure 1-2). Each 1-U (44 mm, or 1.75 inches) of vertical space on a rack with universal-hole spacing has three holes with center-to-center spacing between holes (beginning at the top of a 1-U space) of 0.625, 0.625, and 0.5 inches (see Figure 1-2). NOTE: If your rack has universal-hole spacing, you have completed the procedure for marking the rack. 3 Place a mark 88 mm (3.5 inches) above the original mark you made (or count up to the fourth hole in the rack with wide-hole spacing (see Figure 1-3). Each 1-U (44 mm, or 1.75 inches) of vertical space on a rack with wide-hole spacing has two holes with center-to-center spacing between holes (beginning at the top of a 1-U space) of 31.7 mm (1.25 inches) (see Figure 1-3). Installing the Slide Assemblies in the Rack You can install the slide assemblies in a two-post open-frame rack having either universalhole spacing (see Figure 1-2) or wide-hole spacing (see Figure 1-3). You can install the 2-U slide assemblies in either a flush-mount or center-mount configuration. CAUTION: Do not attempt to install another system using this rack kit. Use only the rack kit intended for your system. Using the rack kit for another system may result in damage to the system and personal injury to yourself and to others. 1-6 2-Post Rack Installation
-
 1
1 -
2
-
3
-
4
-
 5
5 -
 6
6 -
 7
7 -
 8
8 -
 9
9 -
 10
10 -
 11
11 -
 12
12 -
 13
13 -
 14
14 -
 15
15 -
16
-
17
-
18
-
19
-
20
 |
 |
