Dell PowerVault 210S Dell PowerVault 200S and 210S Storage Systems Rack I - Page 26
shown
 |
View all Dell PowerVault 210S manuals
Add to My Manuals
Save this manual to your list of manuals |
Page 26 highlights
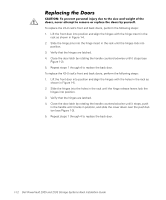
To replace the 24-U rack's front and back doors, perform the following steps: 1. Lift the front door into position and align the hinges with the hinge insert in the rack as shown in Figure 1-4. 2. Slide the hinge pins into the hinge insert in the rack until the hinges lock into position. 3. Verify that the hinges are latched. 4. Close the door latch by rotating the handle counterclockwise until it stops (see Figure 1-2). 5. Repeat steps 1 through 4 to replace the back door. To replace the 42-U rack's front and back doors, perform the following steps: 1. Lift the front door into position and align the hinges with the holes in the rack as shown in Figure 1-5. 2. Slide the hinges into the holes in the rack until the hinge release levers lock the hinges into position. 3. Verify that the hinges are latched. 4. Close the door latch by rotating the handle counterclockwise until it stops, push in the handle until it locks in position, and slide the cover down over the push button (see Figure 1-3). 5. Repeat steps 1 through 4 to replace the back door. 1-12 Dell PowerVault 200S and 210S Storage Systems Rack Installation Guide
-
 1
1 -
2
-
3
-
4
-
5
-
6
-
7
-
8
-
9
-
10
-
11
-
12
-
13
-
14
-
15
-
16
-
17
-
18
-
19
-
20
-
 21
21 -
 22
22 -
 23
23 -
 24
24 -
 25
25 -
 26
26
 |
 |
