Denon AVR 688 Owners Manual - English - Page 46
Operating DENON Audio, Components, Presetting, Operating Preset Components
 |
UPC - 081757507851
View all Denon AVR 688 manuals
Add to My Manuals
Save this manual to your list of manuals |
Page 46 highlights
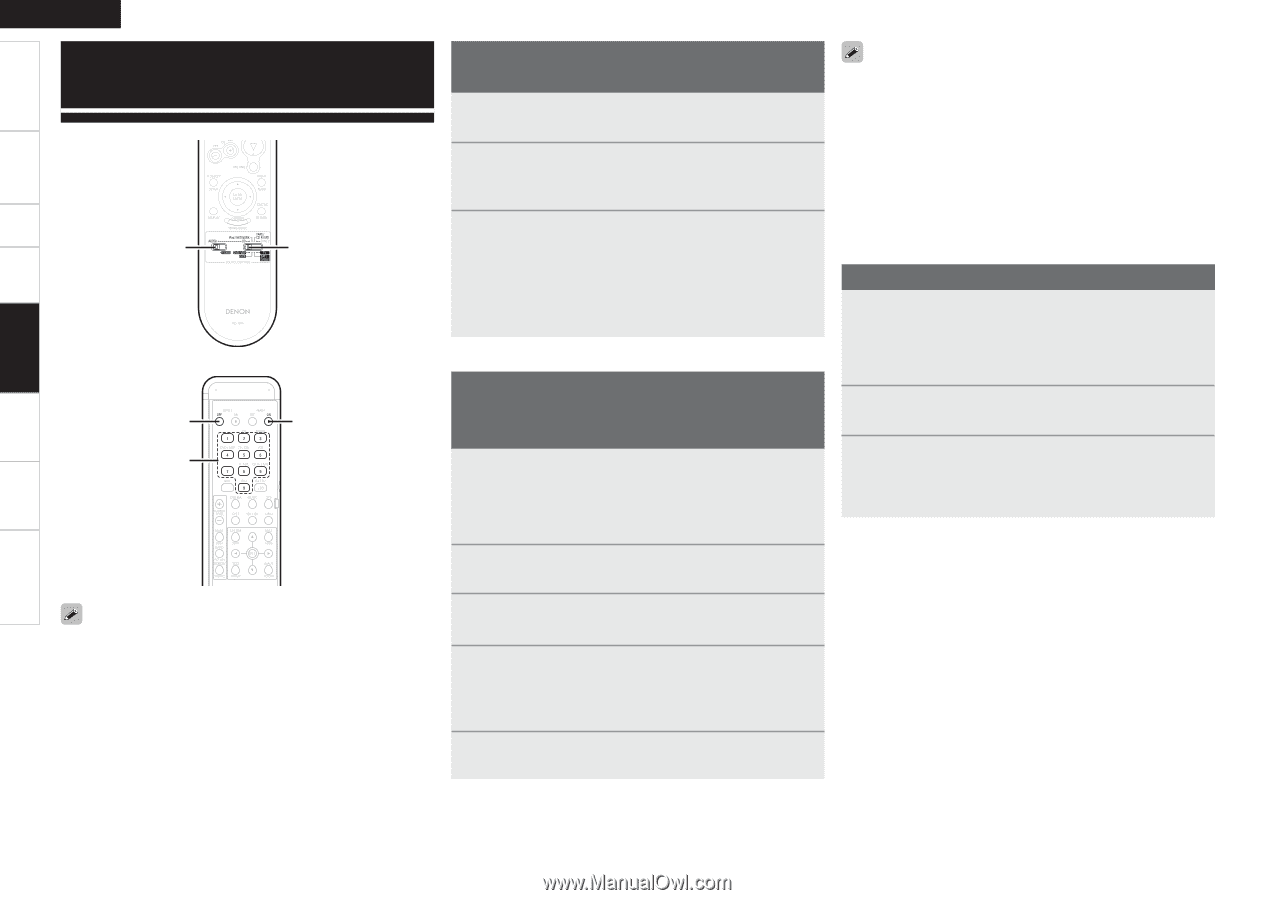
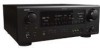
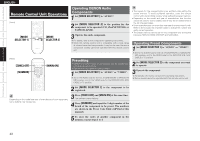
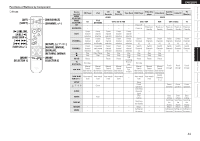
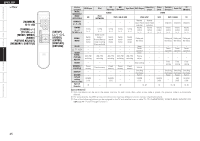
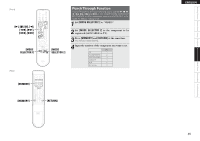
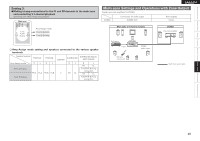
Getting Started Connections Setup Playback Remote Control Multi-Zone Information Troubleshooting ENGLISH Remote Control Unit Operations [Front] [MODE SELECTOR 1] [MODE SELECTOR 2] [Rear] [ZONE2 OFF] [NUMBER] [MAIN ON] Operating DENON Audio Components 1 Set [MODE SELECTOR 1] to "AUDIO". 2 Set [MODE SELECTOR 2] to the position for the component to be operated (CD, iPod/NETWORK or TAPE/CD-R/MD). 3 Operate the audio component. b For details, refer to the component's operating instructions. b While this remote control unit is compatible with a wide range of infrared controlled components, it may be the case that some component models cannot be operated with this remote control unit. Presetting • DENON and other makes of components can be operated by setting the preset memory. • Operation is not possible for some models. 1 Set [MODE SELECTOR 1] to "AUDIO" or "VIDEO". b Set to the AUDIO side for the CD, iPod/NETWORK or TAPE/CD-R/ MD position, and to the VIDEO side for the DVD/VDP, VCR, SAT/ CABLE or TV position. • The signals for the pressed buttons are emitted while setting the preset memory. To avoid accidental operation, cover the remote control unit's transmitting window while setting the preset memory. • Depending on the model and year of manufacture, this function cannot be used for some models, even if they are of makes listed in the list of preset codes. • Some manufacturers use more than one type of remote control code. Refer to the included list of preset codes to change the number and verify correct operation. • The preset memory can be set for one component only among the following: TAPE/CD-R/MD, DVD/VDP and SAT/CABLE. Operating Preset Components 1 Set [MODE SELECTOR 1] to "AUDIO" or "VIDEO". b Set to the AUDIO side for the CD, iPod/NETWORK or TAPE/CD-R/ MD position, and to the VIDEO side for the DVD/VDP, VCR, SAT/ CABLE or TV position. 2 Set [MODE SELECTOR 2] to the component you want to operate. 3 Operate the component. b For details, refer to the component's operating instructions. b Some models cannot be operated with this remote control unit. 2 Set [MODE SELECTOR 2] to the component to be registered. Depending on the model and year of manufacture of your equipment, some buttons may not operate. 3 Press [ZONE2 OFF] and [MAIN ON] at the same time. The indicator starts flashing. 4 Press [NUMBER] and input the 3-digit number of the brand of the component to be preset. The numbers are shown in the Preset Code Table (vEnd of this manual). 5 To store the codes of another component in the memory, repeat steps 1 to 4. 43
-
 1
1 -
2
-
3
-
4
-
5
-
6
-
7
-
8
-
9
-
10
-
11
-
12
-
13
-
14
-
15
-
16
-
17
-
18
-
19
-
20
-
21
-
22
-
23
-
24
-
25
-
26
-
27
-
28
-
29
-
30
-
31
-
32
-
33
-
34
-
35
-
36
-
37
-
38
-
39
-
40
-
 41
41 -
 42
42 -
 43
43 -
 44
44 -
 45
45 -
 46
46 -
 47
47 -
 48
48 -
 49
49 -
 50
50 -
 51
51 -
52
-
53
-
54
-
55
-
56
-
57
-
58
-
59
-
60
-
61
-
62
-
63
-
64
-
65
-
66
-
67
-
68
 |
 |