Dymo LabelManager® PnP User Guide 1 - Page 4
Inserting the Battery, See
 |
View all Dymo LabelManager® PnP manuals
Add to My Manuals
Save this manual to your list of manuals |
Page 4 highlights
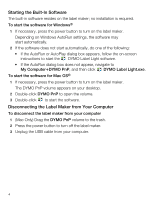
Become familiar with the features shown in Figure 2. 1 2 5 7 6 3 4 Figure 2 9 8 1 Power button/Status light 2 Cutter button 3 Label exit slot 4 USB port 5 Side cover 6 Cleaning tool 7 Battery compartment 8 Label compartment 9 Serial Number label Inserting the Battery The label maker is powered using a rechargeable lithium-ion battery. To insert the battery 1 Open the side cover of the label maker. 2 Remove the battery compartment cover. See Figure 3. 3 Insert the battery into the battery compartment as shown. 4 Replace the battery compartment cover. 5 Close the side cover of the label maker. NOTE Remove the battery if the label maker will not be used for a long period of time. Figure 3 2
-
 1
1 -
 2
2 -
 3
3 -
 4
4 -
 5
5 -
 6
6 -
 7
7 -
 8
8 -
 9
9 -
 10
10 -
11
-
12
 |
 |

2
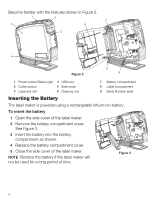
Become familiar with the features shown in Figure 2.
Inserting the Battery
The label maker is powered using a rechargeable lithium-ion battery.
To insert the battery
1
Open the side cover of the label maker.
2
Remove the battery compartment cover.
See Figure 3.
3
Insert the battery into the battery
compartment as shown.
4
Replace the battery compartment cover.
5
Close the side cover of the label maker.
NOTE
Remove the battery if the label maker will
not be used for a long period of time.
1
Power button/Status light
4
USB port
7
Battery compartment
2
Cutter button
5
Side cover
8
Label compartment
3
Label exit slot
6
Cleaning tool
9
Serial Number label
Figure 2
7
3
4
2
6
9
8
5
1
Figure 3