Dymo LabelManager® PnP User Guide 1 - Page 5
Inserting the Label Cassette, Connecting the Label Maker to your Computer, See
 |
View all Dymo LabelManager® PnP manuals
Add to My Manuals
Save this manual to your list of manuals |
Page 5 highlights
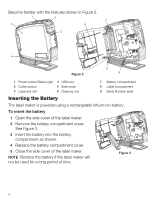
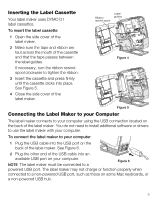
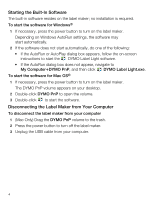
Inserting the Label Cassette Your label maker uses DYMO D1 label cassettes. To insert the label cassette 1 Open the side cover of the label maker. 2 Make sure the tape and ribbon are taut across the mouth of the cassette and that the tape passes between the label guides. If necessary, turn the ribbon rewind spool clockwise to tighten the ribbon. 3 Insert the cassette and press firmly until the cassette clicks into place. See Figure 5. 4 Close the side cover of the label maker. Ribbon rewind spool Label guides Figure 4 Figure 5 Connecting the Label Maker to your Computer The label maker connects to your computer using the USB connection located on the back of the label maker. You do not need to install additional software or drivers to use the label maker with your computer. To connect the label maker to your computer 1 Plug the USB cable into the USB port on the back of the label maker. See Figure 6. 2 Plug the other end of the USB cable into an available USB port on your computer. NOTE The label maker must be connected to a Figure 6 powered USB port. The label maker may not charge or function properly when connected to a non-powered USB port, such as those on some Mac keyboards, or a non-powered USB hub. 3
-
 1
1 -
 2
2 -
 3
3 -
 4
4 -
 5
5 -
 6
6 -
 7
7 -
 8
8 -
 9
9 -
 10
10 -
 11
11 -
12
 |
 |
