Epson BrightLink Solo Interactive Module ELPIU01 Quick Setup Guide - Page 15
Using the Interactive Module, ELPIU01 User's Guide
 |
View all Epson BrightLink Solo Interactive Module ELPIU01 manuals
Add to My Manuals
Save this manual to your list of manuals |
Page 15 highlights
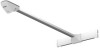
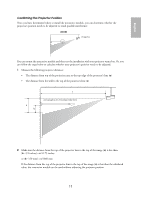
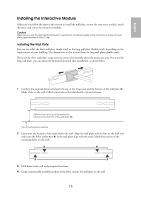
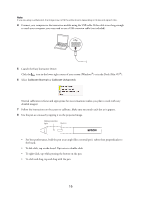
English 5 Slide the cover over the wall plate as shown. Note Make sure you route the USB cable around the whiteboard or image area. An optional cable management system is available from Epson (part # ELPCK01). 6 To attach the bracket plate cover, follow the instructions that came with the cover. 7 For convenient pen storage and security, attach the pen tray to your whiteboard or wall (bolts not included). Using the Interactive Module Once the interactive module is installed on the wall, you can connect the USB cable to your computer and begin using the interactive pens. For detailed instructions and troubleshooting tips, see your on-screen ELPIU01 User's Guide. Follow these steps to get ready: 1 Install the Easy Interactive Driver software on your computer from the CD labeled Epson Projector Software for Easy Interactive Function. You can also install TeamBoard Draw annotation software. 2 Install the pen batteries as shown. You can use either the alkaline batteries or the rechargeable batteries; do not mix the two battery types. 3 Connect your computer to your projector and display an image. 15
-
 1
1 -
2
-
3
-
4
-
5
-
6
-
7
-
8
-
9
-
 10
10 -
 11
11 -
 12
12 -
 13
13 -
 14
14 -
 15
15 -
 16
16 -
 17
17 -
 18
18 -
 19
19 -
 20
20 -
21
-
22
-
23
-
24
-
25
-
26
-
27
-
28
-
29
-
30
-
31
-
32
-
33
-
34
-
35
-
36
-
37
-
38
-
39
-
40
 |
 |
