Epson C11CA2920 Basics - Page 29
Selecting and Printing Photos
 |
View all Epson C11CA2920 manuals
Add to My Manuals
Save this manual to your list of manuals |
Page 29 highlights
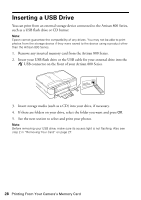
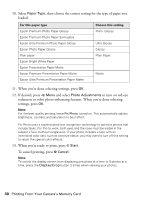
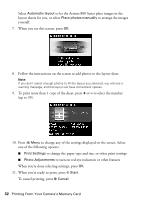
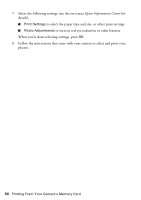
Selecting and Printing Photos 1. Load Epson photo paper. See page 10 for a list. 2. Press the Home button, if necessary, and select Photos. 3. Select View and Print Photos and press OK. 4. Press l or r to move through your photos and display one you want to print. Tip: If View Auto Correct: Off appears on the screen, press the View Auto Correct button to see how the image will look if Fix Photo is turned on (see page 30). 5. To print more than one copy, press + or - to select the number of copies you want of that photo. 6. To crop the photo, press the Display/Crop button and see page 16 for instructions. Note: In cropping mode, you can press x Menu to rotate the image. 7. Press l or r to view other photos, select the number of copies, and crop, if desired. 8. When you're done selecting photos, press OK. You see the Print Preview screen. 9. Press x Menu, select Print Settings, and select Paper Size. Choose the size of paper you loaded. Note: Paper Size options depend on the Paper Type setting you choose. Selecting and Printing Photos 29
-
 1
1 -
2
-
3
-
4
-
5
-
6
-
7
-
8
-
9
-
10
-
11
-
12
-
13
-
14
-
15
-
16
-
17
-
18
-
19
-
20
-
21
-
22
-
23
-
 24
24 -
 25
25 -
 26
26 -
 27
27 -
 28
28 -
 29
29 -
 30
30 -
 31
31 -
 32
32 -
 33
33 -
 34
34 -
35
-
36
-
37
-
38
-
39
-
40
-
41
-
42
-
43
-
44
-
45
-
46
-
47
-
48
-
49
-
50
-
51
-
52
-
53
-
54
-
55
-
56
-
57
-
58
-
59
-
60
-
61
-
62
-
63
-
64
-
65
-
66
-
67
-
68
-
69
-
70
-
71
-
72
-
73
-
74
-
75
-
76
-
77
-
78
-
79
-
80
 |
 |
