Epson CX5800F Product Information Guide - Page 15
Setting Up Your Speed Dial List - stylus error 10
 |
UPC - 010343856264
View all Epson CX5800F manuals
Add to My Manuals
Save this manual to your list of manuals |
Page 15 highlights
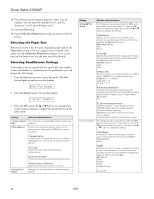
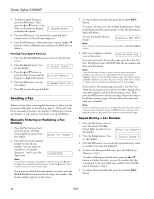
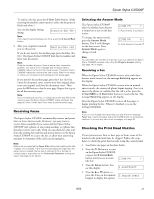
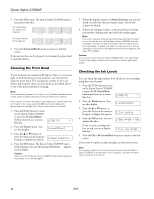
Epson Stylus CX5800F Setting 5.Communication (continued) Options and descriptions 3.ECM: On/Off Indicates whether you use Error Correction Mode to automatically request retransmission of fax data that is received with detected errors. On (default) Off 4.V.34: On/Off Indicates the speed at which you transmit faxes. On is 33.6 Kbps and Off is 14.4 Kbps. On (default) Off 6.Header & Time 7.Setup 5.Rings to Answer Indicates the number of rings that must occur before the Epson Stylus CX5800F automatically receives a fax. 4 (default) 1, 2, 3, 5, 6, 7, 8, or 9 For instructions on creating fax header information, and setting the date and time, see page 13. For instructions on using the maintenance utilities, see page 17 through page 20. 4. When you're finished, press the y Cancel/Back button to return to the first screen. Setting Up Your Speed Dial List You can create a speed dial list of up to 60 fax numbers so you can quickly select them for faxing. You can also add names to identify the recipients and print the speed dial list. 1. Press the Fax button once to enter Fax mode. The Fax button lights up and you see this display: Enter Fax Number 2. Press the Setup button. You see this display: 1.Select Speed D 3. Press the u or d button, or press the 3 key on the numeric 3.Speed Dial Set keypad, to display this option: 4. Press the OK button. You see this display: 1.Add Entry 5. Press the OK button again. You [01] see this display: 6. Press the OK button again. The screen displays Telephone Number briefly, then goes blank except for a cursor (_). 7. Press the keys on the numeric keypad to enter the fax number of the first speed dial entry. You can enter the numbers 0 to 9, and the characters * and #; up to 64 digits total. 1234567890 Note: If you need to change a character to the left, press the l button to delete the character and re-enter it. Press the r button if you need to move the cursor to the right. 8. Press the OK button again. The screen displays Name briefly, then goes blank except for a cursor (_). 9. Press the keys on the numeric keypad to enter a name for the speed dial entry (up to 30 characters). Use the number keys to enter the letters A to Z (in uppercase or lowercase), the numbers 0 to 9, and various symbols. Main Office Press a key repeatedly to display first the numbers and symbols (if available), then the uppercase and lowercase letters, as indicated on the key. Wait a few seconds or press the r button to move to the next character space. When you're finished, wait a few seconds or press the r button to move to a blank space. 10. Press the OK button. You see this display, indicating the next available speed dial entry number: [02] 11. If you want to add another speed dial entry, repeat steps 6 through 10. When you're finished, press the y Cancel/Back button to return to the 3.Speed Dial Setup menu. Editing or Deleting a Speed Dial Entry 1. To edit a speed dial entry, press the OK button. Then press the u or d button, or the 2 key on the numeric keypad, to display this option: 2.Edit Entry 2. Press the OK button. You see the first speed dial entry number and name displayed. 3. Press the OK button to edit this entry, or press the u or d button to select a different entry and press the OK button. 4. The phone number for the selected entry is displayed. Press the r button to move to the digits you want to edit. Press the number keys to enter new numbers or press the l button to delete digits to the left. When you're finished, press the OK button. 5. The name for the selected entry is displayed. Edit the name the same way as in step 4. When you're finished, press the OK button to return to the 2.Edit Entry display. 6. Press the y Cancel/Back button to return to the 3.Speed Dial Setup menu. 8/05 15
-
 1
1 -
2
-
3
-
4
-
5
-
6
-
7
-
8
-
9
-
 10
10 -
 11
11 -
 12
12 -
 13
13 -
 14
14 -
 15
15 -
 16
16 -
 17
17 -
 18
18 -
 19
19 -
 20
20 -
21
-
22
 |
 |