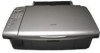
Epson CX5800F Product Information Guide - Page 16
Sending a Fax, Manually Entering or Redialing a Fax Number, Speed Dialing a Fax Number, Delete Entry - stylus how to scan
 |
UPC - 010343856264
View all Epson CX5800F manuals
Add to My Manuals
Save this manual to your list of manuals |
Page 16 highlights
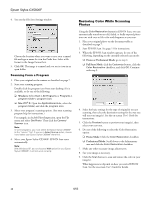
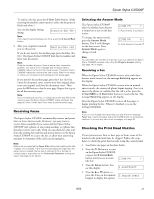
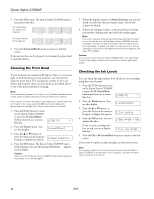
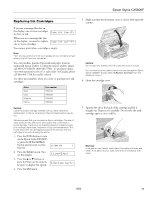
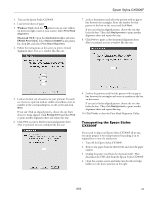
Epson Stylus CX5800F 7. To delete a speed dial entry, press the OK button. Then press the u or d button, or the 3 key on the numeric keypad, to display this option: 3.Delete Entry 8. Press the OK button. You see the first speed dial entry number (such as [1]) and name displayed. 9. Press the OK button to delete this entry, or press the u or d button to select a different entry and press the OK button to delete it. Printing Your Speed Dial List 1. Press the y Cancel/Back button to return to the first fax screen. 2. Press the Setup button. You see this display: 1.Select Speed D 3. Press the u or d button, or press the 2 key on the numeric keypad, to display this option: 2.Print Report 4. Press the OK button. You see 1.Speed Dial Lis this display: 5. Press OK to print the speed dial list. Sending a Fax Before you fax, place your original document or photo on the document table glass as described on page 7. Then send your fax by manually entering a fax number, redialing the previous fax number, or selecting an entry from your speed dial list. Manually Entering or Redialing a Fax Number 1. Press the Fax button once to enter Fax mode. The Fax button lights up and you see this display: Enter Fax Number 2. Press the keys on the numeric keypad to enter the fax number. You can enter the numbers 0 to 9 and the characters * and #; up to 64 digits total. 1234567890 Note: If you need to change a character to the left, press the l button to delete the character and re-enter it. Press the r button if you need to move the cursor to the right. If you want to redial the last fax number you used, press the Redial/Pause button instead of entering a fax number. The last fax number appears on the screen. 3. To send a black-and-white fax, press the x Start B&W button. To send a color fax, press the x Start Color button. (If the receiving fax machine cannot print in color, the fax prints in black-and-white.) You see this display during faxing: Scanning 001 98% Note: If you need to cancel faxing at any time, press the y Cancel/Back button. 4. After your original is scanned, Send another pag you see this screen: If you do not need to fax another page, press the 2 key (for No). The Epson Stylus CX5800F dials the fax number and faxes your document. Note: If the fax number is busy or there is some other connection problem, you see an error message and the Epson Stylus CX5800F returns to the first fax mode screen. The Epson Stylus CX5800F redials the number after one minute. Wait for the redial, or check your connection and settings and try faxing again. If you need to fax another page, press the 1 key (for Yes). Open the document cover, remove your first original, place your next original, and close the document cover. Then press the OK button to fax the next page. Repeat this step to fax all the necessary pages. The fax connection stays open until you're finished. Note: If you're sending a color fax, or a large document that fills up the memory area, the Epson Stylus CX5800F scans and faxes one page at a time. It then asks if you want to send another page. Speed Dialing a Fax Number 1. Press the Fax button once to enter Fax mode. The Fax button lights up and you see this display: Enter Fax Number 2. Press the Setup button. You see this display: 1.Select Speed D 3. Press the OK button. You see the first speed dial entry name or number from your list displayed. 4. To fax to the first speed dial entry, press the OK button. Then go to step 5. To select a different speed dial entry, press the u or d button to display the entry, or press the number key that corresponds to the speed dial entry number. Press the OK button, then go to step 5. 5. To send a black-and-white fax, press the x Start B&W button. 16 8/05
-
 1
1 -
2
-
3
-
4
-
5
-
6
-
7
-
8
-
9
-
10
-
 11
11 -
 12
12 -
 13
13 -
 14
14 -
 15
15 -
 16
16 -
 17
17 -
 18
18 -
 19
19 -
 20
20 -
 21
21 -
22
 |
 |
