Epson PictureMate Pal - PM 200 Product Information Guide - Page 4
Inserting a Memory Card Removing a Memory Card, Saving Power, Choosing Photos to Print, Caution
 |
View all Epson PictureMate Pal - PM 200 manuals
Add to My Manuals
Save this manual to your list of manuals |
Page 4 highlights
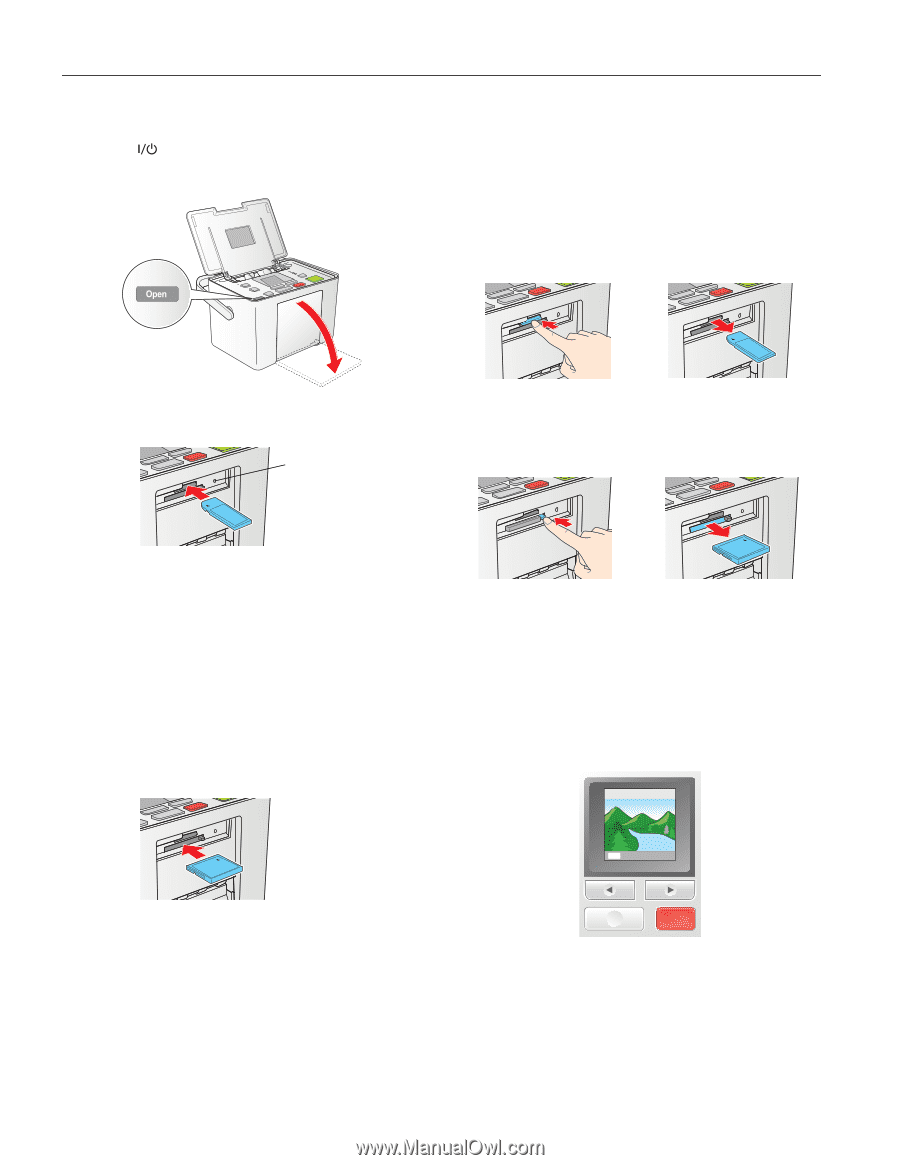
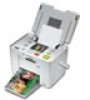
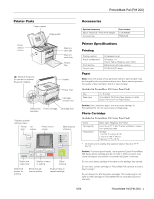
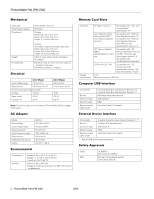
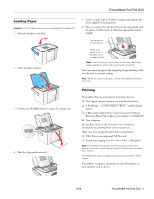
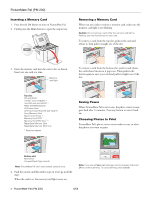
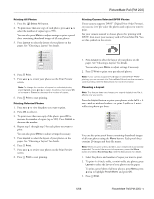
PictureMate Pal (PM 200) Inserting a Memory Card 1. Press the On button to turn on PictureMate Pal. 2. Firmly press the Open button to open the output tray. Removing a Memory Card When you are ready to remove a memory card, make sure the memory card light is not flashing. Caution: Do not remove a card while the memory card light is flashing; you may lose photos on your card. To remove a card from the top slot, push in the card and release it, then pull it straight out of the slot. 3. Insert the memory card into the correct slot, as shown. Insert just one card at a time. Memory card light To remove a card from the bottom slot, push in and release the card release button so it pops out. Then push in the button again to eject your card and pull it straight out of the slot. Top slot: SD and SDHC™ miniSD™ and miniSDHC * microSD and microSDHC * MMC (MultiMediaCard) xD-Picture Card xD-Picture Card (Type M and Type H) Sony Memory Stick Memory Stick Duo * Memory Stick PRO™ Memory Stick PRO Duo™ * MagicGate Memory Stick MagicGate Memory Stick Duo * Requires adapter Saving Power When PictureMate Pal is not in use, the photo viewer screen goes dark after 13 minutes. Press any button to turn it back on. Choosing Photos to Print PictureMate Pal's photo viewer screen makes it easy to select the photos you want to print. 2/99 OK : Select Photo Bottom slot: Microdrive™ CompactFlash (Type I and II) Note: PictureMate Pal can't read multiple cards at once. 4. Push the card in carefully until it stops (it won't go in all the way). When the card is in, the memory card light comes on. OK Cancel Note: If you see a Paper out message, load more paper and press OK to continue printing. To cancel printing, press Cancel. 4 - PictureMate Pal (PM 200) 6/06
-
 1
1 -
 2
2 -
 3
3 -
 4
4 -
 5
5 -
 6
6 -
 7
7 -
 8
8 -
 9
9 -
 10
10
 |
 |