Epson PictureMate Pal - PM 200 Product Information Guide - Page 9
Cleaning the Print Head, User's Guide
 |
View all Epson PictureMate Pal - PM 200 manuals
Add to My Manuals
Save this manual to your list of manuals |
Page 9 highlights
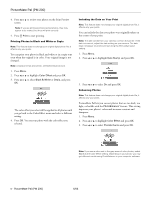
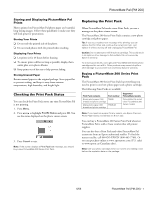
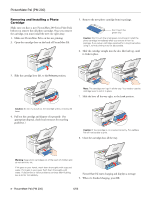
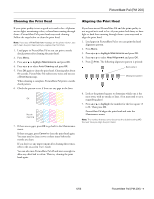
PictureMate Pal (PM 200) Cleaning the Print Head If your print quality is not as good as it used to be-if photos are too light, are missing colors, or have lines running through them-PictureMate Pal's print head may need cleaning. Follow the steps below to clean the print head. Note: If you see a Print Pack low message on the photo viewer, you can't clean the print head until you replace the Print Pack. 1. Load paper in PictureMate Pal so you can print a nozzle check pattern after cleaning the print head. 2. Press Menu. 3. Press or to highlight Maintenance and press OK. 4. Press or to select Auto Cleaning and press OK. 5. Press OK again to clean the print head. Cleaning takes about 60 seconds. PictureMate Pal makes some noise and you see a Cleaning message. When cleaning is complete, PictureMate Pal prints a nozzle check pattern. 6. Check the pattern to see if there are any gaps in the lines. OK Needs cleaning 7. If there are no gaps, press OK to go back to the Maintenance menu. If there are gaps, press Cancel to clean the print head again. You may need to clean it two or three times before the nozzles are clean. If you don't see any improvement after cleaning three times, refer to the on-screen User's Guide. You can also turn PictureMate Pal off and wait overnight to allow any dried ink to soften. Then try cleaning the print head again. Aligning the Print Head If you have moved PictureMate Pal and the print quality is not as good as it used to be-if your prints look fuzzy or have light or dark lines running through them-you may need to align the print head. 1. Load paper in PictureMate Pal so you can print the head alignment pattern. 2. Press Menu. 3. Press or to highlight Maintenance and press OK. 4. Press or to select Head Alignment and press OK. 5. Press Print. The following alignment pattern is printed: Best pattern Misaligned pattern 6. Look at the printed squares to determine which one is the most even, with no streaks or lines. (You may need to use a magnifying glass.) 7. Press or to highlight the number for the best square (1 to 9). Then press OK. PictureMate Pal aligns the print head and exits the Maintenance menu. Note: The number that you enter becomes the default setting (#5) the next time you align the print head. 6/06 PictureMate Pal (PM 200) - 9
-
 1
1 -
2
-
3
-
 4
4 -
 5
5 -
 6
6 -
 7
7 -
 8
8 -
 9
9 -
 10
10
 |
 |
