Epson Stylus Pro 5000 Product Information Guide - Page 9
Using the Standard and Optional, Paper Trays - errors
 |
View all Epson Stylus Pro 5000 manuals
Add to My Manuals
Save this manual to your list of manuals |
Page 9 highlights
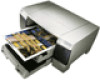
EPSON Stylus Pro 5000 The following table indicates the substrate sizes you can print from the four paper paths: Substrate sizes and paper paths Half letter/ A5 or less Executive (7.5 × 10 in.) Letter/A4 Letter/A4 landscape Legal Ledger/tabloid/A3/B (11 × 17 in.) Super A3/B (13 × 19 in.) Panoramic or banner paper longer than 19 in. Standard paper tray × × × × × × × Optional lower paper tray × × × × × × Front manual slot × × × × × Rear manual slot × × × × × × × × Using the Standard and Optional Paper Trays You can use these trays for most sizes of paper up to 13 × 19 inches. The standard paper tray can handle all smaller sizes of paper; however, the optional lower tray can't handle paper smaller than 7.5 × 10 inches (Executive size). When you load paper in either of the trays, you need to set the paper size and media type levers to match the paper you're using, as described in the following section. This allows your software to verify that the print option settings for a project are correct for the substrate you're using. If the print option settings for a job don't match the lever settings, you'll get an error message, and your job won't print. This will save you both time and money by making sure you don't accidently print with the wrong settings. Note: You can disable verification by setting the levers to Other. However, the purpose of paper size and media type (print mode) verification is to help you avoid printing errors, and you should take advantage of this help whenever possible. Setting the Paper Tray Levers For best printing results, you need to set the media type and paper size levers correctly when you load paper. You should also use the media type and paper size cards to identify the substrate loaded in each tray. This helps all users to be aware of what's in the printer at a glance, and also prevents anyone from inadvertently changing the lever positions. The following table identifies the media type settings for EPSON media and similar substrates: Media type lever settings Substrate Plain paper Photo Quality Ink Jet Paper or Card stock Photo Quality Glossy Paper Photo Quality Glossy Film Ink Jet Transparencies 360 dpi Ink Jet Paper Use only if ink smears Use for unlisted substrates Media type lever setting Plain Paper Photo Quality Paper Glossy Paper Glossy Film Transparencies 360dpi Paper Thick Paper Other Note: For any substrates not on this list, set the lever to Other. The following table identifies the paper size settings: Paper size lever settings Media size 13 × 19 in. 297 × 420 mm Ledger/tabloid/11 × 17 in. Legal/11 × 14 in. 210 × 297 mm Letter/8.5 × 11 in. No. 10/DL/C5/C6 envelopes Any other size Paper size lever setting Super A3/B A3 LGR LGL A4 LTR Envelope Other To set the levers and use the cards: 1. Load paper or other substrate. 2. Set the media type and paper size levers according to the guidelines in the tables above. 3. Find the paper size and media type cards that match the substrate you loaded, open the clear plastic covers above the levers, and insert the cards. paper size media type levers If you change substrates in one of the trays, be sure you change the lever settings and cards. Store unused cards on the sheet with adhesive windows. 11/98 EPSON Stylus Pro 5000 - 9
-
 1
1 -
2
-
3
-
 4
4 -
 5
5 -
 6
6 -
 7
7 -
 8
8 -
 9
9 -
 10
10 -
 11
11
 |
 |
